Building your first Portal map with Hammer
Contents
This tutorial provides a step-by-step guide to working with Hammer to create a small 128x128x128 room with some walls where portals can be created and some that cannot. Finally, a player start and the portal gun are added then the map is compiled. Portal can then be started and the map loaded for play.
Left Side Toolbar

|

|
Selection Tool (Shift+S)
|
Closes all other tools and allows selection of a new object. Each time an object is clicked while this tool is selected allows that object to Resize, Rotate, or Shear.
|

|
Magnify (Shift+G)
|
Left Click zooms in and Right Click zooms out while this tool is active. Mouse wheel or D (zoom in) and C (soom out) can be used at any time instead of using this tool.
|

|
Camera (Shift+C)
|
Allows a camera to be placed in the 2D views in order to immediately change the 3D view.
|

|
Entity Tool (Shift+E)
|
Used to create entities, like a player start location.
|

|
Block Tool (Shift+B)
|
Used to create geometry such as walls, ceilings, and floors.
|

|
Toggle Texture Application (Shift+A)
|
Used to change textures and texture settings. This only works on world geometry created with the Block Tool (not on entities).
|

|
Apply Current Texture
|
This applies the current texture (as selected in the right side toolbar) to selected object(s).
|

|
Apply Decals (Shift+D)
|
Decals are just what they sound like - images that can be pasted to a wall like stickers.
|

|
Apply Overlays (Shift+O)
|
Overlays are very similar to Decals, but they have more options, to be explained later.
|

|
Clipping Tool (Shift+X)
|
This tool allows objects to be made smaller or cut up into pieces.
|

|
Vertex Tool (Shift+V)
|
Allows manual movement of individual vertexes (corners) of objects.
|
Right Side Toolbars

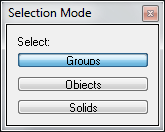
The top tool window is Selection Mode which controls what object(s) will be selected when clicking on an object. By default groups are selected when any object in a group is selected. Clicking the Objects button means only the object will be selected. Clicking the Solids button means the encompassing solid object will be selected.

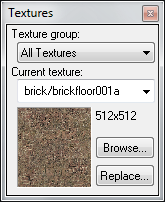
Below the Selection Mode tool window is the Textures window, which shows the currently selected texture.

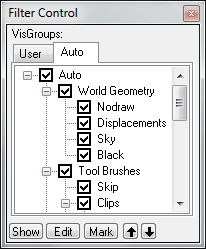
Below that is the Filter Control, which allows selection of what is visible or not visible in the view windows.

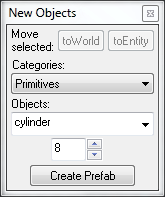
To the right of the Selection Mode windows is the New Objects tool which allows objects to be attached to entities or saved as a Prefab group.


