Portal Design And Detail: Difference between revisions
m (No longer a WIP) |
m (Fixed) |
||
| Line 6: | Line 6: | ||
=== Step 1 === | === Step 1 === | ||
The first step | The first step to use when making a Portal map is to first design a rough, and simple map. This is generally done with dev textures, and it is generally completed in about 4-5 minutes. At this point, you should thoroughly play test this area, and determine what areas will be portable and non portable. | ||
[[Image:tuta.jpg|right|thumb|Step 1]] | [[Image:tuta.jpg|right|thumb|Step 1]] | ||
| Line 19: | Line 19: | ||
=== Step 2 === | === Step 2 === | ||
Now detail the areas where portals will be placed. I moved the top section in and added a hazard texture, and I shrunk the floor and made it into a platform. | |||
[[Image:tutb.jpg|right|thumb|Step 2]] | [[Image:tutb.jpg|right|thumb|Step 2]] | ||
| Line 32: | Line 32: | ||
=== Step 3 === | === Step 3 === | ||
Now | Now add metal textures where players will not be able to place portals on. The metal textures will have standard detail for now. Play test this section again, and find any glitches. | ||
[[Image:tutc.jpg|right|thumb|Step 3]] | [[Image:tutc.jpg|right|thumb|Step 3]] | ||
| Line 45: | Line 45: | ||
=== Step 4 === | === Step 4 === | ||
Now | Now add doors, buttons, catchers, and triggers for the area. Now play test the section thoroughly. It will be very difficult to modify the detailed walls afterwards. | ||
[[Image:tutd.jpg|right|thumb|Step 4]] | [[Image:tutd.jpg|right|thumb|Step 4]] | ||
| Line 58: | Line 58: | ||
=== Step 5 === | === Step 5 === | ||
Now | Now, add detail in the metal areas. The best way is to first cordon off the brush, so the cordon boundary are the exact same size of the brush. Then resize the main brush to 128*128 and texture it with the large metal texture. Copy it a few times, and shrink it down to 64*64 and texture it to the medium metal block. Then copy it and finally fill in all the gaps with the small metal texture. The cordon helps make the walls in 2d mode, without being confused with the other walls. | ||
[[Image:tute.jpg|right|thumb|Step 5]] | [[Image:tute.jpg|right|thumb|Step 5]] | ||
| Line 71: | Line 71: | ||
=== Step 6 === | === Step 6 === | ||
Now | Now, finish off the rest of the section. | ||
[[Image:tutf.jpg|right|thumb|Step 6]] | [[Image:tutf.jpg|right|thumb|Step 6]] | ||
| Line 84: | Line 84: | ||
=== Step 7 === | === Step 7 === | ||
Next | Next add lights. The trick is to have them uneven. That way it is more attractive. The best white texture to use is white001. Generally, you should never use a 64*64 sized hole on a wall because a player can jump inside of it. | ||
[[Image:tutg.jpg|right|thumb|Step 7]] | [[Image:tutg.jpg|right|thumb|Step 7]] | ||
| Line 97: | Line 97: | ||
=== Step 8 === | === Step 8 === | ||
Admire a job well done and fix minor texture alignments and bugs. | |||
[[Image:tuth.jpg|right|thumb|Step 8]] | [[Image:tuth.jpg|right|thumb|Step 8]] | ||
Revision as of 18:30, 11 November 2008
For help, see the VDC Editing Help and Wikipedia cleanup process. Also, remember to check for any notes left by the tagger at this article's talk page.
Introduction
The most important thing in any map is design and detail. This is especially important when making a portal map. A portal map needs to have a good layout, be fun to play, and be visually attractive.
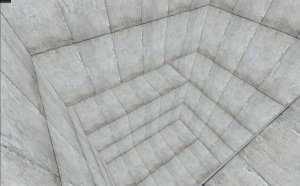
Step 1
The first step to use when making a Portal map is to first design a rough, and simple map. This is generally done with dev textures, and it is generally completed in about 4-5 minutes. At this point, you should thoroughly play test this area, and determine what areas will be portable and non portable.
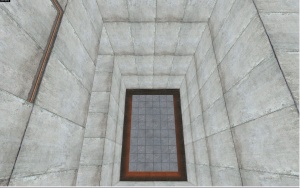
Step 2
Now detail the areas where portals will be placed. I moved the top section in and added a hazard texture, and I shrunk the floor and made it into a platform.
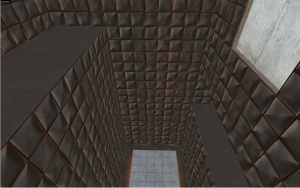
Step 3
Now add metal textures where players will not be able to place portals on. The metal textures will have standard detail for now. Play test this section again, and find any glitches.
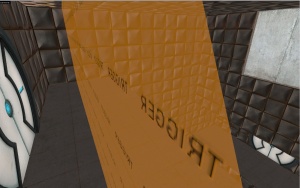
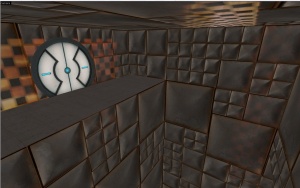
Step 4
Now add doors, buttons, catchers, and triggers for the area. Now play test the section thoroughly. It will be very difficult to modify the detailed walls afterwards.
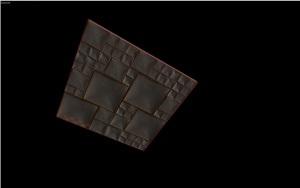
Step 5
Now, add detail in the metal areas. The best way is to first cordon off the brush, so the cordon boundary are the exact same size of the brush. Then resize the main brush to 128*128 and texture it with the large metal texture. Copy it a few times, and shrink it down to 64*64 and texture it to the medium metal block. Then copy it and finally fill in all the gaps with the small metal texture. The cordon helps make the walls in 2d mode, without being confused with the other walls.
Step 6
Now, finish off the rest of the section.
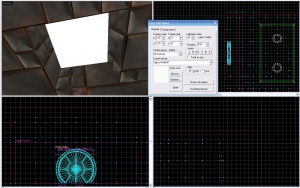
Step 7
Next add lights. The trick is to have them uneven. That way it is more attractive. The best white texture to use is white001. Generally, you should never use a 64*64 sized hole on a wall because a player can jump inside of it.
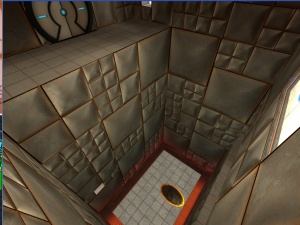
Step 8
Admire a job well done and fix minor texture alignments and bugs.
