How To Take Artistic Screenshots: Difference between revisions
No edit summary |
m (lang tag added) |
||
| Line 95: | Line 95: | ||
When combined, the above techniques can be used to greatly improve the images with which you show off your latest work. While they won't cover the cracks in a poor-quality original, they can definitely help differentiate your efforts from the crowd. So have fun, and happy screenshotting! | When combined, the above techniques can be used to greatly improve the images with which you show off your latest work. While they won't cover the cracks in a poor-quality original, they can definitely help differentiate your efforts from the crowd. So have fun, and happy screenshotting! | ||
{{otherlang:en}} {{otherlang:en:jp|How To Take Screenshots:jp}} | |||
Revision as of 01:02, 8 March 2006
Introduction
Taking screenshots is thought to be a very simple process. Which is why everyone gets it wrong.
In fact, it's a much under-appreciated skill which involves aspects of photography, art and (most importantly) persuading one's inadequate hardware to give the best picture possible. So, how would you do that?
Graphics quality
Modern graphics hardware is often capable of much higher quality rendering than what it commonly runs at, as gaming usually involves a compromise between image fidelity and rendering cost. Various tricks such as antialiasing can help hide jagged, step-like boundaries at the edges of polygons, but at the expense of lowering the framerate on less expensive hardware. However, taking screenshots is not about performance. Instead of rendering images perhaps thirty or forty times a second, our aim is to render a single image which is to be displayed for perhaps minutes at a time - so the aim is to jack your graphics card's settings up as far as they'll go.
NVIDIA
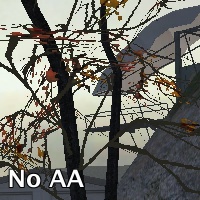
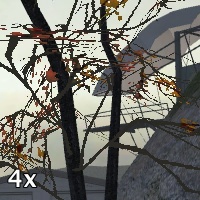
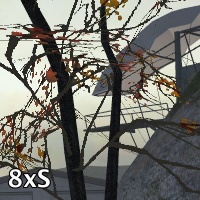
NVIDIA graphics cards command around half of the market, up against arch-rival ATI. On an Nvidia GeForce 6600, for example, there are graphics settings which are not directly accessible through Half-Life 2's in-game configuration screens - there is an additional '8xS' antialiasing setting which is definitely worth pursuing for taking screenshots, due to the significantly improved image quality when rendering masked textures such as foliage, fences and gratings. Examples of some of the antialiasing levels available are shown below:
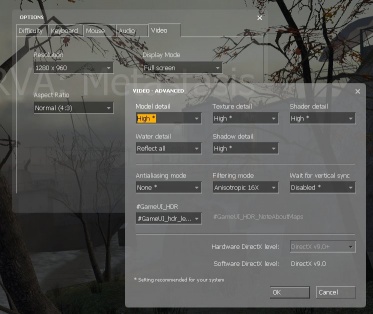
First of all, start up Half-Life 2 with the mod of your choice and set everything except antialiasing to as high as it will possibly go; Model detail, Texture detail and Filtering mode will make the most visible differences. An example screenshot is shown below:
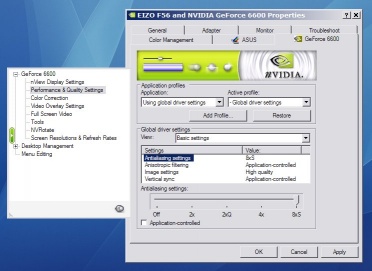
Next, quit the game, right-click on the desktop and bring up your Display Properties settings window, then click on the Settings tab. Now click on the Advanced button near the bottom, then on the GeForce tab. We now want to select the highest antialiasing mode available, so click on Performance & Quality Settings to the left, uncheck Application-controlled then drag the slider as far right as it will possibly go. In the author's case, this is to '8xS'. Another example screenshot is shown below:
Click on various OK buttons, and restart the game. In the author's case, bringing up the console and typing "mat_antialias 8" appears to be necessary to enable the '8xS' antialiasing. Once this is done, there should be precipitous drop in framerates, so type in "sv_cheats 1" and load your map - the game is now ready for screenshots!
Targa (TGA) screenshots
The standard screenshot function in Source compresses the output to lossily-compressed JPEG images, which while great for quickly uploading to the web do result in a loss of quality for any subsequent editing.
To save screenshots in an uncompressed Targa (TGA) format which can easily be opened by most decent image-editing software, it is recommended that you type something like following into the console: "bind f4 screenshot", which will save a TGA screenshot every time you press the F4 key.
Removing the crosshair and HUD
Sometimes when taking screenshots, the aim is to give a visual, near-photographic impression of the map without the presence of any game interface elements. In single-player Half-Life 2 (and most other games and mods), the primary elements are the HUD (head-up display), the crosshair and the weapon model. Fortunately, there are console commands to remove all of these - "cl_drawhud 0", "crosshair 0" and "impulse 200".
Environmental shots
For this, enable the "god", "notarget" and "noclip" commands at the console - the player character will then effectively become an invisible, free-floating camera. Try to find interesting angles which give a flavour of some of the more interesting sections of your map. Treat it as if you are using a real camera and you are visiting a real place, with the aim of taking aesthetically pleasing photographs rather than merely documenting what is there - with the advantage of effectively infinite film, no need to focus or choose exposure settings and the ability to float the camera absolutely anywhere in the world in order to get the best shot.
Countless millions of pages have been written on real-world photographic techniques, so it is impossible to condense it all into a paragraph here - perhaps the best approach is to experiment, and to most importantly expect to throw many of your shots away in the pursuit of getting that one, 'perfect' image.
Action shots
For screenshots which illustrate gameplay and other dynamic aspects of a map, it can be advantageous to record a 'demo' of normal gameplay (essentially a film of everything which happens) and then to take screenshots during its playback - it is much easier to capture fleeting details such as gun muzzle-flashes, explosions and other events this way.
More information is available on the Demo Recording Tools page, which documents Source's highly versatile demo playback facilities.
Another technique is to actually slow down game time by typing "host_timescale x" into the console, x being the desired timescale. 1 = normal time 0.5 = half the time. with this technique you can orchestrate brilliant battle scenes.
Post-processing
Uploading an otherwise unmodified JPEG version of a screenshot will result in a dark, impenetrable mess. There are, however, some simple tasks you can perform in post-processing which will make the screenshot appear more as it did in-game.
Gamma
The images a typical computer game saves in a screenshot and what it actually displays on screen are usually sublty different, thanks to something called gamma. A way of describing a display's brightness response for a given input value, a game's output gamma is generally different from a typical computer desktop's gamma. A game such as Half-Life 2 will typically brighten low- to midrange-values much more than a normal computer graphics application - in Source, this is controlled using the in-game Brightness dialogue box.
To make your screenshots look as they did while you were playing the game, it is thus best to use an external graphics editing program such as Photoshop or, in the case of this article, examples from the free, open source GIMP will be used.
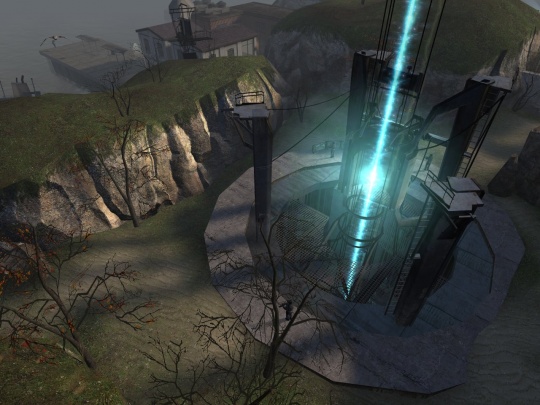
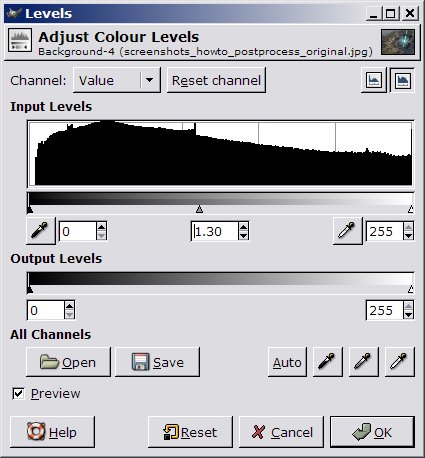
As can be seen above, the original screenshot is far too dark. So, bring up the Levels dialogue box (Layer: Colors: Levels...) and increase the applied gamma from 1.00 - around 1.30 seems to be a good number for typical screenshots:
For particularly dark images, it can be useful to apply 'overbrightening' by decreasing the input level's maximum from the standard 255 to something lower - a gamma of 1.3 combined with a maximum input level of 200 can work wonders on screenshots portraying night-time or underground scenes.
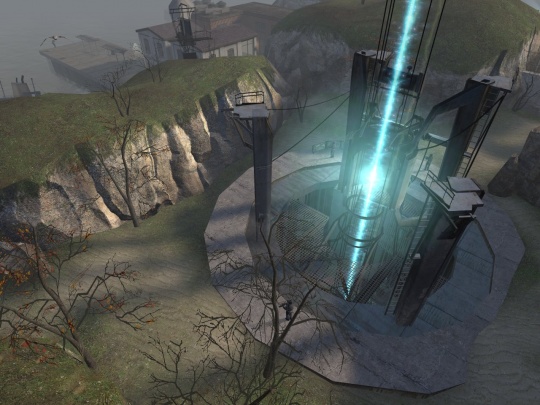
Your image should now look something like the following:
Sharpening
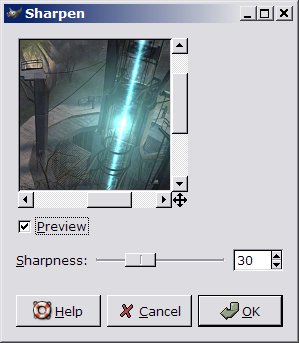
If you wish to reduce your screenshot's size, it can be useful to then apply a relatively small amount of sharpening. First, scale it down to the appropriate size (Image: Scale Image...) then bring up the Sharpen dialogue box (Filters: Enhance: Sharpen...). A value of 10 to 30 is usually about right - if set too high, black and white fringes may start to appear around edges and other details.
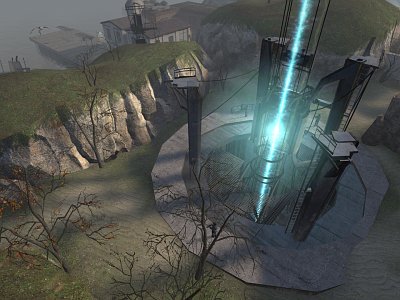
Finally, your screenshot should look something like this 400x300 image:
Saving as JPEG
To save your masterpiece, go to File: Save as..., select the destination and type in the final filename (to save as JPEG, simply end the filename with a '.jpg') and press OK. To see what the lossy JPEG compression will do to your image, click on Show Preview in image window - increase the quality if necessary to remove compression artifacts. Advanced options include 'progressive' (image blurs in when loading, and file is often slightly smaller too) and different subsampling methods (for more accurate colors at the expense of filesize).
Conclusions
When combined, the above techniques can be used to greatly improve the images with which you show off your latest work. While they won't cover the cracks in a poor-quality original, they can definitely help differentiate your efforts from the crowd. So have fun, and happy screenshotting!
