List of SE1 Levels: Difference between revisions
Jump to navigation
Jump to search
(Added images of all the maps, added more text to the page description) |
(Added more descriptions to the page) |
||
| Line 8: | Line 8: | ||
== Intro == | == Intro == | ||
{| class="standard-table" | style="width:100% | {| class="standard-table" | style="width:100%;" | ||
!width="140px" | Map | !width="140px" | Map | ||
!width="140px" | Name | !width="140px" | Name | ||
| Line 14: | Line 14: | ||
!width="250px" | Image | !width="250px" | Image | ||
|- | |- | ||
|align=" | |se1_intro01 | ||
|Escape | |align="center" | Escape | ||
| | | | ||
|[[file: se1_level_intro01.jpg | center | 250px]] | |[[file: se1_level_intro01.jpg | center | 250px]] | ||
|- | |- | ||
|align=" | |se1_intro02 | ||
|Pursuit | |align="center" | Pursuit | ||
| | | | ||
|[[file: se1_level_intro02.jpg | center | 250px]] | |[[file: se1_level_intro02.jpg | center | 250px]] | ||
|- | |- | ||
|align=" | |se1_intro03 | ||
|Arrival | |align="center" | Arrival | ||
| | | | ||
|[[file: se1_level_intro03.jpg | center | 250px]] | |[[file: se1_level_intro03.jpg | center | 250px]] | ||
| Line 31: | Line 31: | ||
== Docks == | == Docks == | ||
{| class="standard-table" | style="width:100% | {| class="standard-table" | style="width:100%;" | ||
!width="140px" | Map | !width="140px" | Map | ||
!width="140px" | Name | !width="140px" | Name | ||
| Line 37: | Line 37: | ||
!width="250px" | Image | !width="250px" | Image | ||
|- | |- | ||
|align=" | |se1_docks01 | ||
|Trapped | |align="center" | Trapped | ||
| | | | ||
|[[file: se1_level_docks01.jpg | center | 250px]] | |[[file: se1_level_docks01.jpg | center | 250px]] | ||
|- | |- | ||
|align=" | |se1_docks02 | ||
|Lighthouse | |align="center" | Lighthouse | ||
| | | | ||
|[[file: se1_level_docks02.jpg | center | 250px]] | |[[file: se1_level_docks02.jpg | center | 250px]] | ||
|- | |- | ||
|align=" | |se1_docks03 | ||
|Generators | |align="center" | Generators | ||
| | | | ||
|[[file: se1_level_docks03.jpg | center | 250px]] | |[[file: se1_level_docks03.jpg | center | 250px]] | ||
|- | |- | ||
|align=" | |se1_docks04 | ||
|Trainyard | |align="center" | Trainyard | ||
| | | | ||
|[[file: se1_level_docks04.jpg | center | 250px]] | |[[file: se1_level_docks04.jpg | center | 250px]] | ||
| Line 59: | Line 59: | ||
== Druglab == | == Druglab == | ||
{| class="standard-table" | style="width:100% | {| class="standard-table" | style="width:100%;" | ||
!width="140px" | Map | !width="140px" | Map | ||
!width="140px" | Name | !width="140px" | Name | ||
| Line 65: | Line 65: | ||
!width="250px" | Image | !width="250px" | Image | ||
|- | |- | ||
|se1_u4lab01 | |||
|Infiltration | |Infiltration | ||
| | | | ||
|[[file: se1_level_U4Lab01.jpg | center | 250px]] | |[[file: se1_level_U4Lab01.jpg | center | 250px]] | ||
|- | |- | ||
|se1_u4lab02 | |||
|Laboratory | |Laboratory | ||
| | | | ||
|[[file: se1_level_U4Lab02.jpg | center | 250px]] | |[[file: se1_level_U4Lab02.jpg | center | 250px]] | ||
|- | |- | ||
|align=" | |se1_u4lab03 | ||
|Catastrophe | |align="center" | Catastrophe | ||
| | | | ||
|[[file: se1_level_U4Lab03.jpg | center | 250px]] | |[[file: se1_level_U4Lab03.jpg | center | 250px]] | ||
|- | |- | ||
|align=" | |se1_u4lab04 | ||
|Hunted | |align="center" | Hunted | ||
| | | | ||
|[[file: se1_level_U4Lab04.jpg | center | 250px]] | |[[file: se1_level_U4Lab04.jpg | center | 250px]] | ||
|- | |- | ||
|align=" | |se1_u4lab05 | ||
|Minigame | |align="center" | Minigame | ||
| | | | ||
|[[file: se1_level_U4Lab05.jpg | center | 250px]] | |[[file: se1_level_U4Lab05.jpg | center | 250px]] | ||
| Line 92: | Line 92: | ||
== Pit == | == Pit == | ||
{| class="standard-table" | style="width:100% | {| class="standard-table" | style="width:100%;" | ||
!width="140px" | Map | !width="140px" | Map | ||
!width="140px" | Name | !width="140px" | Name | ||
| Line 98: | Line 98: | ||
!width="250px" | Image | !width="250px" | Image | ||
|- | |- | ||
|align=" | |se1_pit01 | ||
|Descent | |align="center" | Descent | ||
| | | | ||
|[[file: se1_level_pit01.jpg | center | 250px]] | |[[file: se1_level_pit01.jpg | center | 250px]] | ||
|- | |- | ||
|align=" | |se1_pit02 | ||
|Emergence | |align="center" | Emergence | ||
| | | | ||
|[[file: se1_level_pit02.jpg | center | 250px]] | |[[file: se1_level_pit02.jpg | center | 250px]] | ||
| Line 110: | Line 110: | ||
== Highrise == | == Highrise == | ||
{| class="standard-table" | style="width:100% | {| class="standard-table" | style="width:100%;" | ||
!width="140px" | Map | !width="140px" | Map | ||
!width="140px" | Name | !width="140px" | Name | ||
| Line 116: | Line 116: | ||
!width="250px" | Image | !width="250px" | Image | ||
|- | |- | ||
|align=" | |se1_highrise01 | ||
|Entry | |align="center" | Entry | ||
| | | | ||
|[[file: se1_level_highrise01.jpg | center | 250px]] | |[[file: se1_level_highrise01.jpg | center | 250px]] | ||
|- | |- | ||
|align=" | |se1_highrise02 | ||
|Search | |align="center" | Search | ||
| | | | ||
|[[file: se1_level_highrise02.jpg | center | 250px]] | |[[file: se1_level_highrise02.jpg | center | 250px]] | ||
|- | |- | ||
|align=" | |se1_highrise03 | ||
|NOC | |align="center" | NOC | ||
| | | | ||
|[[file: se1_level_highrise03.jpg | center | 250px]] | |[[file: se1_level_highrise03.jpg | center | 250px]] | ||
| Line 133: | Line 133: | ||
== Finale == | == Finale == | ||
{| class="standard-table" | style="width:100% | {| class="standard-table" | style="width:100%;" | ||
!width="140px" | Map | !width="140px" | Map | ||
!width="140px" | Name | !width="140px" | Name | ||
| Line 139: | Line 139: | ||
!width="250px" | Image | !width="250px" | Image | ||
|- | |- | ||
|align=" | |se1_finale01 | ||
| | |align="center" | Finale | ||
| | |The finale battle in the game for the player to overcome with what has been learned throughout, starting with a short cutscene of Jessica getting poison injected into her by Radek. Following the route around the top of the tower the player will end up on the roof of the building and has to fight against an [[npc_quadralex | quadralex]] and a [[npc_druglab_helicopter | druglab attack helocopter]]. The map will end by walking to the end of the destroyed helipad where a helicopter is waiting and the screen will fade to black. | ||
|[[file: se1_level_finale01.jpg | center | 250px]] | |[[file: se1_level_finale01.jpg | center | 250px]] | ||
|- | |- | ||
|align=" | |se1_finale02 | ||
|Finale | |align="center" | Finale | ||
| | |This map is one entire cutscene that begins by letting the player know of what is going to happen in the next episode - the situations that are currently unfolding in the game's world by the actions taken throughout the game's story. Afterwards the credits about the people creating the software will rollover the screen, with a hidden gem with bloopers before returning to the main menu. | ||
|[[file: se1_level_finale02.jpg | center | 250px]] | |[[file: se1_level_finale02.jpg | center | 250px]] | ||
|} | |} | ||
== Backgrounds == | == Backgrounds == | ||
{| class="standard-table" | style="width:100% | {| class="standard-table" | style="width:100%;" | ||
!width="140px" | Map | !width="140px" | Map | ||
!width="140px" | Name | !width="140px" | Name | ||
| Line 157: | Line 157: | ||
!width="250px" | Image | !width="250px" | Image | ||
|- | |- | ||
|align=" | |background01 | ||
|''none'' | |align="center" | ''none'' | ||
| | |Used as the background map on the main menu during chapter 1: "Emergence" | ||
|[[file: se1_level_background01.jpg | center | 250px]] | |[[file: se1_level_background01.jpg | center | 250px]] | ||
|- | |- | ||
|align=" | |background02 | ||
|''none'' | |align="center" | ''none'' | ||
| | |Used as the background map on the main menu during chapter 2: "Docks" | ||
|[[file: se1_level_background02.jpg | center | 250px]] | |[[file: se1_level_background02.jpg | center | 250px]] | ||
|- | |- | ||
|align=" | |background03 | ||
|''none'' | |align="center" | ''none'' | ||
| | |Used as the background map on the main menu during chapter 3: "U4 Laboratory" | ||
|[[file: se1_level_background03.jpg | center | 250px]] | |[[file: se1_level_background03.jpg | center | 250px]] | ||
|- | |- | ||
|align=" | |background04 | ||
|''none'' | |align="center" | ''none'' | ||
| | |Used as the background map on the main menu during chapter 4: "Pursuit" | ||
|[[file: se1_level_background04.jpg | center | 250px]] | |[[file: se1_level_background04.jpg | center | 250px]] | ||
|- | |- | ||
|align=" | |background05 | ||
|''none'' | |align="center" | ''none'' | ||
| | |Used as the background map on the main menu during chapter 5: "Supremacy Tower" | ||
|[[file: se1_level_background05.jpg | center | 250px]] | |[[file: se1_level_background05.jpg | center | 250px]] | ||
|- | |- | ||
|align=" | |background06 | ||
|''none'' | |align="center" | ''none'' | ||
| | |Used as the background map on the main menu during chapter 6: "Showdown". Seems identical to background05. | ||
|[[file: se1_level_background06.jpg | center | 250px]] | |[[file: se1_level_background06.jpg | center | 250px]] | ||
|} | |} | ||
== Arena == | == Arena == | ||
{| class="standard-table" | style="width:100% | {| class="standard-table" | style="width:100%;" | ||
!width="140px" | Map | !width="140px" | Map | ||
!width="140px" | Name | !width="140px" | Name | ||
| Line 195: | Line 195: | ||
!width="250px" | Image | !width="250px" | Image | ||
|- | |- | ||
|align=" | |arena_behindzeebeaker | ||
|align="center" | Behind Zee Beaker | |||
| | |Set in an enlarged open lab area. | ||
|[[file: se1_level_arena_behindzeebeaker.jpg | center | 250px]] | |[[file: se1_level_arena_behindzeebeaker.jpg | center | 250px]] | ||
|- | |- | ||
|align=" | |arena_lobby | ||
|align="center" | Highrise Lobby | |||
| | |Uses the theme of the elevator lobby in Supremacy Tower. | ||
|[[file: se1_level_arena_lobby.jpg | center | 250px]] | |[[file: se1_level_arena_lobby.jpg | center | 250px]] | ||
|- | |- | ||
|align=" | |arena_office | ||
|align="center" | The Office | |||
| | |Set in the Supremacy Tower office section of the campaign. | ||
|[[file: se1_level_arena_office.jpg | center | 250px]] | |[[file: se1_level_arena_office.jpg | center | 250px]] | ||
|- | |- | ||
|align=" | |arena_pit01 | ||
|align="center" | The Pit | |||
| | |Themed after and uses a repurposed enclosed part of the pit01 map. | ||
|[[file: se1_level_arena_pit01.jpg | center | 250px]] | |[[file: se1_level_arena_pit01.jpg | center | 250px]] | ||
|- | |- | ||
|align=" | |arena_turbine | ||
|align="center" | Turbine | |||
| | |Set in a very open turbine area with a lower and top floor. | ||
|[[file: se1_level_arena_turbine.jpg | center | 250px]] | |[[file: se1_level_arena_turbine.jpg | center | 250px]] | ||
|- | |- | ||
|align=" | |arena_u4factory | ||
|align="center" | U4 Processing Station | |||
| | |A dark enclosed factory setting with multiple cramped levels. | ||
|[[file: se1_level_arena_U4Factory.jpg | center | 250px]] | |[[file: se1_level_arena_U4Factory.jpg | center | 250px]] | ||
|- | |- | ||
|align=" | |arena_vertigo | ||
|align="center" | Vertigo | |||
| | |A weird floating platform in the middle of nowhere with teleporters. | ||
|[[file: se1_level_arena_vertigo.jpg | center | 250px]] | |[[file: se1_level_arena_vertigo.jpg | center | 250px]] | ||
|} | |} | ||
[[Category:Level Design]][[Category: Sin Episodes Level Creation]][[Category: Sin Episodes]] | [[Category:Level Design]][[Category: Sin Episodes Level Creation]][[Category: Sin Episodes]] | ||
Revision as of 13:12, 14 June 2019
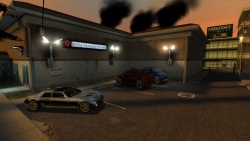
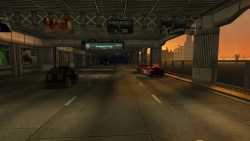
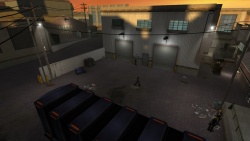
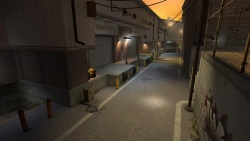
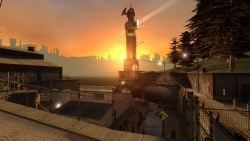
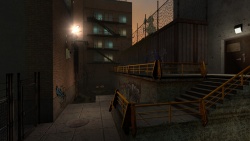
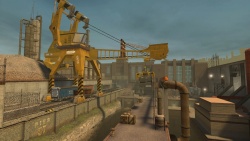
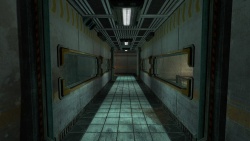
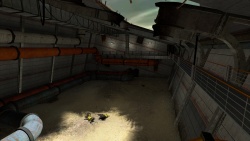
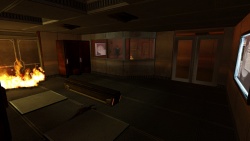
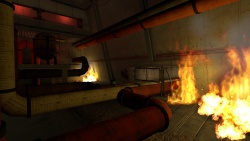
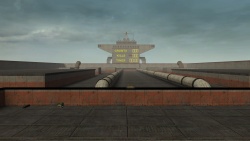
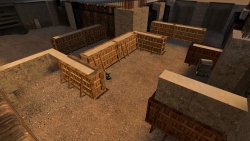
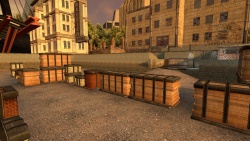
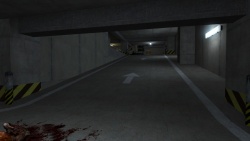
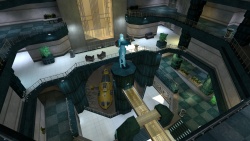
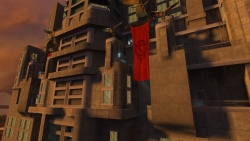
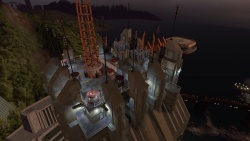
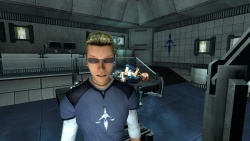
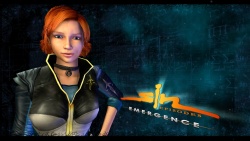
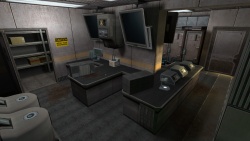
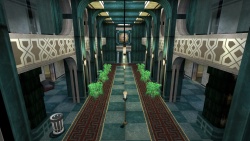
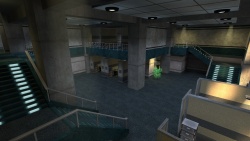
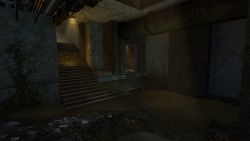
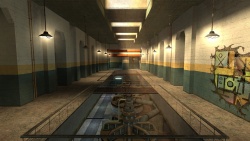
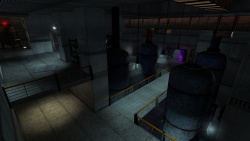
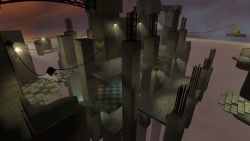
This page contains a list of all the official maps available in Sin Episodes in the order they mostly appear in the game, with the list containing the mapname of the level, the level name, a description of what happens throughout the level and an image of how a section of the map looks like. There is a total of 18 story missions (6 chapters, ~3 maps per chapter), 7 arena maps, 6 backgrounds and 1 minigame, making it 32 official levels in the entire game by default.
Intro
| Map | Name | Description | Image |
|---|---|---|---|
| se1_intro01 | Escape | ||
| se1_intro02 | Pursuit | ||
| se1_intro03 | Arrival |
Docks
| Map | Name | Description | Image |
|---|---|---|---|
| se1_docks01 | Trapped | ||
| se1_docks02 | Lighthouse | ||
| se1_docks03 | Generators | ||
| se1_docks04 | Trainyard |
Druglab
| Map | Name | Description | Image |
|---|---|---|---|
| se1_u4lab01 | Infiltration | ||
| se1_u4lab02 | Laboratory | ||
| se1_u4lab03 | Catastrophe | ||
| se1_u4lab04 | Hunted | ||
| se1_u4lab05 | Minigame |
Pit
| Map | Name | Description | Image |
|---|---|---|---|
| se1_pit01 | Descent | ||
| se1_pit02 | Emergence |
Highrise
| Map | Name | Description | Image |
|---|---|---|---|
| se1_highrise01 | Entry | ||
| se1_highrise02 | Search | ||
| se1_highrise03 | NOC |
Finale
| Map | Name | Description | Image |
|---|---|---|---|
| se1_finale01 | Finale | The finale battle in the game for the player to overcome with what has been learned throughout, starting with a short cutscene of Jessica getting poison injected into her by Radek. Following the route around the top of the tower the player will end up on the roof of the building and has to fight against an quadralex and a druglab attack helocopter. The map will end by walking to the end of the destroyed helipad where a helicopter is waiting and the screen will fade to black. | |
| se1_finale02 | Finale | This map is one entire cutscene that begins by letting the player know of what is going to happen in the next episode - the situations that are currently unfolding in the game's world by the actions taken throughout the game's story. Afterwards the credits about the people creating the software will rollover the screen, with a hidden gem with bloopers before returning to the main menu. |
Backgrounds
| Map | Name | Description | Image |
|---|---|---|---|
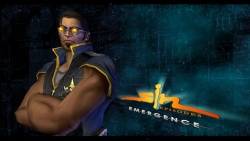
| background01 | none | Used as the background map on the main menu during chapter 1: "Emergence" | |
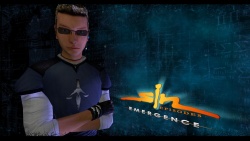
| background02 | none | Used as the background map on the main menu during chapter 2: "Docks" | |
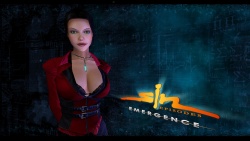
| background03 | none | Used as the background map on the main menu during chapter 3: "U4 Laboratory" | |
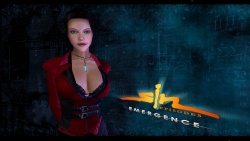
| background04 | none | Used as the background map on the main menu during chapter 4: "Pursuit" | |
| background05 | none | Used as the background map on the main menu during chapter 5: "Supremacy Tower" | |
| background06 | none | Used as the background map on the main menu during chapter 6: "Showdown". Seems identical to background05. |
Arena
| Map | Name | Description | Image |
|---|---|---|---|
| arena_behindzeebeaker | Behind Zee Beaker | Set in an enlarged open lab area. | |
| arena_lobby | Highrise Lobby | Uses the theme of the elevator lobby in Supremacy Tower. | |
| arena_office | The Office | Set in the Supremacy Tower office section of the campaign. | |
| arena_pit01 | The Pit | Themed after and uses a repurposed enclosed part of the pit01 map. | |
| arena_turbine | Turbine | Set in a very open turbine area with a lower and top floor. | |
| arena_u4factory | U4 Processing Station | A dark enclosed factory setting with multiple cramped levels. | |
| arena_vertigo | Vertigo | A weird floating platform in the middle of nowhere with teleporters. |
