HLMV create hitboxes: Difference between revisions
No edit summary |
m (→See also) |
||
| Line 35: | Line 35: | ||
== See also == | == See also == | ||
* [[Hitbox|Hitboxes]] | |||
* <code>[[$hbox]]</code> | * <code>[[$hbox]]</code> | ||
* <code>[[$hboxset]]</code> | * <code>[[$hboxset]]</code> | ||
Revision as of 18:42, 27 June 2012
If you are starting from scratch, you can use HLMV to create a base set of hitboxes, and then modify them to fit your models needs. This page will take you step by step through the process.
Auto Generating hitboxes
The first thing we'll do is get HLMV to create a set of hitboxes for us. When it does this it will create a hitbox for every bone that has geometry skinned to it, and will fit the hitbox around that geometry.
- Open HLMV and load your model. From the Render tab press
CTRL+Hor select theHit Boxescheckbox to view the hitboxes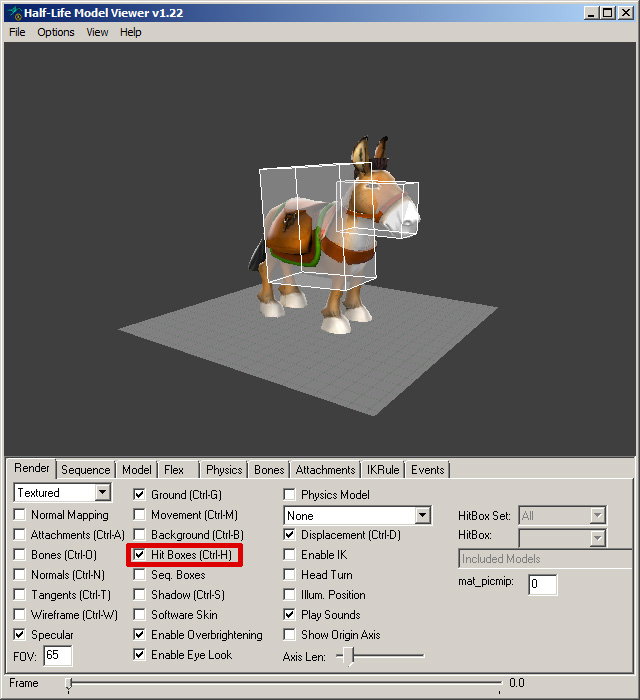
- Select the
Bonestab. If you did not create hitboxes in your.qc/.qcifile(s) then theAuto-Generate Hitboxescheckbox should be ON. If you have specified some hitboxes, turning on the auto-generation will do nothing.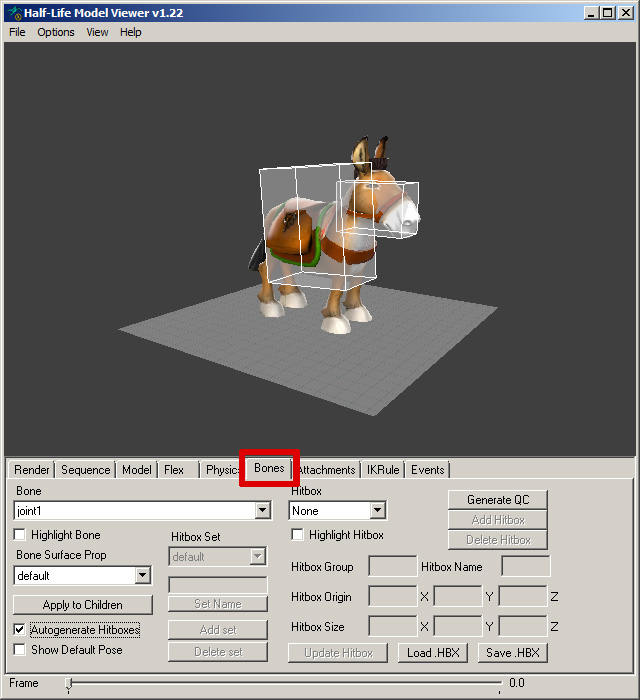
- With the auto-generated hitboxes visible, click
Generate QCbutton. This will copy the .qc commands needed to create the auto-generated hitboxes into your clipboard.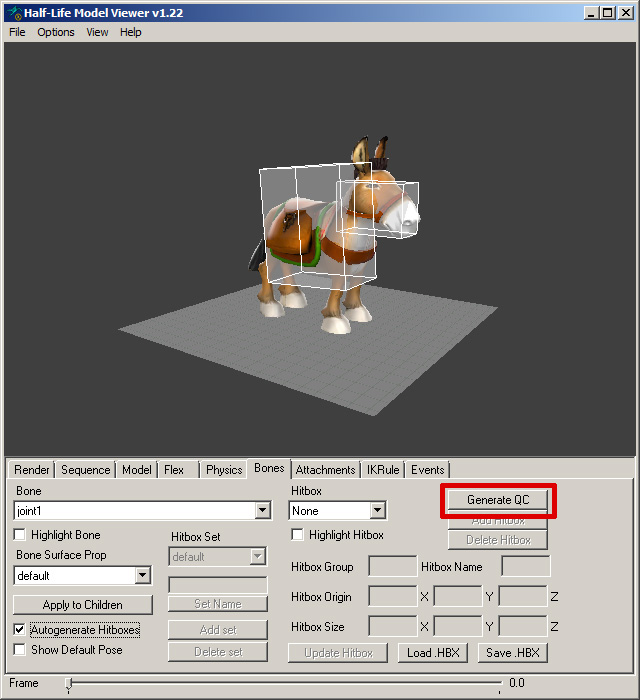
- Open your model's
.qcor create a newhitbox.qcifile with your favorite text editor.CTRL+Vto paste the autogenerated .qc lines into the file, save it, and recompile your model. It's a good idea to format the pasted commands into something more legible, especially if you plan on modifying the hitboxes. It should look something like this:


<br>// .qc block generated by HLMV begins.
<br>$surfaceprop "default"
<br>$hboxset "default"
<br>$hbox 0 "head"	   -14.83  -11.24  -23.58    32.59   11.24    9.46 "head"
<br>$hbox 0 "spine1"	   -33.32  -20.38  -40.78    33.32   20.38   40.78 "spine1"
<br>// .qc block generated by HLMV ends.
Creating new hitboxes and hitbox sets
The easiest way to create new hitboxes or hitbox sets is to simply cut/copy & paste the lines in the .qc that refer to a hitbox on the bone you'd like to add the hitbox to.
You can create a new hitbox set by adding $hboxset "your_set_name_here" and then cut/copy & pasting the .qc commands for an existing hitbox below.
Once you've finished adding the all the hitboxes and sets you need, save the file and recompile the model.
Modifying your hitboxes with HLMV
Once you have all of your hitboxes and sets added, it's much faster to use HLMV to edit the scale and position of them. You can do it directly in the .qc file, but it will require recompiling the model many times to review your changes and thus is a much more inefficient way of accomplishing the same thing.
- Open your model in HLMV, turn the hitboxes on, flip over to the
Bonestab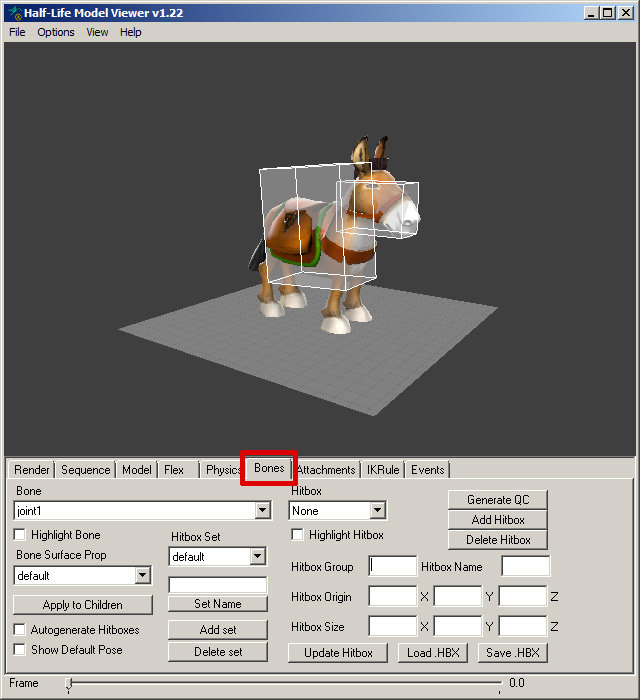
- Select the set that contains the hitbox you would like to edit, and then the joint it is attached to. You'll see the boxes describing the hitboxes' position and size fill out.
 Note:While this info represents what is defined in the .qc, it is presented differently. The .qc script defines the 2 opposite corners of the hitbox in relation to the bones pivot. HLMV converts that info into a more user friendly
 sizeandorigin, or offset if you will, in relation to the bone's pivot.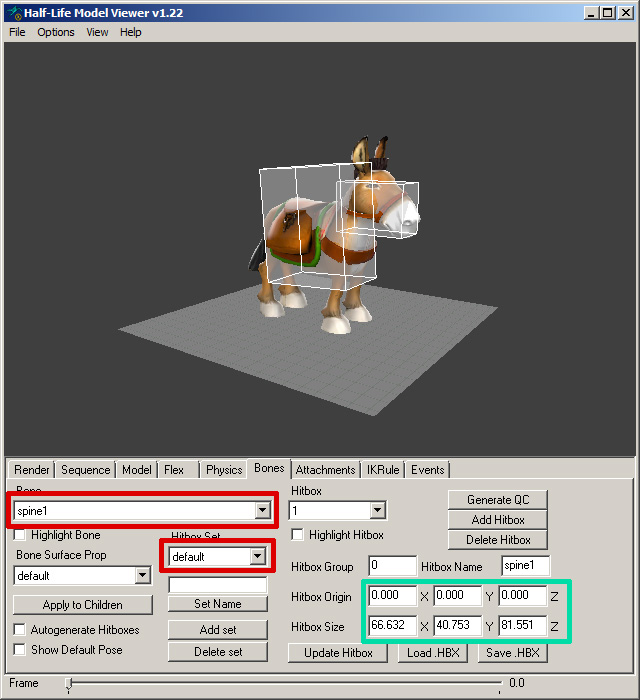
- Edit the
OriginandSizeblocks and press theUpdate Hitboxbutton to see your changes.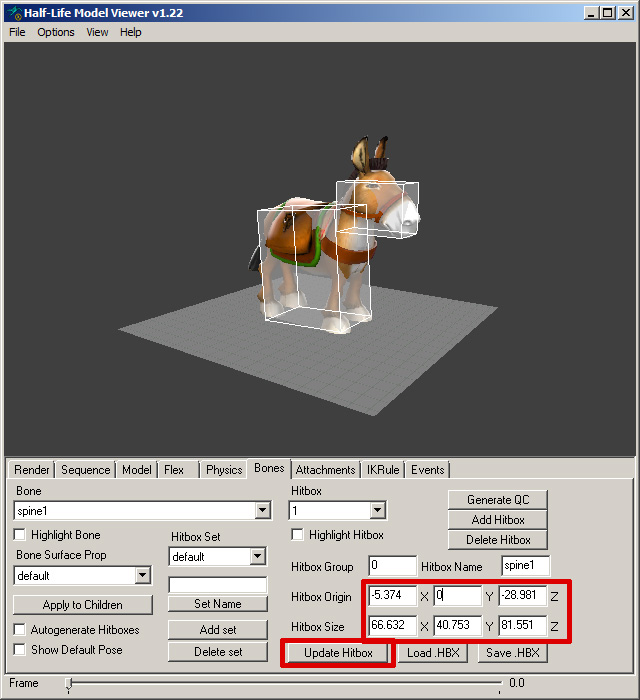
- Repeat until all of the hitboxes in all of your sets are looking good.
- Click
Generate QCto copy these new settings into your clipboard again and then replace your old hitbox info with it. Recompile your model. High-five someone.


