Converting brushes to models with XSI: Difference between revisions
Jump to navigation
Jump to search
(messy stub.) |
(Pic added, but need to learn more about image wiki tags...) |
||
| Line 1: | Line 1: | ||
[[Category:Level Design]] | [[Category:Level Design]] | ||
[[Category:Tutorials]] | [[Category:Tutorials]] | ||
[[Category:Modeling]] | [[Category:Modeling]] | ||
This tutorial shows how to convert brush structures in Hammer Editor into | This tutorial shows how to convert brush structures in Hammer Editor into a prop_static using XSI Mod Tool. | ||
a prop_static using XSI Mod Tool. | |||
==Basics and Limitation== | |||
*1 unit in Hammer = 1 unit in XSI | |||
*You'll have to set Texture UV in XSI again, so don't spend much time tuning texture in hammer. | |||
*You need Valve Source Addon(ValveSource.0105.01.xsiaddon) for XSI. This can be found in <code>sourcesdk/xsi</code>. | |||
==Hammer== | |||
*Save brush structures as a prefab in Hammer Editor. | *Save brush structures as a prefab in Hammer Editor. | ||
**Select brush structures. | |||
**Then click '''Create Prefab''', and save it as .vmf file. | |||
[[Image:Xsibrush01.JPG|Select brush and Create Prefab]] | |||
==XSI Mod Tool== | |||
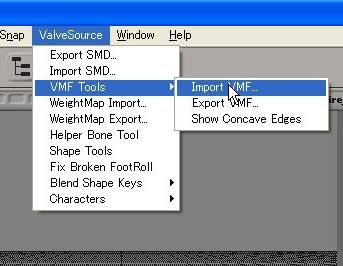
*Load that prefab file in XSI Mod Tool using ValveSource>VMF Tools>VMF import. | *Load that prefab file in XSI Mod Tool using ValveSource>VMF Tools>VMF import. | ||
[[Image:Xsibrush02.jpg|ValveSource>VMF Tools>VMF import]] | |||
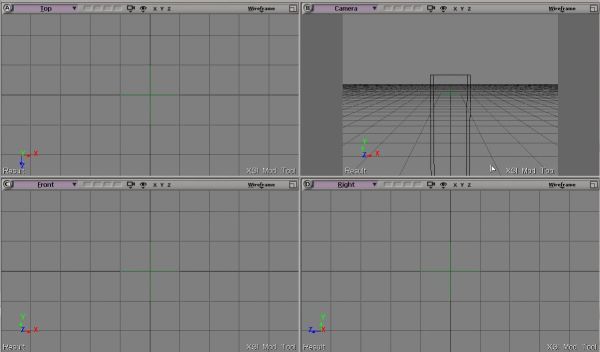
[[Image:Xsibrush03.jpg|Brush loaded]] | |||
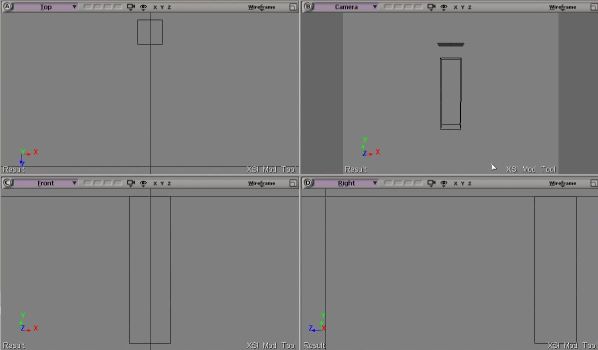
[[Image:Xsibrush04.jpg|Press Ctrl+A to see the whole]] | |||
*To make the editing easier do: | *To make the editing easier do: | ||
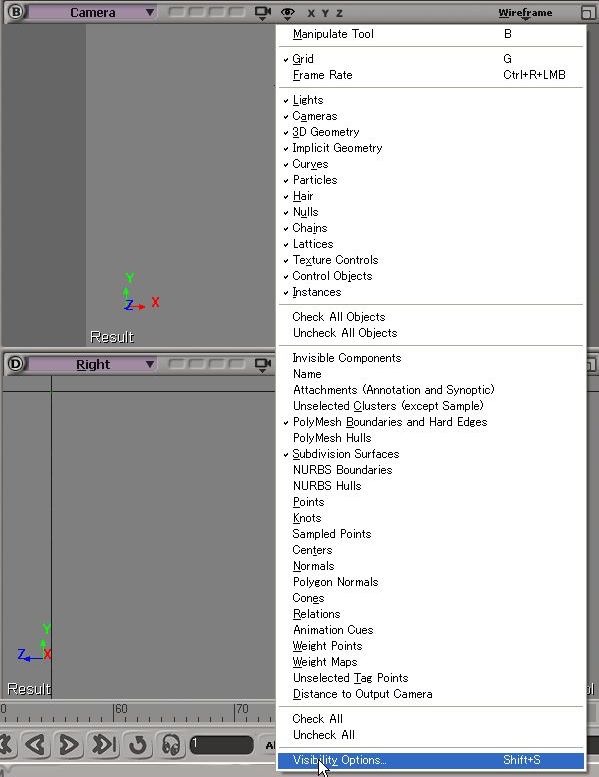
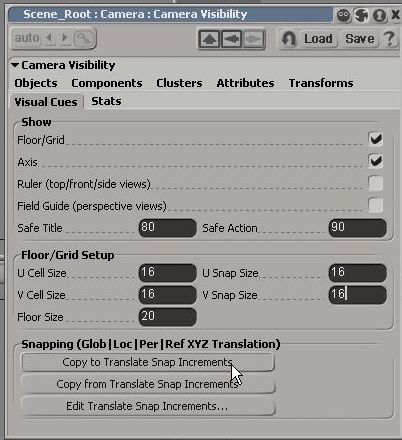
**Go to visibility options(click eye icon in each view), switch to '''Visual Cues''' tab, and set U/V Cell/Snap Size to 16 or 32 in Floor/Grid Setup, then click '''Copy to Translate Snap Increment'''. | **Go to visibility options(click eye icon in each view), switch to '''Visual Cues''' tab, and set U/V Cell/Snap Size to 16 or 32 in Floor/Grid Setup, then click '''Copy to Translate Snap Increment'''. | ||
[[Image:Xsibrush05.jpg|visibility options]] | |||
[[Image:Xsibrush06.jpg|Change Grid setup, click Copy to Translate Snap Increment]] | |||
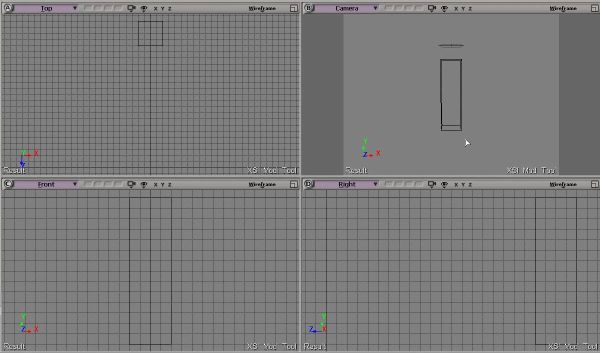
[[Image:Xsibrush07.jpg|Now grid displayed]] | |||
**In the Snap panel, click ON and grid icons. | **In the Snap panel, click ON and grid icons. | ||
*Now XSI works like Hammer's ''Snap to Grid''. | [[Image:Xsibrush09.jpg|Enable Snapping]] | ||
*Move loaded mesh to the origin. | *Now XSI works like Hammer's ''Snap to Grid''. | ||
*Move loaded mesh to the world origin.The world origin in XSI will be the pivot point in Hammer. See [[Animators Guide to Scripted Sequences]] for details. | |||
[[Image:Xsibrush10.JPG|Move the brush so that the World Origin to be centered on the ground]] | |||
[[Image:Xsibrush11.JPG|Moved correctly]] | |||
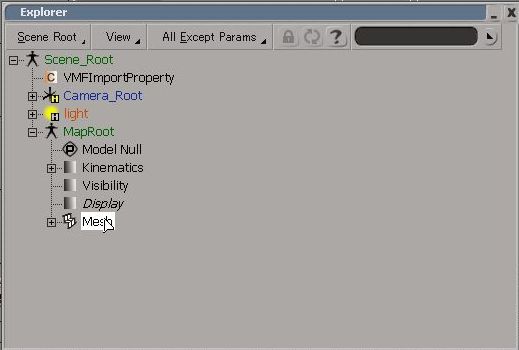
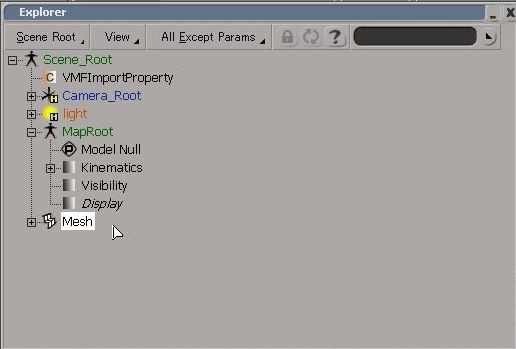
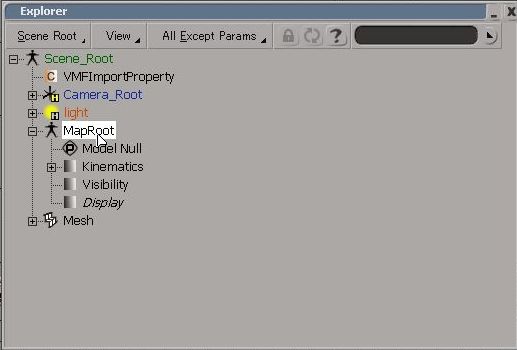
*Select the mesh, then click cut button in the Constrain panel. This will free the mesh from MapRoot which has rotations. | *Select the mesh, then click cut button in the Constrain panel. This will free the mesh from MapRoot which has rotations. | ||
[[Image:Xsibrush12.jpg|Explorer:Mesh is under the MapRoot. Mesh is selected.]] | |||
[[Image:Xsibrush13.jpg|Cut Hierarchical Link]] | |||
[[Image:Xsibrush14.jpg|Mesh is now free from the MapRoot]] | |||
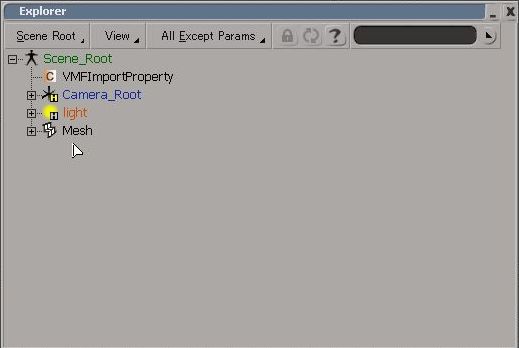
*Delete MapRoot. | *Delete MapRoot. | ||
[[Image:Xsibrush15.jpg|Select MapRoot and delete]] | |||
[[Image:Xsibrush16.jpg|MapRoot deleted]] | |||
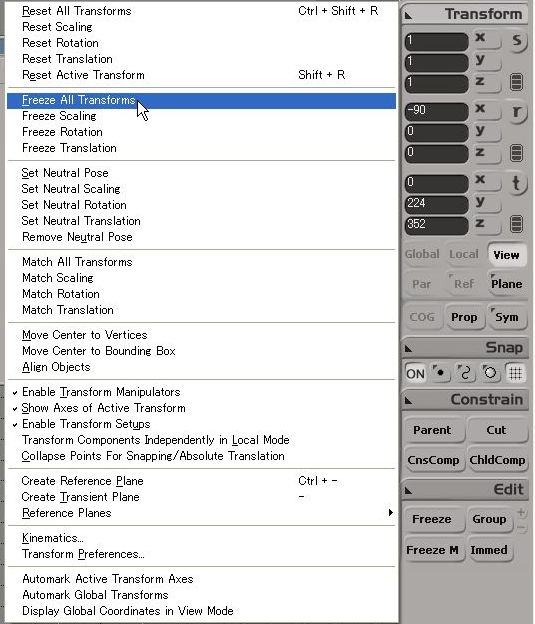
*Select the mesh, do Freeze and Freeze All Transformation. | *Select the mesh, do Freeze and Freeze All Transformation. | ||
[[Image:Xsibrush18.jpg|Freeze]] | |||
[[Image:Xsibrush17.jpg|Freeze All Transformation]] | |||
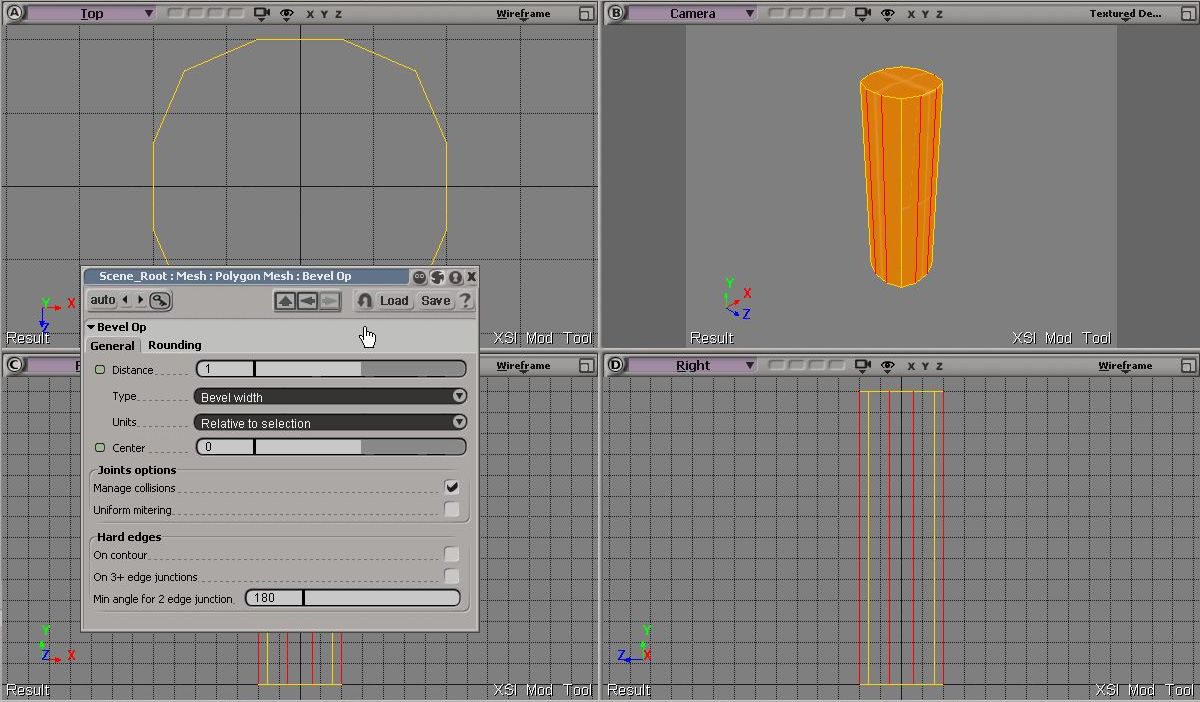
*Now you can edit it as you like, give it more detail etc. Don't forget to texture it, for SMD exporter only export mesh with material and UV informations. | *Now you can edit it as you like, give it more detail etc. Don't forget to texture it, for SMD exporter only export mesh with material and UV informations. | ||
[[Image:Xsibrush26.jpg|Textured and beveling added]] | |||
*If you are happy with your mesh, Freeze and Freeze All Transformation again, then click ValveSource>Export SMD, and export as a reference SMD. | *If you are happy with your mesh, Freeze and Freeze All Transformation again, then click ValveSource>Export SMD, and export as a reference SMD. | ||
* | [[Image:Xsibrush27.JPG|Export SMD]] | ||
==Compile== | |||
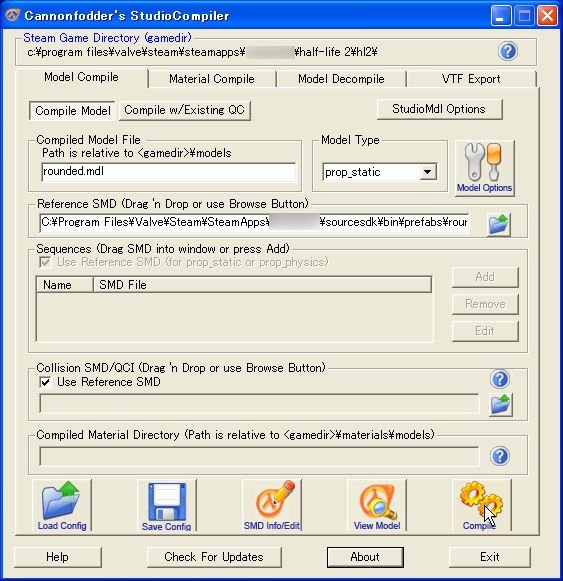
*Now compile the model and textures. Here I use Cannonfodder's StudioCompiler for compiling prop_static model and texture. | |||
[[Image:Xsibrush28.JPG|Compiling Model]] | |||
[[Image:Xsibrush26.JPG|Compiling Texture]] | |||
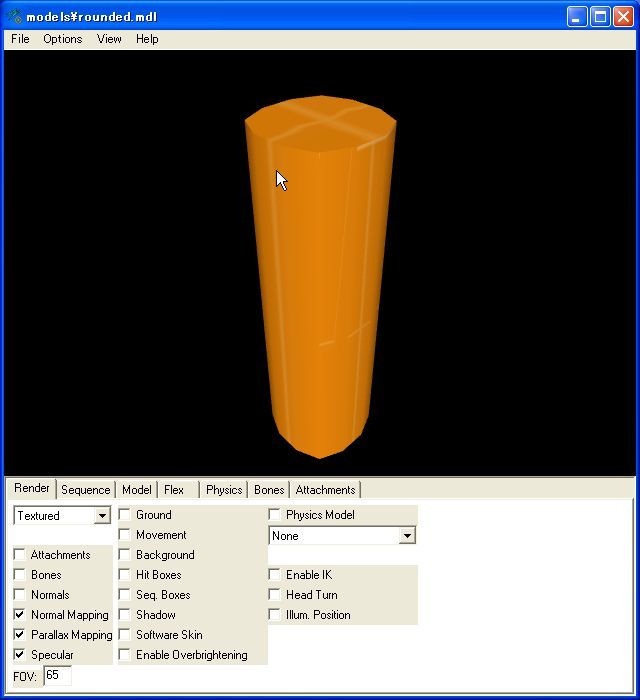
*Preview the compiled model in HLMV | *Preview the compiled model in HLMV | ||
[[Image:Xsibrush30.jpg|HLMV.exe preview]] | |||
==Hammer again== | |||
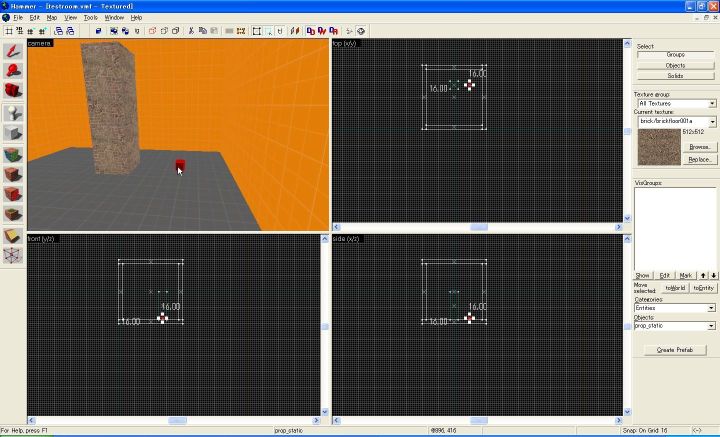
*Place it as prop_static in hammer. | *Place it as prop_static in hammer. | ||
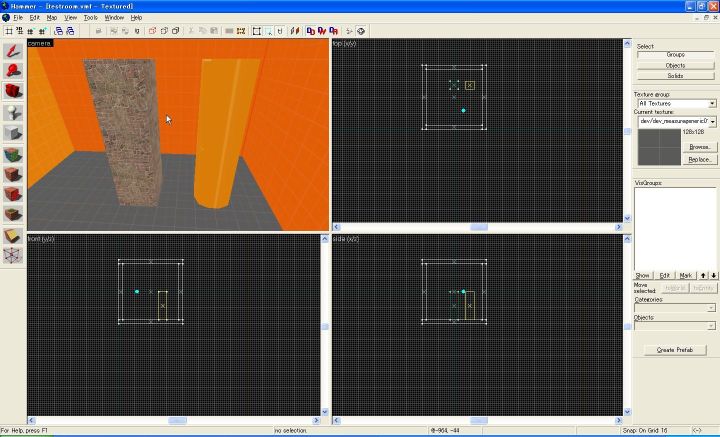
[[Image:Xsibrush31.jpg|placing a prop_static]] | |||
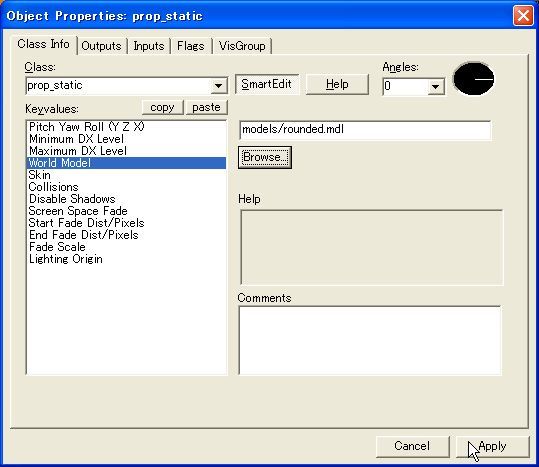
*Set the World Model in entity properties. | |||
[[Image:Xsibrush32.jpg|Select the model]] | |||
*Now place the model as you like. | |||
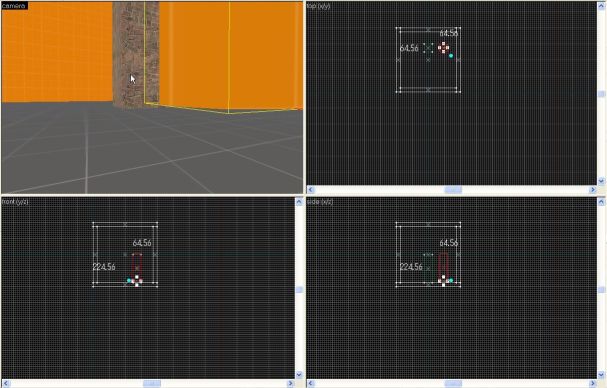
[[Image:Xsibrush33.jpg|seems float]] | |||
[[Image:Xsibrush34.jpg|moved to ground]] | |||
Revision as of 06:12, 26 September 2005
This tutorial shows how to convert brush structures in Hammer Editor into a prop_static using XSI Mod Tool.
Basics and Limitation
- 1 unit in Hammer = 1 unit in XSI
- You'll have to set Texture UV in XSI again, so don't spend much time tuning texture in hammer.
- You need Valve Source Addon(ValveSource.0105.01.xsiaddon) for XSI. This can be found in
sourcesdk/xsi.
Hammer
- Save brush structures as a prefab in Hammer Editor.
- Select brush structures.
- Then click Create Prefab, and save it as .vmf file.
XSI Mod Tool
- Load that prefab file in XSI Mod Tool using ValveSource>VMF Tools>VMF import.
- To make the editing easier do:
- Go to visibility options(click eye icon in each view), switch to Visual Cues tab, and set U/V Cell/Snap Size to 16 or 32 in Floor/Grid Setup, then click Copy to Translate Snap Increment.
- In the Snap panel, click ON and grid icons.
- Now XSI works like Hammer's Snap to Grid.
- Move loaded mesh to the world origin.The world origin in XSI will be the pivot point in Hammer. See Animators Guide to Scripted Sequences for details.
- Select the mesh, then click cut button in the Constrain panel. This will free the mesh from MapRoot which has rotations.
- Delete MapRoot.
- Select the mesh, do Freeze and Freeze All Transformation.
- Now you can edit it as you like, give it more detail etc. Don't forget to texture it, for SMD exporter only export mesh with material and UV informations.
- If you are happy with your mesh, Freeze and Freeze All Transformation again, then click ValveSource>Export SMD, and export as a reference SMD.
Compile
- Now compile the model and textures. Here I use Cannonfodder's StudioCompiler for compiling prop_static model and texture.
- Preview the compiled model in HLMV
Hammer again
- Place it as prop_static in hammer.
- Set the World Model in entity properties.
- Now place the model as you like.

