Complimentary Victory Lift: Difference between revisions
m (fix continuous formatting errors) |
(Added rules, removed Portal 2 mentions) |
||
| Line 70: | Line 70: | ||
=== Step 2 === | === Step 2 === | ||
Add an output to the entity that will activate the lift that sends the ''Open'' input to <code>lift</code> and the ''Enable'' input to <code>lift_up_trigger</code>. | Add an output to the entity that will activate the lift that sends the ''Open'' input to <code>lift</code> and the ''Enable'' input to <code>lift_up_trigger</code>. {{clr}} | ||
==Rules== | |||
Lift Platforms are only activated by energy ball catchers or things that can be only activated once (non-togglable objects). | |||
== See Also == | == See Also == | ||
*[[ | *[[Portal Level Creation]] | ||
[[Category:Level Design Tutorials]] | [[Category:Level Design Tutorials]] | ||
[[Category:Portal]] | [[Category:Portal]] | ||
Revision as of 13:29, 27 July 2021
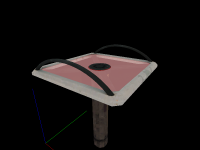
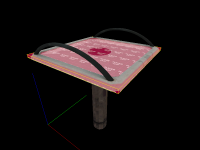
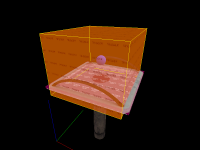
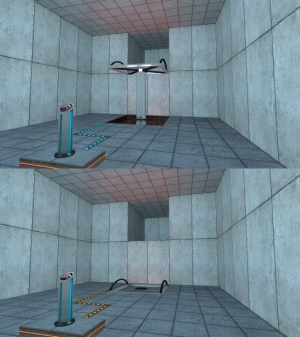
This tutorial will show how to create the complimentary victory lift seen in the Portal test chambers. The lift usually starts in its raised position, and lowers when a certain object is activated, such as an energy pellet catcher or a switch. The lift then raises when the player steps on it.
Construction
Step 1
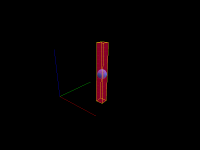
Create a 16w*16l*128h brush textured with tools/toolsinvisible. Tie this brush to a func_door entity and make sure all of its flags are unchecked. Next, set the following keyvalues on it:
| Property Name | Value |
|---|---|
| Name | lift |
| Speed | 20 |
| Start Sound | apc_engine_start |
| Stop Sound | apc_engine_stop |
| Delay Before Reset | -1 |
| Move Direction | 90 0 0 |
Step 2
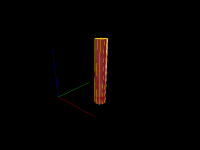
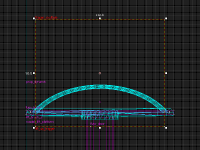
Create a 24w*24l*136h 12-sided cylinder and position it so it's in the same place as the lift brush. Tie it to a func_brush and set its Name to brush_lift and its Parent to lift.
Finally, texture the sides of the cylinder with metal/metal_lift001.
Step 3
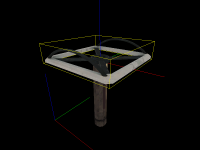
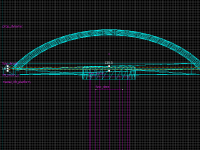
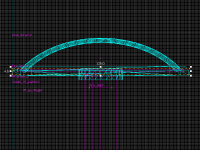
Create a prop_dynamic entity and set its Name to model_lift_platform, its Parent to lift and its World Model to models/props/lift_platform.mdl. Position it on top of the brush_lift brush so its origin is 2 units below the top of the brush.
Step 4
Create a 120w*120l*1h brush. Texture the top and bottom sides of the brush with glass/glasswindow_frosted_003, and texture all of the sides with tools/toolsnodraw. Position the brush so its in the middle of the model_lift_platform entity, with its bottom side being 6 units above the origin of model_lift_platform.
Next, create a 128w*128l*4h brush textured with tools/toolsplayerclip. Position it so it surrounds the model_lift_platform entity with its bottom side being 4 units above the origin of model_lift_platform.
Now, select both the glass brush and the playerclip brush and tie them to a single func_brush entity. Set its Name to lift_brush_2 and set its Parent to lift.
Step 5
Create a 112w*128l*92h brush textured with tools/toolstrigger. Tie it to a trigger_multiple entity and set its Name to lift_up_trigger, its Parent to lift and Start Disabled to Yes. Next, add the following outputs to it:
| My Output | Target Entity | Target Input | Parameter | Delay | Only Once | |
|---|---|---|---|---|---|---|
| OnTrigger | lift | Close | 0.00 | No | ||
| OnEndTouch | lift | Open | 0.00 | No |
The victory lift is now completed and ready to be implemente in a map.
Implementation
Step 1
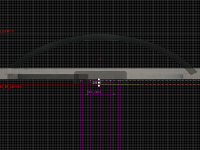
Place the lift where it should be in the map. The top of the lift_brush_2 playerclip brush should be 2 units below the floor level of the upper floor. If the lift needs to travel more than 128 units, stretch the brush_lift and lift brushes down to the lower floor level. The length of the lift brush determines how far the victory lift travels.
Step 2
Add an output to the entity that will activate the lift that sends the Open input to lift and the Enable input to lift_up_trigger.
Rules
Lift Platforms are only activated by energy ball catchers or things that can be only activated once (non-togglable objects).
