Detailing metal walls: Difference between revisions
mNo edit summary |
(cleanup) |
||
| Line 3: | Line 3: | ||
}} | }} | ||
{{Back|Portal Level Creation}} | {{Back|Portal Level Creation}} | ||
[[Category:Level Design Tutorials]] | [[Category:Level Design Tutorials]] | ||
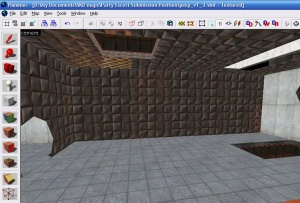
[[Image:wall1.jpg|right|thumb|Our starting wall]] | |||
The walls in official [[Portal]] test chambers tend to be made of blocks of various sizes. It's considered more aesthetically pleasing to simulate the effect in custom maps than to have generic walls of the same sized tile. | |||
== | ==Steps== | ||
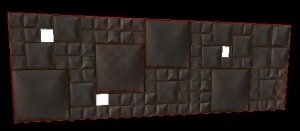
Find the wall you | Find the wall you want to detail. It may help to [[Hammer Cordon Usage|cordon]] it off. Resize the wall to 128x128 and texture it with the largest metal wall texture. Copy the block to random places on the wall, snapping them to a 32x32 grid so as to not create problems later. [[Image:wall7.jpg|right|thumb|What your wall should look like when finished]] | ||
[[Image: | |||
Repeat this process for the medium and small blocks. | |||
Move some of the blocks back 32 or 64 units and texture them with a light texture like <code>lights/white001</code>. Be sure the player can't jump inside them and cheat (you may want to use a [[clip texture]]). | |||
Remember to turn off cordon and re-enable any disabled [[visgroup|visgroups]]. For the final touch, place [[env_cubemap]] entities around the distinct sections of the wall (no more than three for most average-sized walls). | |||
Compile and <code>buildcubemaps</code> in the console. When it's all finished, you should have a blocky wall like in most test chambers that accurately reflects light. | |||
Revision as of 20:10, 19 December 2013
The walls in official Portal test chambers tend to be made of blocks of various sizes. It's considered more aesthetically pleasing to simulate the effect in custom maps than to have generic walls of the same sized tile.
Steps
Find the wall you want to detail. It may help to cordon it off. Resize the wall to 128x128 and texture it with the largest metal wall texture. Copy the block to random places on the wall, snapping them to a 32x32 grid so as to not create problems later.
Repeat this process for the medium and small blocks.
Move some of the blocks back 32 or 64 units and texture them with a light texture like lights/white001. Be sure the player can't jump inside them and cheat (you may want to use a clip texture).
Remember to turn off cordon and re-enable any disabled visgroups. For the final touch, place env_cubemap entities around the distinct sections of the wall (no more than three for most average-sized walls).
Compile and buildcubemaps in the console. When it's all finished, you should have a blocky wall like in most test chambers that accurately reflects light.

