Making a wall of water: Difference between revisions
TomEdwards (talk | contribs) (recat and style) |
(Reworded much of it so it uses correct grammar and is easier to understand.) |
||
| Line 1: | Line 1: | ||
[[Image:fake_eau.jpg|thumb|Water with LightmappedGeneric.]] | [[Image:fake_eau.jpg|thumb|Water with LightmappedGeneric.]] | ||
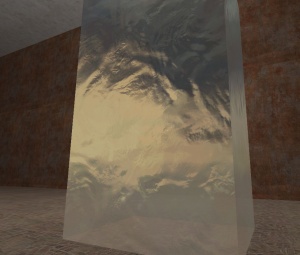
Sometimes, a wall of water is a nice (or required) feature of a map. However, the [[Water (shader)|Water]] shader can not do that; it is limited to flat, horizontal surfaces. The [[LightmappedGeneric]] shader can be used to mimic most of the Water shader's features instead. | |||
You can simulate | You can simulate reflections with cubemaps and fog, with the material's "bottom". However, refractions are not possible. Like the Water shader you have to use two VMT files. The normal $bumpmap will be used. | ||
== VMT | == VMT Top == | ||
For $basetexture, an image created in Photoshop with a cloud filter should make an alpha channel using the desired transparency. You can then export to a file | For $basetexture, an image created in Photoshop with a cloud filter should make an alpha channel using the desired transparency. You can then export to a Source VTF file with the right tools. | ||
[[Image:surface.jpg|150px| | [[Image:surface.jpg|150px|A $basetexture created with Photoshop.]] | ||
LightmappedGeneric | LightmappedGeneric | ||
| Line 45: | Line 45: | ||
} | } | ||
You will notice that $basetexture is animated | You will notice that the still-image $basetexture is set to be animated in the VMT. This is necessary to get $bumpmap animated too. | ||
== VMT Bottom == | == VMT Bottom == | ||
Revision as of 06:12, 30 October 2010
Sometimes, a wall of water is a nice (or required) feature of a map. However, the Water shader can not do that; it is limited to flat, horizontal surfaces. The LightmappedGeneric shader can be used to mimic most of the Water shader's features instead.
You can simulate reflections with cubemaps and fog, with the material's "bottom". However, refractions are not possible. Like the Water shader you have to use two VMT files. The normal $bumpmap will be used.
VMT Top
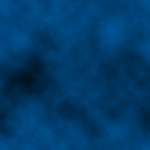
For $basetexture, an image created in Photoshop with a cloud filter should make an alpha channel using the desired transparency. You can then export to a Source VTF file with the right tools.
LightmappedGeneric
{
	%compilewater 1
	$abovewater 1
	$surfaceprop water
	$bottommaterial ...
	$basetexture dev/water_moving	// base texture that you made earlier
	$bumpmap dev/water_normal	// bump map
	$translucent 1
	$envmap env_cubemap
	$envmaptint "[1 .9 .8]"
	$envmapcontrast 1
	$fogenable 1
	$fogcolor "[1 1 1]"
	$fogstart 0
	$fogend 50

	Proxies
	{
		AnimatedTexture
		{
			animatedtexturevar $basetexture
			animatedtextureframenumvar $frame
			animatedtextureframerate 21
		}
		AnimatedTexture
		{
			animatedtexturevar $bumpmap
			animatedtextureframenumvar $bumpframe
			animatedtextureframerate 21
		}
	}
}
You will notice that the still-image $basetexture is set to be animated in the VMT. This is necessary to get $bumpmap animated too.
VMT Bottom
LightmappedGeneric
{
	$basetexture ...
	$translucent 1
	$fogenable 1
	$fogcolor "[1 1 1]"
	$fogstart 0
	$fogend 300
}

