QuickStartLipSync: Difference between revisions
mNo edit summary |
Thunder4ik (talk | contribs) m (Unicodifying, replaced: [[Image: → [[File: (4)) |
||
| (16 intermediate revisions by 12 users not shown) | |||
| Line 1: | Line 1: | ||
==Prelude== | == Prelude == | ||
FacePoser is Valve Software's tool to | [[FacePoser]] is Valve Software's tool to lip-sync characters and control facial animations. The lipsyncing in FacePoser can be done automatically and quickly by the program, or manually and more time consuming by the user. The lipsyncing process is based on a set of standardized rules based on phonemes, which are how words are constructed by using individual sounds. The models in Half-Life 2 have mouth shapes for each of these sounds, so by combining these shapes, realistic lipsyncing can be created. | ||
More information on phonemes can be found [http://en.wikipedia.org/wiki/Phoneme here]. | |||
{{Warning|Faceposer's phoneme extraction doesn't work by default on Windows Vista and higher due to these OS'es having newer versions of Microsoft's Speech API. '''[[Phoneme_Tool#Using_Lipsinc_Speech_API|However, there is a solution.]]'''}} | |||
==Start | == Start screen == | ||
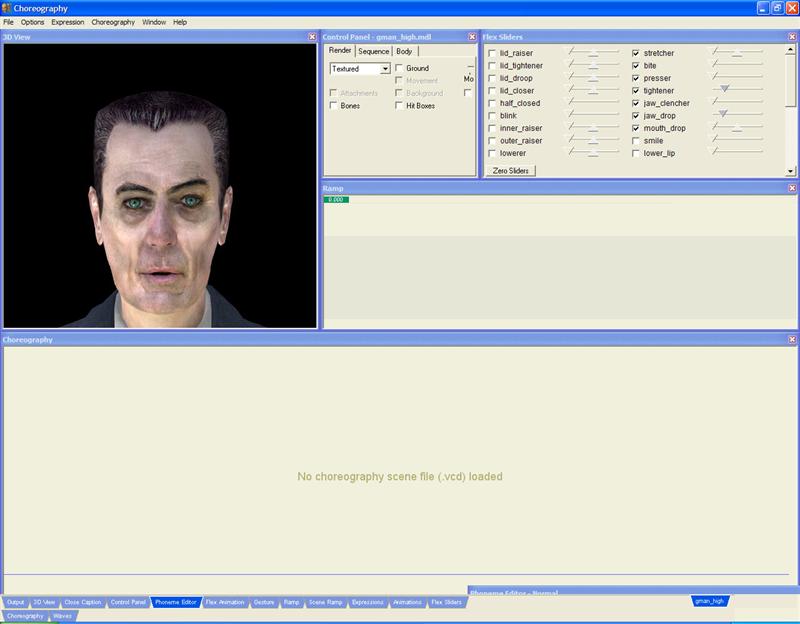
This is the | This is the initial layout of FacePoser (minus the G-Man.) To start off, load a model from the File->Load model dialog. In this case, the G-Man was chosen. | ||
<center>[[ | <center>[[File:Initialscreen (Medium).jpg]]</center> | ||
To have a character lipsync, an actual wav file is needed, along with what was said in the wav file. The dialogue of the wav file in this article is, "Rise and shine, Mr. Freeman. Rise and shine." | |||
== Phoneme Editor == | |||
Open up the "Phoneme Editor" tab. The window will show a blank slate; right click inside of that slate and select Load, then navigate to the wav file. After opening it, this will come up: | |||
<center>[[File:Phonemestart.jpg]]</center> | |||
Right click again and select Redo Extraction. A textbox for the speech in the wav file will pop up. Fill in the dialogue and push OK. Note that phonetically spelled words will result in better lipsynching; so "Mister" would have better results than the abbreviated word, "Mr." Words with more than three syllables should also be spelled phonetically. | |||
<center>[[File:Wordlist.jpg]]</center> | |||
Once the extraction is finished, the phonemes will be laid out on the wav file: | |||
<center>[[File:Phoenemeeditorend.jpg]]</center> | |||
(If the extraction fails or gives an unsatisfactory result, phrase the speech in a more phonetic fashion. Failing that, the phonemes can be manually placed by [[Phoneme_Tool#Word_Editing|editing words]].) | |||
Extraction may also fail if the .wav file you loaded is not in your mod directory. Make sure the file resides in your mod directory.<br/> | |||
For example if you installed Steam to C:\Program Files\Steam\ your mod directory would be | |||
C:\Program Files\Steam\SteamApps\SourceMods\<''your mod name''>\ | |||
[[ | |||
Right click and choose, "Commit extraction." This saves the phonemes into the wav file for lip-syncing. Push Play, and the character will lipsync to the audio. | |||
== Resources == | |||
* [http://www.microsoft.com/downloads/details.aspx?FamilyId=5E86EC97-40A7-453F-B0EE-6583171B4530&displaylang=en Microsoft Speech SDK 5.1] '''THIS DOESN'T WORK ON VISTA AND HIGHER!''' For newer PC's, click the link mentioned in the warning above. | |||
* [http://en.wikipedia.org/wiki/Phoneme Wikipedia article on Phonemes] | |||
* [http://www.deadworkers.com/tf2/?page_id=25 Control Point's Lip Syncing Tutorial] by Devil Turnip | |||
[[Category:Choreography]] | |||
Latest revision as of 00:08, 7 January 2024
Prelude
FacePoser is Valve Software's tool to lip-sync characters and control facial animations. The lipsyncing in FacePoser can be done automatically and quickly by the program, or manually and more time consuming by the user. The lipsyncing process is based on a set of standardized rules based on phonemes, which are how words are constructed by using individual sounds. The models in Half-Life 2 have mouth shapes for each of these sounds, so by combining these shapes, realistic lipsyncing can be created.
More information on phonemes can be found here.
Start screen
This is the initial layout of FacePoser (minus the G-Man.) To start off, load a model from the File->Load model dialog. In this case, the G-Man was chosen.

To have a character lipsync, an actual wav file is needed, along with what was said in the wav file. The dialogue of the wav file in this article is, "Rise and shine, Mr. Freeman. Rise and shine."
Phoneme Editor
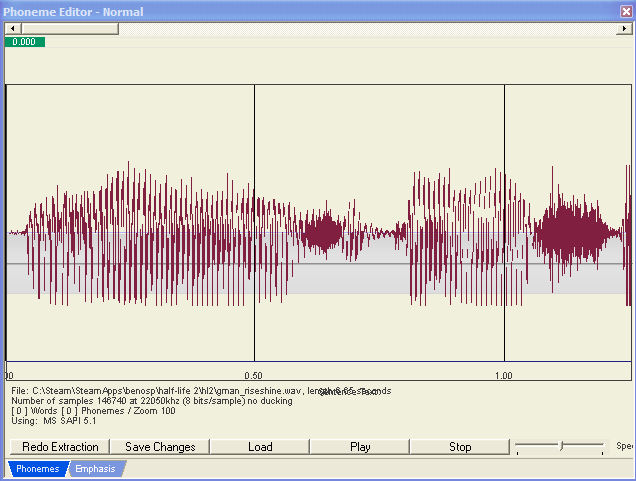
Open up the "Phoneme Editor" tab. The window will show a blank slate; right click inside of that slate and select Load, then navigate to the wav file. After opening it, this will come up:

Right click again and select Redo Extraction. A textbox for the speech in the wav file will pop up. Fill in the dialogue and push OK. Note that phonetically spelled words will result in better lipsynching; so "Mister" would have better results than the abbreviated word, "Mr." Words with more than three syllables should also be spelled phonetically.

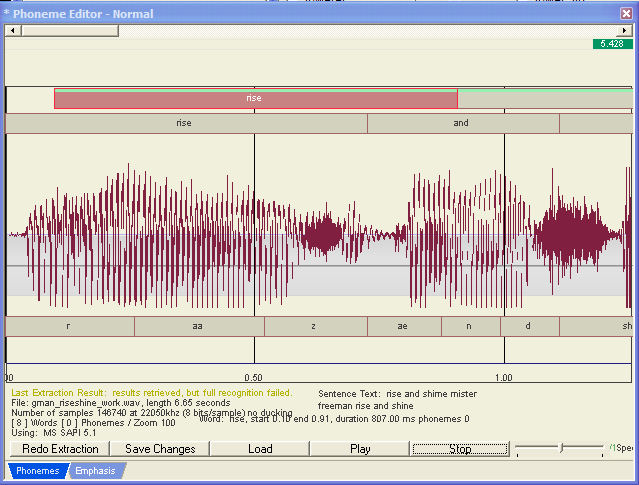
Once the extraction is finished, the phonemes will be laid out on the wav file:

(If the extraction fails or gives an unsatisfactory result, phrase the speech in a more phonetic fashion. Failing that, the phonemes can be manually placed by editing words.)
Extraction may also fail if the .wav file you loaded is not in your mod directory. Make sure the file resides in your mod directory.
For example if you installed Steam to C:\Program Files\Steam\ your mod directory would be
C:\Program Files\Steam\SteamApps\SourceMods\<your mod name>\
Right click and choose, "Commit extraction." This saves the phonemes into the wav file for lip-syncing. Push Play, and the character will lipsync to the audio.
Resources
- Microsoft Speech SDK 5.1 THIS DOESN'T WORK ON VISTA AND HIGHER! For newer PC's, click the link mentioned in the warning above.
- Wikipedia article on Phonemes
- Control Point's Lip Syncing Tutorial by Devil Turnip