SteamVR/Environments/Turret Tutorial
< SteamVR | Environments(Redirected from Destinations/Turret Tutorial)
Jump to navigation
Jump to search
Triggers, Animation, and Sound
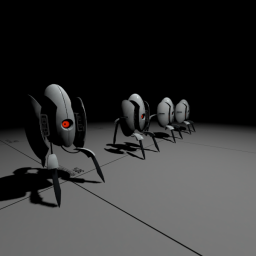
In this tutorial we will be recreating the singing turrets of the “Turret Singers” environment, and learn about some more advanced Hammer features.
Topics we will cover in this tutorial:
- Models with animation
- Trigger Volumes and Triggers
- Sound events
Some background on the Turret Singers environment: This song and dance was originally slated to be part of Portal 2. There was going to be a sequence where you fell among a colony of turrets, and they became obsessed with making you a turret wife - by singing you this song.
Create a new addon from Turret Singers
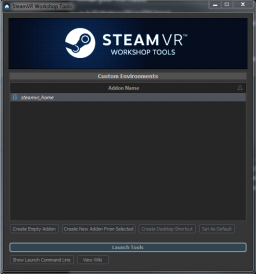
- Open SteamVR Workshop Tools from the SteamVR Status Menu > Workshop > Create / Modify an Environment.
- Select 'Create Empty Addon'
- Click "Launch Tools"
Create a base map
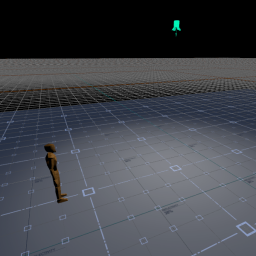
- Open Hammer and create a new map with:
- A player start
- A floor
- A light
- A teleport mesh on the floor
- For more instructions on how to do this, look through the Getting Started Tutorial.
Singing Turret model
- In the Asset Browser and find “turret.vmdl” (you can perform a search in the Asset Browser to find this quickly).
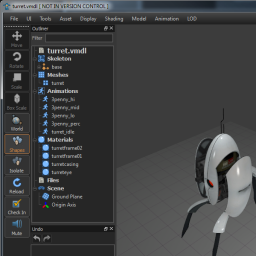
- Double click on turret.vmdl to open the model in Model Editor.
- In Model Editor, you’ll see a panel on the left called Outliner. In here there’s a section called "Animations” - these are the animations associated with the model
- This model has four singing and one idle animation associated with it - click on these and you can see the model going through the animations.
- Each animation was timed to a specific piece of audio before bringing it into Workshop Tools. In our environment, we will be using this same model four times, activating a different animation on each model.
Bring the Turret into Hammer
- Go back to the Asset Browser, and drag turret.vmdl into Hammer.
- If you look at Object Properties (should be a panel in the bottom right) for this turret, you'll see it came in as a "prop_static".
- Since we want this model to be animating, we'll need this to be “prop_dynamic". Click drop down in Object Properties > Class or type "prop_dynamic" in this field and hit Enter.
Creating a Trigger Volume
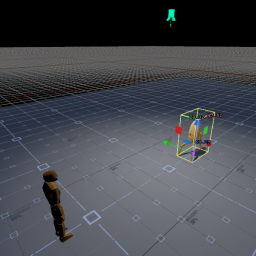
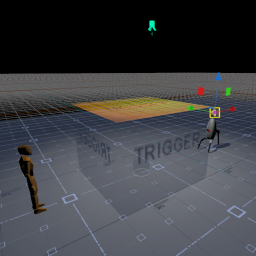
- Using the Block tool, create a box in your map.
- Resize this box to be taller than the player start.
- You can use the Scale tool “E” to do this.
- Alternatively you can click the “Faces” button at the top of the screen, and click the top of the box. Then hit the Transform tool “T” and drag the face up to resize the box this way. Make sure you go back to “Objects” mode after you are finished scaling the box.
- With the box selected, click the "tie selected meshes to entity" button in the Object Properties panel.
- It will default to "trigger_multiple" which is what we want.
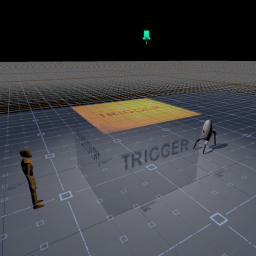
- Next, let’s set the material. In the Materials tab of the bottom panel, do a search for “trigger”. Drag the toolstrigger.vmat material onto the box.
Defining the Trigger
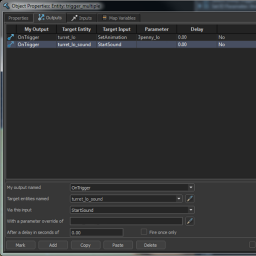
- Double click on your trigger volume box to see the full Object Properties window, and select the Outputs tab
- Click the “Add” button on the bottom of the window to add a new output
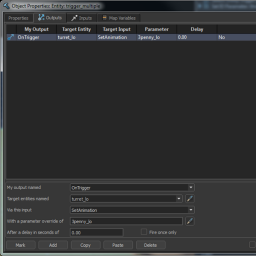
- In the “my output named” select or type "OnTrigger". This field defines how you would like this trigger to be activated.
- The “Target entities named” field defines what you would like to be trigged. Select the eyedropper tool.
- Click on the turret in your map to select it as the thing to be triggered. You will be prompted to name it - name it turret_lo.
- You could have also named this turret in the object properties panel.
- In the "Via this input" field, select or type “SetAnimation. This defines what you want your target entity to do when triggered.
- "With parameter override of" – defines the input more specifically.
- We want it to perform the “turret lo” animation, but we need to make sure we have the exact name
- Go back to the turret in the Model Editor and look at the names of the animations in the left panel.
- This will be the “low” turret, and it looks like that animation is called "3penny_lo".
- Go back to Hammer, and in the “With a parameter override of” field type "3penny_lo".
- One last thing – let’s define how long it will take to repeat when triggered.
- Click the Properties tab of Object Properties. At the bottom is a field called “Delay Before Reset”. By default, it’s set to “1”, which means it will repeat itself every 1 second. We don’t want this, but we do want it to repeat after it’s done with the song.
- Type 110 in the “Delay Before Reset” field, so it will repeat after the song is finished (110 seconds).
- We can figure this out by looking at the model in Model Editor and seeing how many frames there are in the animation. In this case, there are 3125 frames – divided by 30fps, it’s around 105 seconds. So with a little bit of buffer, that’s a 110 second delay before reset.
Trigger Teleport
- The trigger volume is invisible to the user when in VR, so we need a way to get them to jump there.
- A teleport marker will do this job nicely.
- Select the entity tool, and make the Entity Class “vr_teleport_marker”.
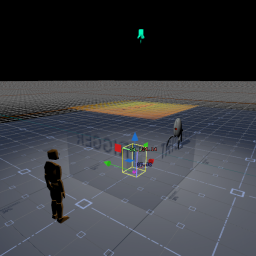
- Click to drop a teleport marker and move it so that it’s inside the trigger volume, flush with the ground.
- You may need to move it into the trigger volume with the Translate (T) tool.
Test your map
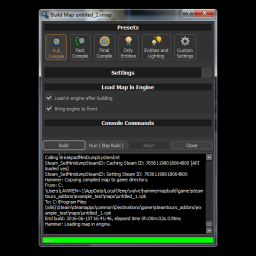
- Press F9 to build and save your map
- Try it out in VR. When you teleport to the teleport marker, you should see the turret animate
Add a soundevent
Unfortunately, the sounds and sound manifest files are not available for this tutorial. To learn more about how soundevents work, see this tutorial.
- In Hammer, click the Entity button (light bulb icon).
- Change the Entity Class to “point_soundevent”.
- Click in your map to place a point_soundevent. Move it with the Translate (T) logo so that it’s hovering just above the turret. It doesn’t matter which direction the icon is pointing.
- In the Object Properties panel, you’ll need to fill a few things out:
- In the “Name” field, name this soundevent “turret_lo_sound”
- In the “Sound Event Name” field, you’ll need to look in the soundevents_addon file to see what name you should type here:
- Go to content/steamtours_addons/turrets/soundevents and open the soundevents_addon.vsndevts in a text editor
- Here we can see that the name of the soundevent we want is “three_penny_lo”
- In the Object Properties “Sound Event Name” field, type “three_penny_lo”
- Click the “Always Transmit to Client” checkbox so that it’s on.
Trigger the soundevent
- Double click on your trigger volume box to open the full Object Properties window
- Go to the Outputs tab and duplicate the animation trigger output that we created a few steps ago. There are copy and paste buttons at the bottom of the window.
- ”My output named”: “OnTrigger”
- ”Target entities named”: “turret_lo_sound“ (you can also use the eyedropper here and click on your soundevent entity in the map)
- ”Via this input”: StartSound
- ”With a parameter override of”: clear this field and leave it empty.
- Press F9 to build and test your map. When you teleport to the teleport marker, you should see the turret animating, and hear a sound clip that matches the animation.
Fill out the rest of the quartet
- Now that you’ve done it once, it’s relatively simple to add the three other turrets with their own animations and sounds.
- Select the turret and sound entity and pick the “Translate” tool. Shift+move the turret and sound entity to duplicate them.
- Rename this duplicated turret to “turret_perc” in Object Properties “Name” field. Rename the duplicated sound entity to “turret_perc_sound.
- Once again, look in the soundevents_addon.vsndevts file to see what to put in the “Sound Event Name” field for your sound entity
- Double click on your trigger volume and go to the Outputs tab.
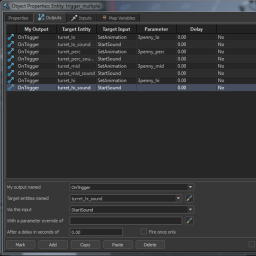
- Duplicate both the animation and sound outputs, and change the “Target entities named” fields to match your duplicated model and sound entity names respectively. You can also use the eyedropper tool to do this quickly.
- Look in the Model Editor and the file to see what names to enter for the “parameter override” fields for the animation
- You should now have four Outputs on this trigger volume - set to make each turret do its own animation, and make each sound entity play its own sound.
- Follow these steps two more times for the other two turrets – turret_mid and turret_hi – and you should end up with the four-part harmony + animations across all four turrets.
