Weight Map Editing
Editing Character Model Weight Maps using the XSI Mod Tool
Often, when a custom character mesh is enveloped and initially weight-mapped, adjustments to the weight-map are necessary to provide smoother mesh deformations during character animation. There are two primary tools available in the XSI Mod Tool:
- The Weight Editor
- Weight Painting
This article will briefly describe methods to use those tools to make minor changes in a character weight-map such as are needed in the final stages of the tutorial Rigging your Custom Character.
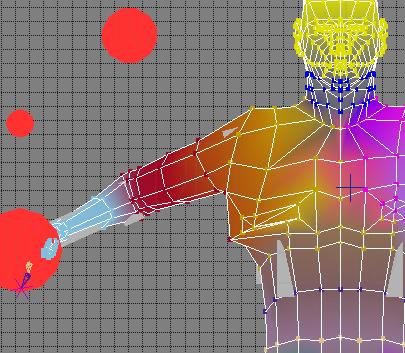
In the illustration, the right side of the mesh is distorted when the right arm is lifted. This is due to weights for the right upper arm deformer (red shading) being too large for the vertices on the right side of the rib cage (yellow shading) whose primary deformer is the clavicle. This can be corrected using the techniques described.
XSI Man.emdl model imported and overlayed on the SDK_Male_reference scene found in sourcesdk_content\hl2\modelsrc\humans_sdk\XSI_scene_files folder.Techniques for overlaying rigging and weight-mapping custom models is covered in the tutorial mentioned above.
The Weight Editor
- In the "eye" dropdown menu at the top-right of the XSI view window, ensure
Weight MapandWeight Pointsare selected. - In the Display Mode dropdown menu at the top-right of the view window, click
Constant. - Select the character mesh to view the weight-mapped mesh.
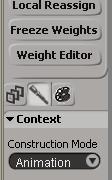
- Click on the "paintbrush" icon in the menu bar on the lower-left to select the weight editing menu.
- With the mesh selected, click on the Point icon in the top menu bar to select Point-select mode.
- Click on each vertex of the mesh that appears to be distorted from the desired animated position. Each click will add to the combined selection.
- Click the
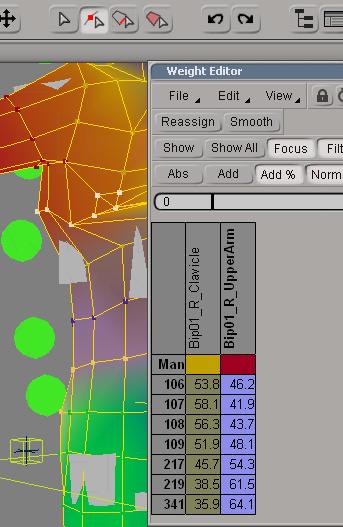
Weight Editorbutton in the lower part of the weight editing menu bar. - Expand the Weight Editor table to better see the names of the deformers (bones) which weight the selected vertices.
- In the Weight Editor, click in the box labeled Bip01_R_UpperArm to highlight the bone weights for the deformer.
- Click on the
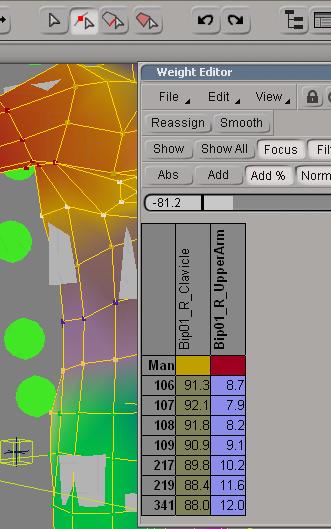
Add %button. - Click on the slide-bar just above the weight table and descrease the weight values for the Upper Arm by clicking and draggin in the slide-bar.
- Alternatively, click in the box labeled Bip01_R_Clavicle and similarly increase the weight values for the Clavicle deformer.
- As the weights are changed, the selected vertices move to positions more heavily weighted to Clavicle deformer.
- Press ctrl-shift-A to deselect all vertices.
- Close the Weight Editor, save your work and re-test the animation to determine if the correct weighting has been achieved.
Painting Weights
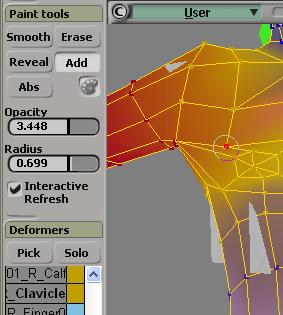
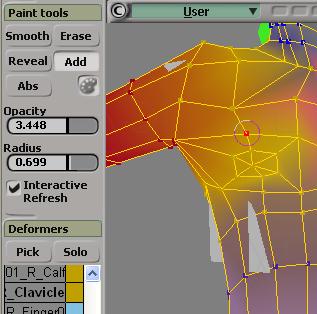
In the illustration above, a single point was missed when using the Weight Editor to change the weights for the vertices in the right chest area of the mesh.
The weights for that vertex can be corrected using the Weight Painting technique in XSI.
- Click and drag the
Opacityslide-bar to a relatively small value (~3.5 in the illustration). - Click and drag the
Radiusslide_bar to a relatively small value (~0.7 in the illustration). - Click the
Addbutton in the Paint Tools menu to add opacity to the vertex. - In the deformer list under the
PickandSolobuttons, select R_Clavicle.
- Click the Palette icon button under the
Addbutton. When the cursor is over the main window, it should change to a circle reflecting the radius chosen. - Click ( or click-and-drag over ) the vertex to be corrected.
- Each click ( or each pass over ) the vertex adds weight for the selected deformer and results in a slight movement of the vertex.
- Adjust the point weight to the desired position.
- Press ctrl-shift-A to deselect all vertices.
- Save your work and re-test the animation.
