Viewmodels in Blender
- This article refers to Blender 2.4, an outdated version. A VERY outdated version!
This article is for information regarding setting up a scene in Blender to correctly make viewmodels. This article does not deal with other things, such as viewmodel optimization (removing extra vertices). See the XSI viewmodel creation tutorial for that.
Camera Setup
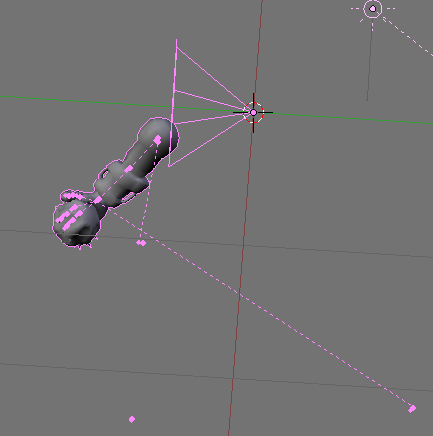
In order to correctly see what you will be seeing when you compile your model, you need to set up your camera in the correct location.
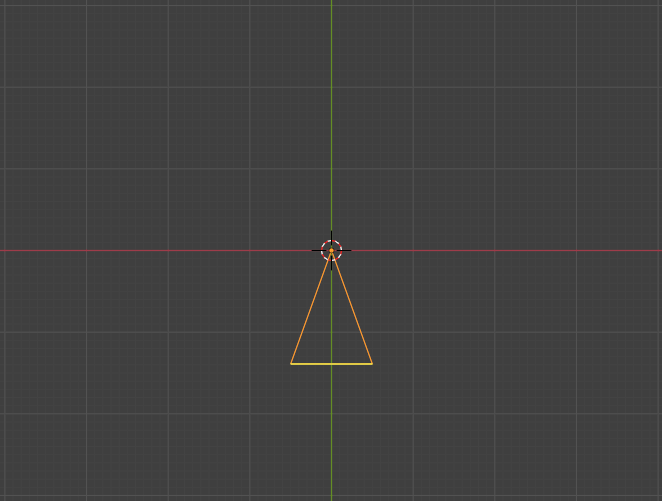
Start by creating a camera at the very center of the world: 0,0,0. Make the camera face along the Negative Y axis
Top view (numpad 7)
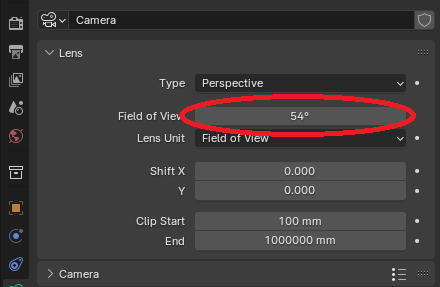
POST-2.8: Then, change the camera's lens, in degrees, to 54.00. Do this by setting the 'Lens Unit' to Field of View. If you have the 'Lens Unit' set to millimetres, the value should be 35.33
PRE-2.8: Then, change the camera's lens, in degrees, to 54.00. Do this by hitting the 'D' button next to the number area. If you have the 'D' button untoggled, the value should be 31.40
The reason you have this value at 54 is because the source engine, by default, renders viewmodels at view angle of 54*.
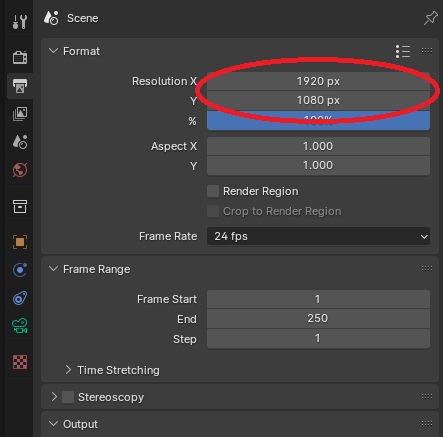
After you have completed setting the view angle, change the resolution for rendering by clicking the 'full' button, this way, the cropping border is correctly set so that you know when something will be visible with a common screen resolution of 1920 x 1080. If you need to check for other resolutions, only change the sizeX and sizeY values - do not change the AspX and AspY values. They should stay at 1.
Positioning Objects
Import/Append your objects if you have to. Then, place their object origins at the same location of 0,0,0. This includes armatures. Do not, under any circumstances, change this location. The object origin is where they are positioned from relative to where the camera in game is positioned. Moving them out of this location can result in them going to odd places. Also, do not move the camera at all. If you need to reposition things:
- Objects
    * Move the actual vertices
    * Move the object, then reposition the center using the 'center cursor' button in the editing (f9) panel (make sure the cursor is at 0,0,0).
- Armatures
    * Pose the armature, or edit it, to the new position. There is no way to recenter the armature's origin point, so you must first move the
armature in object mode to have its origin at 0,0,0, and then reposition it in either pose mode or edit mode.
    Actually, this is no longer true, in 2.49 at least. The "center cursor", "center new" buttons are greyed out/gone, however you can still change
the center by going to the OBJECT>TRANSFORM menu. This will also let you change the center of an object after it has been animated, without screwing
everything up like the normal buttons do. This makes it a lot easier to put the center at 0,0,0 especially if you forgot before you animated everything,
like me.---tigg 00:57, 4 October 2010 (UTC)
Sizing
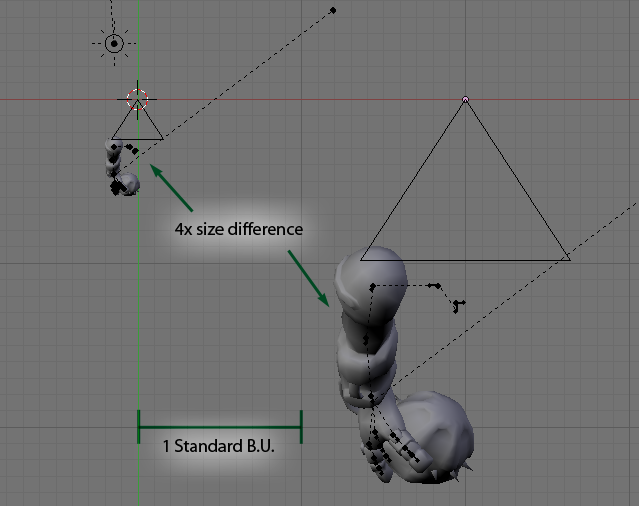
The size of your viewmodel is quite important. Export it too big, and you'll get weird shading issues when you get close to objects. Too small, and the swaying due to walking will be excessive. A good size is in the following range:
This is for the DragonLord export script.
Editing the QC File
Please follow the Viewmodels in XSI tutorial part from here, except for the "Origin 0 0 68" part. DO NOT INCLUDE that in your qc file (as we have positioned our stuff to not need to compensate in the qc file).
