Creating a Waterfall Material
This is a Tutorial to create a Waterfallmaterial.
The Normalmap
For a waterfall you need a Normalmap which Refracts the light so that the things behind it gets distorted.
I used Gimp with a normalmap plug-in for this Tutorial.
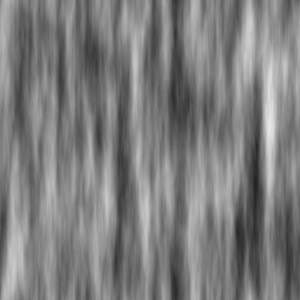
We create now a solid Noise so you go to Filters → Render → Clouds → Solid noise
you have to set the x value to 16.0(the highest possible) the y value between 1.0 and 3.0
the Detail to 15(highest possible)
and you must check the Tileable box to make it seamless.
Now it should look similar to Pic1.
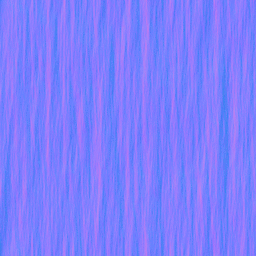
To create a Normalmap with it you should read this.
And use for Scale a value of 9.0.
After you converted it to a Normalmap it should look like Pic2.
The Material
The basic Material
At first you have create a materialfile(vmt) and name it waterfall.vmt or similar. In the materialfile you should use the LightmappedReflective shader:
"LightmappedReflective"
{
}
So we don't need a $basetexture but we need a $RefractTexture and optionaly a $ReflectTexture.
The attribute for the $RefractTexture parameter is _rt_WaterRefraction and for $ReflectTexture is it _rt_WaterReflection.
Now it should look like this:
"LightmappedReflective"
{
	"$RefractTexture" _rt_WaterRefraction
}
That is now the base of our Material.
Now we add the Normalmap with $normalmap and the path to it like "nature/waterfall_n".
For the right refraction amount we add $refractamount with a value between 0 and 1 like 0.08.
Now your vmt should look like this:
"LightmappedReflective"
{
	"$RefractTexture" _rt_WaterRefraction
	"$normalmap" "nature/waterfall_n"
 	"$refractamount" .08
}
$Surfaceprop
You should add "$surfaceprop" "Water" for correct effects and physics.
Scroll animation
When you use your material in a map you should see that the refraction looks frozen, so now you must add a "Scrolling" effect.
You can do this with an animated texture or the easier way you add "Proxies" like this
"Proxies"
{
	"TextureScroll"
	{
	}
}
For the TextureScroll Proxy we need "texturescrollvar", "texturescrollrate" and "texturescrollangle".
With "texturescrollvar" we specify the target like we need "$bumpTransform".
With "texturescrollrate" we specify the scrolling speed you have to test yourself which value could be the best, I used 1.3.
With "texturescrollangle" we specify the moving direction in degrees we use 270 degrees for it, for a down flowing.
So now the whole vmt should look like this
"LightmappedReflective"
{
	"$RefractTexture" _rt_WaterRefraction
	"$normalmap" "nature/waterfall_n"
	"$refractamount" .08
	"Proxies"
	{
		"TextureScroll"
		{
			"texturescrollvar" "$bumpTransform"
			"texturescrollrate" 1.3
			"texturescrollangle" 270.00
		}
	}
}
Optional: Reflection
When you want Reflections you must add $ReflectTexture, $reflectamount and $fresnelpower. Use for $fresnelpower a value of 5 because I think it looks the best. For $reflectamount you must find your own value because there is no "Perfect value".
"LightmappedReflective"
{
	"$RefractTexture" _rt_WaterRefraction
	"$ReflectTexture" _rt_WaterReflection
 	"$normal" "nature/waterfall_n"
 	"$refractamount" .08
 	"$reflectamount" .3
	"$fresnelpower" 5
 	"Proxies"
	{
		"TextureScroll"
		{
			"texturescrollvar" "$bumpTransform"
			"texturescrollrate" 1.3
			"texturescrollangle" 270.00
		}
	}
}

