Создание простой Dota-подобной карты
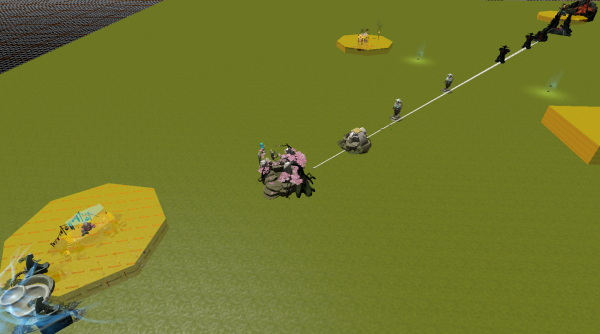
Давайте создадим самую базовую одно-лайновую Дота-подобную карту использующую гейплейные объекты которые могут быть использованы в классических Дота картах. К концу этого урока вы должны иметь карту напоминающую dota_pvp с именем simple_dota_map_example.vmap. Если вы еще не готовы, сделайте это.
Первый запуск Workshop Tools
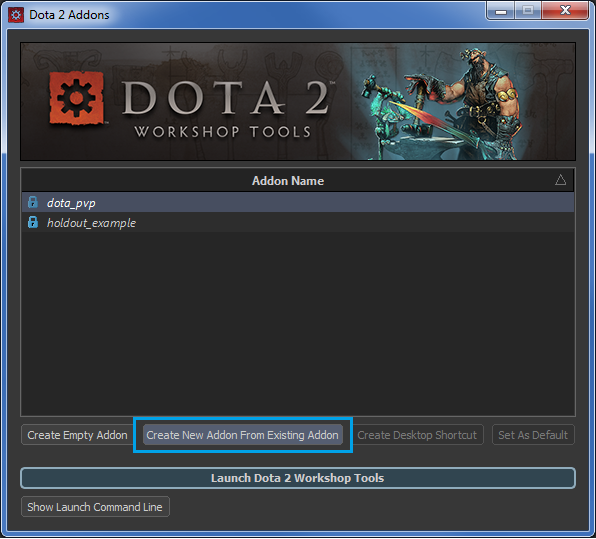
Первым делом запускаем Workshop Tools, жмём dota_pvp, далее выбираем Create New Addon From Existing Addon. Тем самым мы создаём копию экземпляра dota_pvp's. Также аддон dota_pvp уже включает в себя файл со скриптом под названием addon_game_mode.lua находится он в .../[имя_вашего_аддона]/scripts/vscripts. Файл содержит строку кода, делающая башню неуязвимой, которая понадобится нам позже.
Карта-шаблон
Перед тем, как вы создадите свою собственную карту, откройте карту-шаблон simple_dota_map_example.vmap, которая находиться по адресу dota_addons/[your_addon_name]/maps. Это простая однолайновая карта, которая содержит фонтаны, древних крипов, бараки, тавера(вышки), магазины, руны, Рошана и лагерь нейтральных крипов. Если у вас возникнут проблемы по ходу руководства, вы всегда можете обратится к этой карте, чтобы изучить объекты, увидеть их свойства и расстановку на карте.
Создание Вашей карты
Создайте новую карту в Hammer и сгенерируйте ячеистую сетку переключившись на инструмент Tile Editor с помощью ⇧ Shift+C. Сохраните карту сейчас и не забудьте сохранять её регулярно по мере продвижения по этому обучению. Для этой карты, мы будем использовать в основном prefabs и некоторые точечные и сетчатые объекты(point entities and mesh entities).
Basic Entities
In the Assets pane, click the Prefabs tab. Drag the prefabs basic_entities_radiant and basic_entities_dire onto your tilegrid. The Radiant prefab contains the core game entities, so you won't need to use the basic_entities prefab that includes both Radiant and Dire playerstarts. Place the Radiant prefab where you want your Radiant base and the Dire prefab where you want your Dire base -- you'll want a large distance between the two to ensure you've got enough space for ancients, barracks, and towers.
The advantage of using this pair of basic entity prefabs is that the Radiant and Dire playerstarts are in two distinct prefabs, so you don't have to do any prefab collapsing to get your two teams of players to spawn in their own base.
Ancients
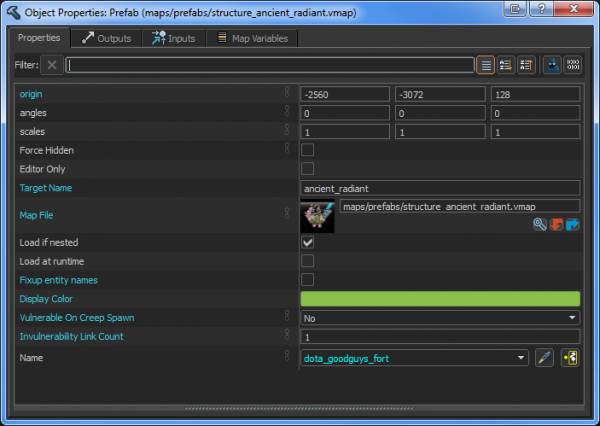
Установите префаб structure_ancient_radiant на Вашу карту и расположите его рядом с префабом basic_entities_radiant неподалеку от спавна героев Radiant . Если Вы откроете настройки structure_ancient_radiant (можно нажатием Alt+↵ Enter), Вы увидите, что его имя Name установлено как "dota_goodguys_fort", что является string значением, искомым Dota2.
Установите его Target Name как "ancient_radiant", so that we can have other structures refer to it. Установите Vulnerable On Creep Spawn (Уязвимость при спавне крипов) на "No", позднее мы используем энтити ввода/вывода для отключения неуязвимости для наших строений. Также установите Invulnerability Link Count на 1.
Сделайте то же самое для префаба святыни Тьмы, располагая structure_ancient_dire рядом с basic_entities_dire, установив Target Name как "ancient_dire", и настроив Vulnerable On Creep Spawn на "No", и Invulnerability Link Count на 1.
Towers
Ваша карта будет располагать одной линией с двумя башнями сил Света и сил Тьмы. Начнем с создания башни Света Т1. В классической версии карты, самые дальние от базы башни именуются tier 1 (первый фронт, второй фронт и тд.), по мере приближения к своей базе эта цифра увеличивается.
Radiant Tier 1 Tower
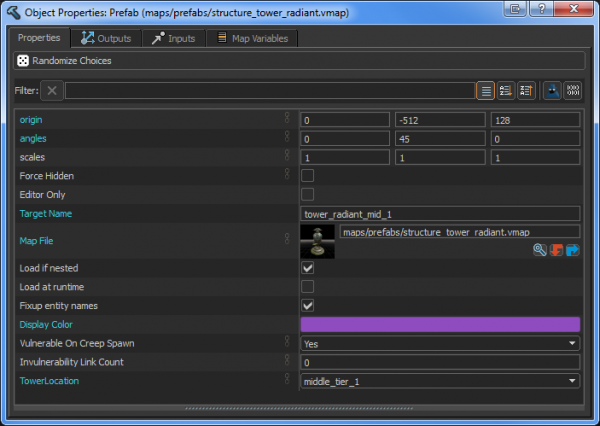
Drag the prefab structure_tower_radiant into your map and give it these settings:
- Target Name = "tower_radiant_mid_1"
- TowerLocation = "middle_tier_1"
The Target Name is what we'll be referencing when we hook up the structures via entity i/o. TowerLocation = "middle_tier_1" signifies that this is our middle lane tier 1 tower. TowerLocation's setting tells the prefab to assign a particular name to this tower behind the scenes, which the game logic looks for (in this case, "npc_dota_goodguys_tower1_mid").
Radiant Tier 2 Tower
Drag another structure_tower_radiant prefab into your map, this one will be our tier 2 tower. Give it these settings:
- Target Name = "tower_radiant_mid_2"
- Vulnerable On Creep Spawn = "No"
- TowerLocation = "middle_tier_2"
Vulnerable On Creep Spawn = "No" means that the tower is invulnerable until we trigger it to become vulnerable. Our tier 1 tower had this set to the default "Yes".
Dire Tier 1 Tower
Drag the structure_tower_dire prefab into your map and create your Dire tier 1 tower using these settings:
- Target Name = "tower_dire_mid_1"
- TowerLocation = "middle_tier_1"
Dire Tier 2 Tower
Drag another structure_tower_dire prefab and create your Dire tier 2 tower:
- Target Name = "tower_dire_mid_2"
- Vulnerable On Creep Spawn = "No"
- TowerLocation = "middle_tier_2"
Entity I/O - Part 1
Let's set it up so that when a tier 1 tower is destroyed it removes the invulnerability buff on the tier 2 tower.
Radiant Tier 1 Tower Output
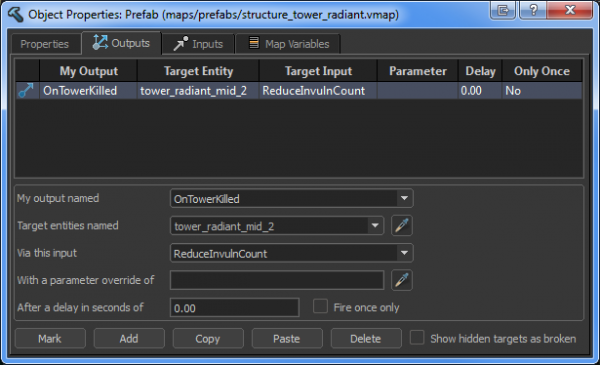
Select your tier 1 Radiant tower, open its properties, and in the Outputs tab add a new output:
- My output named: "OnTowerKilled"
- Target entities named: "tower_radiant_mid_2"
- Via this input: "ReduceInvulnCount"
Now when the tower dies (OnTowerKilled), it will send a ReduceInvulnCount output to your tier 2 tower ("tower_radiant_mid_2"), which removes the tier 2 tower's invulnerability buff.
Dire Tier 1 Tower Output
Select your Dire tier 1 tower and add this output to it:
- My output named: "OnTowerKilled"
- Target entities named: "tower_dire_mid_2"
- Via this input: "ReduceInvulnCount"
Barracks
Radiant Middle Barracks
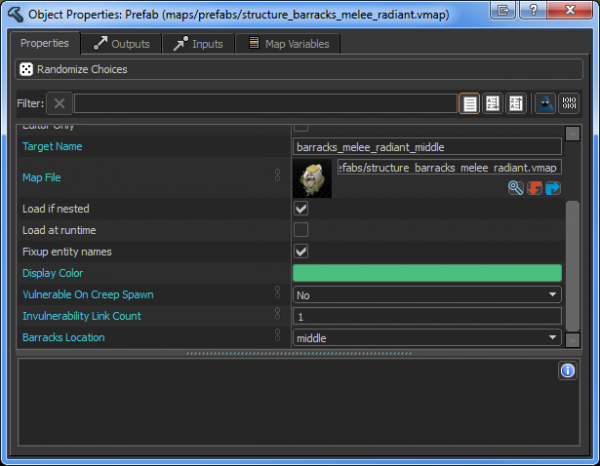
Drag the prefab structure_barracks_melee_radiant into your map and place it behind your Radiant tier 2 tower. Give it these properties:
- Target Name = "barracks_melee_radiant_middle"
- Vulnerable On Creep Spawn = "No"
- Invulnerability Link Count = "1"
- Barracks Location = "middle"
Dire Middle Barracks
Drag in structure_barracks_melee_dire and set it up in a similar way:
- Target Name = "barracks_melee_dire_middle"
- Vulnerable On Creep Spawn = "No"
- Invulnerability Link Count = "1"
- Barracks Location = "middle"
Creep Spawners and Paths
Switch to the Entity Tool with ⇧ Shift+E.
Radiant Creeps
We'll make the Radiant creeps first. We'll make them spawn in, path to a First Waypoint, then proceed down the lane to a Second Waypoint that we'll have placed near the Dire ancient.
Place the following entities near your Radiant melee barracks and give them these properties to set up your Radiant middle-lane creeps:
Creep Spawner
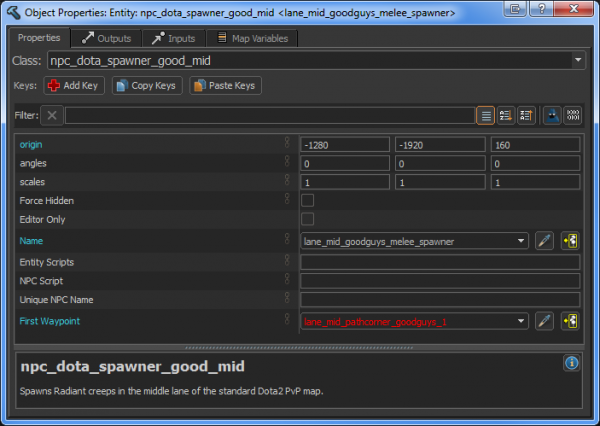
Place a npc_dota_spawner_good_mid entity. This actually spawns the creeps. Note that the name you put in the First Waypoint field will be red (which means the entity referred to does not exist). This will turn white when you create the First Waypoint in the next step.
- Name = "lane_mid_goodguys_melee_spawner"
- First Waypoint = "lane_mid_pathcorner_goodguys_1"
First Waypoint
Place a path_corner. The path_corner entity type defines the path that the creeps follow. Your spawner entity knows to path to this path_corner because it has its First Waypoint field linked to it.
- Name = "lane_mid_pathcorner_goodguys_1"
- Next stop target = "lane_mid_pathcorner_goodguys_2"
Second Waypoint
While in Translate Tool T, make another path_corner by dragging ⇧ Shift+![]() . Place this one next to the Dire's ancient. You're just making a very simplified, straight middle lane, so this second waypoint will be the final waypoint for your Radiant creeps. Note that if you want to make creep paths with some twists and turns, you'll need to link together more path_corners.
. Place this one next to the Dire's ancient. You're just making a very simplified, straight middle lane, so this second waypoint will be the final waypoint for your Radiant creeps. Note that if you want to make creep paths with some twists and turns, you'll need to link together more path_corners.
Since you duplicated your path_corner, Hammer knows to change your next one's Name property to "lane_mid_pathcorner_goodguys_2". Now your Radiant creeps will be able to spawn, move towards the first path_corner ("lane_mid_pathcorner_goodguys_1"), and then continue to its Next stop target, which is "lane_mid_pathcorner_goodguys_2".
Staging Node
Place an info_target entity. The info_target entity is a staging spot that allows creeps to be initialized at different times for performance gain. The only purpose of this entity is to reduce hitching when all the Radiant and Dire creeps spawn (every :00 and :30 on the clock). You don't need to worry about where you place these staging nodes, because the creeps can't be interacted with until they've been spawned in by the npc_dota_spawner_good_mid entity referred to above.
- Name = "npc_dota_spawner_good_mid_staging"
Dire Creeps
Now create the Dire creeps:
Spawner
- Name = "lane_mid_badguys_melee_spawner"
- First Waypoint = "lane_mid_pathcorner_badguys_1"
First Waypoint
- Name = "lane_mid_pathcorner_badguys_1"
- Next stop target = "lane_mid_pathcorner_badguys_2"
Second Waypoint
- Name = "lane_mid_pathcorner_badguys_2"
Staging Node
- Name = "npc_dota_spawner_bad_mid_staging"
Entity I/O - Part 2
Next, let's set up entity logic so that destroying tier 2 towers toggles off invulnerability on barracks and ancients. This is how the structures in the classic Dota map work.
Radiant Tier 2 Tower Outputs
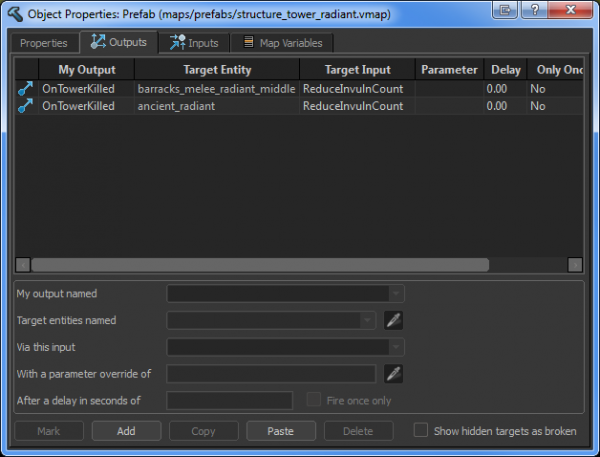
Select the tier 2 Radiant tower, open its Outputs tab and give it these two outputs:
- My output named: OnTowerKilled
- Target entities named: "barracks_melee_radiant_middle"
- Via this input: "ReduceInvulnCount"
- My output named: OnTowerKilled
- Target entities named: "ancient_radiant"
- Via this input: "ReduceInvulnCount"
This means that when the Radiant tier 2 tower is destroyed, it will remove the invulnerability buff on the Radiant barracks as well as the Radiant ancient.
Dire Tier 2 Tower Outputs
Do the same for the Dire tier 2 tower:
- My output named: OnTowerKilled
- Target entities named: "barracks_melee_dire_middle"
- Via this input: "ReduceInvulnCount"
- My output named: OnTowerKilled
- Target entities named: "ancient_dire"
- Via this input: "ReduceInvulnCount"
Fountain
Drag the prefab structure_fountain_radiant into your map and place it next to your basic_entities_radiant prefab. This is the Radiant fountain -- you don't need to change any of its properties for it to work as expected because the prefab has Team Number set to "Good Guys" and Unit Name set to "dota_fountain". Bring in the Dire fountain by dragging the prefab structure_fountain_dire into your map and placing it near your basic_entities_dire prefab.
Магазин
Shop prefabs can be set to any Shop Type -- "Home", "Side", or "Secret". Drag one of the "shop_" prefabs into your map, place it next to your Radiant fountain and ensure its Shop Type is set to "Home". Do the same for the Dire base.
Place a shop_keeper_radiant prefab on the Radiant side of your map and a shop_keeper_dire prefab on the Dire side. These default to Shop Type "Secret", which is what we'll use.
Руны
Переместите два префаба rune на вашу карту и разместите их там, где вы хотите что-бы они спавнились. Обратите внимание, что вы можете иметь больше двух спавнов рун на карте.
Нейтральный лагерь
Перенесите neutral_camp префаб на вашу карту. Этот префаб содержит спавнер, а также связанный с ним триггерный меш. Триггерный меш определяет, является ли лагерь заблокированным игроком, вардом или юнитом и т.д.
- Set both the Volume Name (in spawner) and the Volume Name (in trigger) variables to "neutral_camp_01" (the Volume Name (in trigger) value will be red due to prefab behavior, but everything will still function properly). Now both the spawner and the trigger entities in the prefab are named the same, so this particular neutral spawn location has its blocked/clear state set by this particular trigger mesh.
- Set the Camp Type to "Easy", "Moderate", "Hard", or "Ancient".
Your neutral camp is now functional and is just missing neutral camp art, which you can add using the Tile Editor.
Рошан
Спавн Рошана
Чтобы добавить Рошана на карту, переключитесь на Entity Tool спомощью комбинации ⇧ Shift+E и разместите npc_dota_roshan_spawner на вашей карте. Этот объект спавнит Рошана.
Make Roshan Attackable
Heroes cannot right-click attack Roshan except when they're standing inside a special region (spells are not constrained in this way and can be cast on Roshan from anywhere).
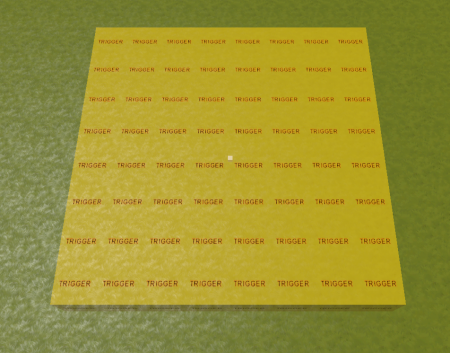
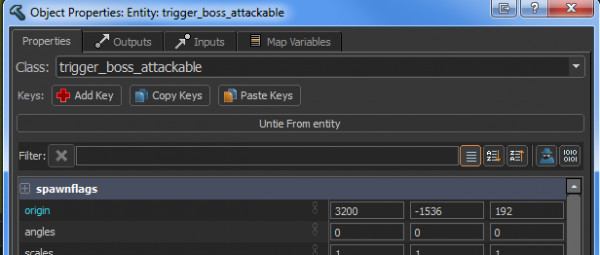
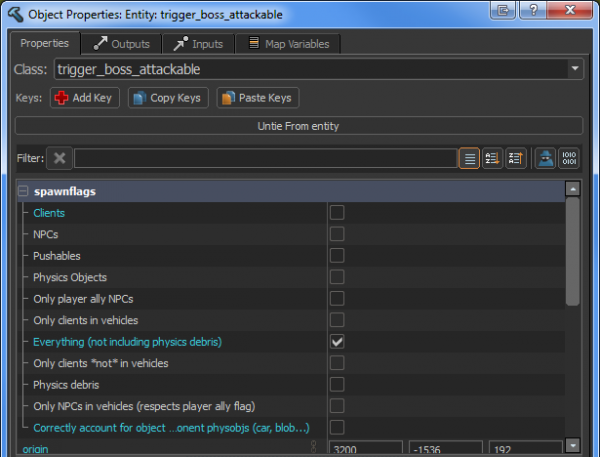
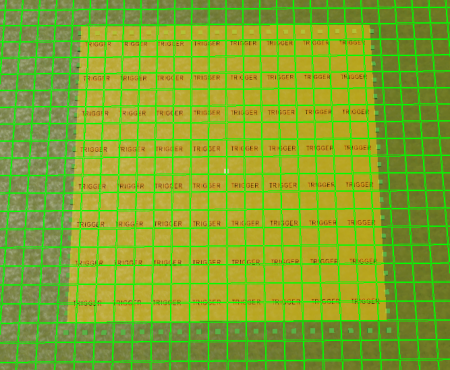
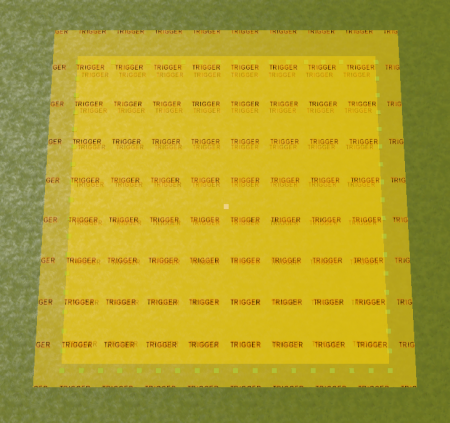
To make a region in which Roshan is attackable, switch to Block Tool with ⇧ Shift+B and create a mesh with a trigger material on it, then convert it to a mesh entity with Ctrl+T. Make it a trigger_boss_attackable. Open its spawnflags by clicking the + symbol next to that field (or double-clicking the spawnflags row), then tick the box next to Everything (not including physics debris), and untick both Clients and Correctly account for object mass....
Adjust the bounds of this trigger_boss_attackable mesh to define where you want players to be able to attack Roshan with right-click physical attacks.
Block Vision Around Roshan
If you want to prevent players from being able to see into and out of the Roshan pit, you can place vision blockers around it. Switch to Entity Tool with ⇧ Shift+E and place a ent_fow_blocker_node near your npc_dota_roshan_spawner entity.
Activate gridnav view with Ctrl+Q, then switch to Translate Tool and move the ent_fow_blocker_node to the center of one of the gridnav squares. You'll want your grid-snap set to 32 units for this.
Switch your grid-snap up to 64 units and duplicate the ent_fow_blocker_node using ⇧ Shift and an arrow key, eg. ⇧ Shift+←. Make a loop of these entities around your Roshan spawner, ensuring you've got one node per gridnav square. This creates artificial Fog of War around Roshan -- you've got to walk to the other side of a node to see what's behind it.
For the sake of visibility, turn off gridnav view with Ctrl+Q before moving on to the next section.
Запрет установки Вардов
Вы можете запретить установку вардов используя специальный триггерный меш. Класическая карта Dota использует их, что бы запретить размещение фардов в нежелательных местах, в таких как: края скал, внутри моделей (например лавочников) и в логове Рошана.
Switch to Block Tool with ⇧ Shift+B and make a mesh that approximately covers the area covered by your ent_fow_blocker node entities. Use Ctrl+T to convert it to a mesh entity and make it a trigger_no_wards. Open its spawnflags, then tick the box next to Everything (not including physics debris), and untick Clients and Correctly account for object mass....
Компиляция и запуск
You now have all the core game-mode objects used in the standard Dota PvP map. If you wish to make more lanes, just refer to the dota_pvp_tiled.vmap file to see the names used by the top and bottom lane's towers, barracks, and creep entities.
Save your map, then press F9 to open the Build dialog, make sure all the checkboxes are ticked, and click Build. If your minimap fails to show up the first time, reload your map with the console command "map [your map name]" and do "jointeam good".
