Gel (Portal 2)
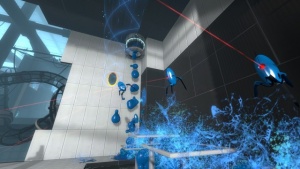
Gel or paint is a puzzle element of Portal 2. It flows out of droppers in blobs, and covers any surface or object it splashes on, changing its physical properties. Water streams behave the same way gel does, but cleans gel off surfaces. Gel streams can be redirected with portals and funnels.
There are three types of gel, and water. Repulsion gel is blue, and causes things to bounce around. Propulsion gel is orange, and makes objects slippery and players move quickly. Conversion gel is white, and allows the placement of portals.
Creation
Use an info_paint_sprayer.
- Set the Paint Type in the info_paint_sprayer's properties to select blue/orange/white gel or water.
- Set its Start Active? property to Yes if you want it to always drop paint.
- You will probably want a dropper as a prop, such as item_dropper.
- Make sure you set "Paint in map" in the Map Properties to yes, or paint won't adhere to surfaces.
Tutorial
Cave Johnson here, in this tutorial I will be covering how to create a button operated gel dropper. So without further ado, lets get to it.
Step 1
First, create a room of at least 256 units deep and about 512 wide. I also recommend at least 384 high.
Texture the ceiling with one of the many black_wall_metal textures, and the floor with a white_wall_tile or white_floor_tile texture.
Important: You will need to add a light source. (Your paint will not work properly in mat_fullbright mode!)
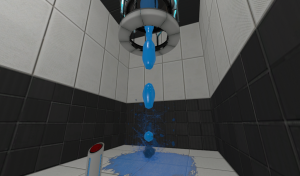
At this point your room should look similar to the image above.
Step 2
Next, create prop_dynamic entity and name it gel_dropper, then set its World Model to item_dropper.mdl.
Set its Hold Animation property to Yes, this will ensure that the animation does not loop.
To continue, position the dropper so that it sits flush against the ceiling.
Step 3
Now use the clipping tool to create a brush 96 wide/deep directly above the dropper. Texture the bottom face toolsblack_noportal.
It should now look like this:
Step 4
Next, create a info_paint_sprayer entity just below the ceiling and inside the dropper; name it gel_sprayer. Make sure that it is facing down. At this point your paint dropper will be barely dripping, so therefore you may also want to set its Blobs per second property to about 6+.
Step 5
Now that we've set up the dropper we must now set up a trigger. You can use anything you like, but for simplicity I'm going to be using a button.
Create a prop_button entity and place it anywhere in your map, preferably near the dropper. Set its Delay Before Reset property to 12, then add these four outputs:
| Output named | Target entities | Via this input | Parameter | Delay |
|---|---|---|---|---|
| OnPressed | gel_dropper | SetAnimation | item_dropper_open | 0.00 |
| OnPressed | gel_sprayer | Start | 2.00 | |
| OnButtonReset | gel_sprayer | Stop | 0.00 | |
| OnButtonReset | gel_dropper | SetAnimation | item_dropper_close | 2.00 |
Step 6
Go to Map > Map Properties... and set Paint in map to Yes. Finally, run your map! (File > Run Map...)
Step 7 - Polishing it
If your dropper is going to be published in a map you may also want to consider these tips.
1. Add a toolsplayerclip around the dropper to prevent the player from accidentally getting stuck inside it.
2. Create a env_cubemap inside the dropper to get proper reflections.
Conclusion
If you have pressed your button and everything functioned correctly, congratulations! You now know how to make paint droppers!
External links
- Example map using all Gels. VMF included.
- Tutorial map from the tutorial above. VMF only.


