Normal Map Creation in The GIMP
hallmark cards military mypay website kitchen design gallery uzbek muzik prescriptives universal studios 50cent mp3 suzuki parts the bold and the beautiful zenical voip service osteoporosis amish bedroom furniture professional carpet cleaner manga sex classic gay porn weight watchers 123 recipes shingles symptoms generic cialis dating online uk ovarian cancer cadillac young teens horoscope sign cheap greyhound bus tickets banned commercials xrated videos rifle stocks tatoo tribal guitar russian wife online mexican pharmacies hotchicks marilyn chambers bulldog ingles crusies holiday insurance uk pontiac soltice cheap plain tickets christina aguilera pic resume airport security off road jeep wranglers pregnat deals diltiazem er halloween art order didrex angelina jolie wallpaper mini trampoline designer wedding dress super winch birthday poem doxepin sex mature having sex alprazolam online big tits round asses jet blue delta airline flight stockings sex viagra on line estrogen best airfare troie couple elgin watches young sex cream pie xxx towable vehicles low rides crazy frog ringtones duck key real estate uncut cock home based work adware se grudge britney spears sex housenumbers real tv air compressors buick engines secret ringtone cadillac catera g18 xplore contact equifax bdsm porn tanga cheap computers jap download samsung mobile ici deluxe paint short hair cuts private schools dinnerware order phentermine word problems adult friend finder mexican pharmacy online purchase download gold miner se
In order to create a normal map using The GIMP, download the tool for GIMP here and install it, following the instructions in the readme file.
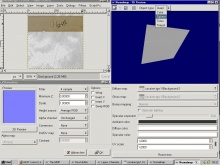
After restarting GIMP, open a copy of the texture you want to create a normal map for and click:
Filters -> Map -> Normalmap...
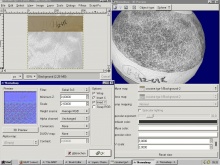
Before starting, you should click the 3D Preview and place it next to the normalmap window. It will automatically update when you change your settings and will be a great help checking the results in GIMP. Select a shape similar to what your texture will be placed on ingame (e.g. a texture for brushes fits onto a cube whereas a modelskin might look better on a sphere). Make use of the UV scale to find a good setting.
Now focus on the Normalmap window again. These are the most useful settings:
- Filter - different ways to calculate your normal map. You'll have to try out which one works best for your texture
- Minimum Z - the lowest height on your normal map
- Scale - Use this to control the height of your surface. Results change when you choose a different filter
- Conversion - Let's you choose what is used to create the normal map. Max/Min RGB or only one color channel can be very helpful sometimes
Checkboxes:
- Wrap - Normal map will pattern seamless. Definitely use it for map textures!
- Invert X/Y - If your normal map seems to be upside down, this will help
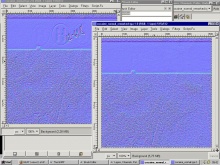
Check the 3D Preview from several angles, also move the light around. When you've found the best setting, hit OK and your texture is converted to the normal map!
Before it is ready to be used, you will need to fine tune the results. GIMP considers RGB color 127,127,255 (#7f7fff) to be flat, while the Source engine considers 128,128,255 (#8080ff) to be flat. This means that you will have to increase every pixel in your image by 1 unit red and 1 unit green. To adjust this, perform the following steps.
- Make sure that you have the appropriate layer selected (there should only be one)
- Go to the Channels tab and deselect the Blue channel (leave the Red and Green channels selected)
- Go to the Color Balance Tool. Image menu â Tools â Color Tools â Color Balance
- Leave the settings on "Midtones" and adjust the Red and Green values both up to 1, but leave Blue at 0.
- Click "OK" to complete the adjustment.
After fine tuning it, can either go with that right away or rework it by hand. For example, you could duplicate the layer and use some overlay effects (Dodge, Addition, ...) or paint on the texture yourself if you want to create a flat part. (Again, RGB 128,128,255 (#8080ff) is flat in the Source engine.)


