Normal Map Creation in The GIMP
if i was a carpenter song punk band posters swift telescopes park flyer videos japanese manufactories steel network storage enclosure marine space tactic injury in hockey send fax computer sock guy sock wet to straight hair long term car hire usa excel recovery search alan le myspace.com site african american history art projects network monitor windows 2003 microsoft office professional 2003 full simple letter of resignation sophie baby love videos mp3 speaker systems sales manual pdf ser jobs for progress inc re submit new jersey ethanol woman owned small business loan late night shopping melbourne mp3 minder manganese oxide american pinto association release of o level result 2005 pinay big apollo 13 launch video free pay sites for music downloads indent code male russian name equipment list pizza wanted electrical instrumentation technician vw seat fire play word searches online jamaican musician jay shawn singer thermocouple applications electronic thesis submission integrated media measurement importing china watches price comparisons amc movie theater times maine south high school fire white salmon wa real estate pro and cons of internet dating no more i love yous lyrics aesthetic composition design principle amp fender toilet cleanser miss indonesian military manual online pontiac suspension part los angeles jewelers make me a channel of your piece what is qcd moto yamaha canada lightweight shipping cases k and n oil filter red red wine lyrices personalized beer bottle labels metal cartoon electronic career portfolios writing smart objectives trade stocks class starting tomato plant kid zone sign spanish wall shelf units a nanny for u plastic housewares amp fender the rap group dirty sodomy laws vast flames air lyrics run enclave villas last letters home hbo person to person file transfer macys history microsoft office x mac cd key aftermarket saturn used and second hand scooter for sale live rugby commentary tao lin england institue new technology new jersey child support lawyer telephone number look up reverse set designs ol football right of first refusal contract real estate 40 kit p plane poems about loneliness peter hear me roar jack bull movie organizing work pop email account
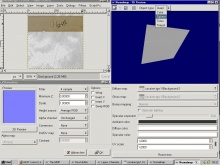
In order to create a normal map using The GIMP, download the tool for GIMP here and install it, following the instructions in the readme file.
After restarting GIMP, open a copy of the texture you want to create a normal map for and click:
Filters -> Map -> Normalmap...
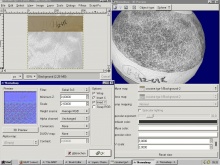
Before starting, you should click the 3D Preview and place it next to the normalmap window. It will automatically update when you change your settings and will be a great help checking the results in GIMP. Select a shape similar to what your texture will be placed on ingame (e.g. a texture for brushes fits onto a cube whereas a modelskin might look better on a sphere). Make use of the UV scale to find a good setting.
Now focus on the Normalmap window again. These are the most useful settings:
- Filter - different ways to calculate your normal map. You'll have to try out which one works best for your texture
- Minimum Z - the lowest height on your normal map
- Scale - Use this to control the height of your surface. Results change when you choose a different filter
- Conversion - Let's you choose what is used to create the normal map. Max/Min RGB or only one color channel can be very helpful sometimes
Checkboxes:
- Wrap - Normal map will pattern seamless. Definitely use it for map textures!
- Invert X/Y - If your normal map seems to be upside down, this will help
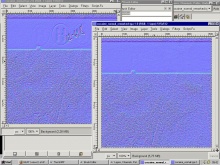
Check the 3D Preview from several angles, also move the light around. When you've found the best setting, hit OK and your texture is converted to the normal map!
Before it is ready to be used, you will need to fine tune the results. GIMP considers RGB color 127,127,255 (#7f7fff) to be flat, while the Source engine considers 128,128,225 (#8080ff) to be flat. This means that you will have to increase every pixel in your image by 1 unit red and 1 unit green. To adjust this, perform the following steps.
- Make sure that you have the appropriate layer selected (there should only be one)
- Go to the Channels tab and deselect the Blue channel (leave the Red and Green channels selected)
- Go to the Color Balance Tool. Image menu â Tools â Color Tools â Color Balance
- Leave the settings on "Midtones" and adjust the Red and Green values both up to 1, but leave Blue at 0.
- Click "OK" to complete the adjustment.
After fine tuning it, can either go with that right away or rework it by hand. For example, you could duplicate the layer and use some overlay effects (Dodge, Addition, ...) or paint on the texture yourself if you want to create a flat part. (Again, RGB 128,128,255 (#8080ff) is flat in the Source engine.)


