Bump map: Difference between revisions
m (→See also) |
TomEdwards (talk | contribs) mNo edit summary |
||
| Line 4: | Line 4: | ||
* The '''red''' channel contains the horizontal facing (X-axis) | * The '''red''' channel contains the horizontal facing (X-axis) | ||
* | *:0 = left | ||
* | *:128 = forward | ||
* | *:255 = right | ||
* The '''green''' channel includes the vertical facing (Y-axis) | * The '''green''' channel includes the vertical facing (Y-axis) | ||
* | *:0 = up | ||
* | *:128 = forward | ||
* | *:255 = down | ||
* The '''blue''' channel decodes the height of the pixel (Z-axis) | * The '''blue''' channel decodes the height of the pixel (Z-axis) | ||
* | *:0 = deepest | ||
* | *:127 = maximum depth capable of receiving light | ||
* | *:255 = at the material's surface | ||
With these 3 channels, every pixel has a normal vector, means the engine knows in which direction the pixel is facing and can thereby calculate shadows and highlights. | With these 3 channels, every pixel has a normal vector, means the engine knows in which direction the pixel is facing and can thereby calculate shadows and highlights. | ||
A normal map is largely useless for really flat surfaces like smooth concrete or metal, but even rough concrete sometimes has enough depth to it to make a normal map worthwhile. | A normal map is largely useless for really flat surfaces like smooth concrete or metal, but even rough concrete sometimes has enough depth to it to make a normal map worthwhile. | ||
==See also== | ==See also== | ||
| Line 28: | Line 26: | ||
*[[Normal2dudv]] a third party tool for converting normalmaps to Dx8-friendly [[du/dv maps]]. | *[[Normal2dudv]] a third party tool for converting normalmaps to Dx8-friendly [[du/dv maps]]. | ||
*[http://planetpixelemporium.com/tutorialpages/normal.html An old article that explains the concept well.] | *[http://planetpixelemporium.com/tutorialpages/normal.html An old article that explains the concept well.] | ||
* | *[[Wikipedia:Bump mapping]] | ||
*[[Bump mapping]] (merge?) | *[[Bump mapping]] (merge?) | ||
{{otherlang:en}} {{otherlang:en:jp|Creating Normal Maps:jp}} | |||
[[category:material system]] | [[category:material system]] | ||
[[Category:Glossary]] | |||
Revision as of 12:33, 3 July 2008
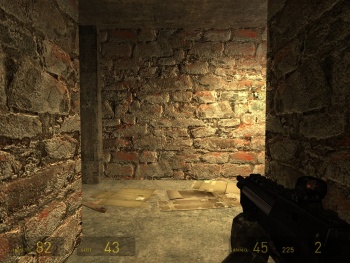
A texture used to give a material the illusion of depth through refracting light cast upon it (pixel by pixel). This shader method is called bump mapping, and is perhaps the main reason that games such as Doom 3, FarCry, and Half-Life 2 are able to look so much better than previous games. The normal map is the successor to the heightmap. While heightmaps only used one channel to decode the height of each pixel, normal maps use all three:
- The red channel contains the horizontal facing (X-axis)
- 0 = left
- 128 = forward
- 255 = right
- The green channel includes the vertical facing (Y-axis)
- 0 = up
- 128 = forward
- 255 = down
- The blue channel decodes the height of the pixel (Z-axis)
- 0 = deepest
- 127 = maximum depth capable of receiving light
- 255 = at the material's surface
With these 3 channels, every pixel has a normal vector, means the engine knows in which direction the pixel is facing and can thereby calculate shadows and highlights.
A normal map is largely useless for really flat surfaces like smooth concrete or metal, but even rough concrete sometimes has enough depth to it to make a normal map worthwhile.
See also
- $bumpmap for normalmap syntax in VMT files.
- Normal Map Creation
- Normal Map Creation in The GIMP
- Normal2dudv a third party tool for converting normalmaps to Dx8-friendly du/dv maps.
- An old article that explains the concept well.
- Wikipedia:Bump mapping
- Bump mapping (merge?)
