Adding chapters to your mod: Difference between revisions
m (→STEP 4: Chapter images: Link thingie) |
|||
| Line 34: | Line 34: | ||
=== STEP 4: Chapter images === | === STEP 4: Chapter images === | ||
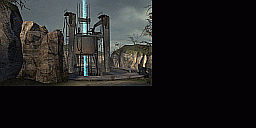
[[image:CBXChapter1.gif|thumb|Sample Chapter Image]] | [[image:CBXChapter1.gif|thumb|Sample Chapter Image]] | ||
Next you will need to create [[VMT|*.vmt]] and [[VTF|*.vtf]] image files for your chapters. Place the [VMT|*.vmt]] and [[VTF|*.vtf]] files into the <code>yourmodfolder/materials/vgui/chapters/</code> folder. Be sure to name your images chapter1.vtf, chapter1.vmt and chapter2.vtf, chapter2.vmt respectivly. | Next you will need to create [[VMT|*.vmt]] and [[VTF|*.vtf]] image files for your chapters. Place the [[VMT|*.vmt]] and [[VTF|*.vtf]] files into the <code>yourmodfolder/materials/vgui/chapters/</code> folder. Be sure to name your images chapter1.vtf, chapter1.vmt and chapter2.vtf, chapter2.vmt respectivly. | ||
Make sure to make the image files 256x128 in size (IE: Power of 2). Also be aware that when your chapter is selected in the new game dialog that only a portion of the image will be visible from the top left corner pixel 1,0 to the bottom right corner pixel 152,86. | Make sure to make the image files 256x128 in size (IE: Power of 2). Also be aware that when your chapter is selected in the new game dialog that only a portion of the image will be visible from the top left corner pixel 1,0 to the bottom right corner pixel 152,86. | ||
Revision as of 14:17, 31 August 2005
Adding chapters to your mod is a little complecated because you need to modify a number of files in order to add new chapters.
STEP 1: Chapter config files
Create a chapter1.cfg file and put it in the cfg folder like so yourmodfolder/cfg/chapter1.cfg. Then edit the file to read ...
map Map1
Replacing Map1 with the name of your own map. Do this for each chapter in your mod.
STEP 2: Strings file
Goto your yourmodfolder/resource folder an copy the HL2_english.txt file and give it the name YourModName_english.txt. (Again replacing YourModName with the name of your mod) Now you will need to edit the YourModName_english.txt file. At the top of the file add the fallowing lines above HL2_Chapter1_Title like so ...
"YourModName_Chapter1_Title"		"Title of the chapter goes here"

"HL2_Chapter1_Title"		"POINT INSERTION"
You can leave the original HL2_Chapter1_Title title entries as they will not affect your mod by being there.
=== STEP 3: Chapter titles === Open up the yourmodfolder/scripts/titles.txt file and scroll down to the CHAPTER TITLES section and modify the chapters entries like so ...
//CHAPTER TITLES

$fadein 0.01
$holdtime 3.5
$position -1 0.58

CHAPTER1_TITLE
{
#YourModName_Chapter1_Title
}
STEP 4: Chapter images
Next you will need to create *.vmt and *.vtf image files for your chapters. Place the *.vmt and *.vtf files into the yourmodfolder/materials/vgui/chapters/ folder. Be sure to name your images chapter1.vtf, chapter1.vmt and chapter2.vtf, chapter2.vmt respectivly.
Make sure to make the image files 256x128 in size (IE: Power of 2). Also be aware that when your chapter is selected in the new game dialog that only a portion of the image will be visible from the top left corner pixel 1,0 to the bottom right corner pixel 152,86.
STEP 5: The map list
Now that you have your images setup do not forget to create a yourmodfolder/maplist.txt file containing a list of maps that your mod will use. For example inside a maplist.txt file would look like ...
Map1
Map2
STEP 6: Chapter map loading images
You will need to edit the yourmodfolder/scripts/chapterbackgrounds.txt file and specify what loading images you want to be displayed while your mod is starting and the background map is loading. Below is an example of what a chapterbackgrounds.txt might look like.
"chapters"
{
	1	"YourImage1"
	2	"YourImage3"
	3	"YourImage3"
	4	"YourImage4"
	5	"background03"
	6	"background03"
	7	"background04"
	8	"background04"
	9	"background05"
	9a	"background05"
	10	"background06"
	11	"background06"
	12	"background07"
	13	"background07"
	14	"background07"
	15	"background07"
}
Be sure to create your images 1024x1024. The trick to creating a image that is displayed properly in either 4:3, 16:9, or 16:10 is to create a 1024x768 image then resize it to 1024x1024 before saving it. For widescreen you would start by creating 1280x800 for example, then resize it to 1024x1024. See Creating Menu Background Maps for more info on this topic.
Additional notes
If you want your chapters to be unlocked when you first play your mod then be sure to edit the yourmodfolder/cfg/config.cfg file. Scroll down to about line 162 and edit the line ...
sv_unlockedchapters "1"
This tutorial also needs to describe how to have your map unlock chapters. I currently have not got to this point yet. Someone please add the info to this page as a step 7. In time (when I know how) I will add the info
--Created by: X 13:26, 31 Aug 2005 (PDT)
