Portal - Tutorial - Scaffolds

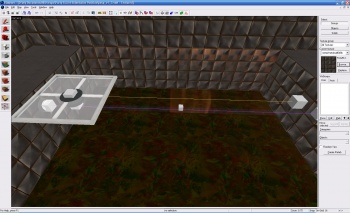
This tutorial covers the creation of a Scaffold in Portal.
The Platform
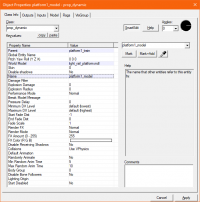
1. The first step is to insert the model of the platform. Create a prop_dynamic with the following settings:
Property Name Value World Model models/props/light_rail_platform.mdl Name platform1_model Parent platform1_train
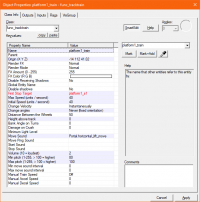
2. The platform model does not have glass in it; this must be created manually. Create a brush that is 120x120x2 with the texture glass/glasswindow_frosted_004. Place it inside the platform model so that it lines up perfectly with the edges (you may need to set the grid scale to 2 or 1 temporarily). Tie it to a func_tracktrain with these settings:
Property Name Value Name platform1_train Height above track 0 Change angles never Move sound Portal.horizontal_lift_move Volume 2 Max pitch 100 Min pitch 80 First stop target platform1_s1 Max speed 40 Initial Speed 40
- Also, ensure no user control is checked.
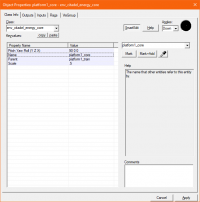
3. To add an energy effect underneath the platform, create an env_citadel_energy_core point entity, place it under the model, and set these values:
Property Name Value Name platform1_core Parent platform1_train Pitch Yaw Roll 90 0 0 Scale .5
- Set the flag to start on if desired.
The Path

You can upload screenshots at Special:Upload. For help, see the Help:Images.
1. Create a path_track, center it in the very center of platform1_train. This will be the starting waypoint for the path the platform follows. Set these values:
Property Name Value Name platform1_s1 Next stop target platform1_s2 Orientation type no change
- Set the flag teleport to this path_track if you have a one direction system.
- Also set these outputs:
2. Create as many path_track entities as desired. Ensure they stay the same height, and follow the same numbers. Also make sure the last path_track 's keyvalue Next stop target points back to the first path_track if the platform is intended to travel in a loop.
3. Compile and test the map before continuing.
The Energy Rail

You can upload screenshots at Special:Upload. For help, see the Help:Images.
1. Create a brush 12x2 and set it around the path. Texture it with effects/light_rail_beam1. Turn it to a func_brush with these settings:
Property Name Value Fx color 225 252 253 Solidity Never Solid
2. Place info_targets at each bend or end of the rail brushes. The active energy rail beam effect will travel between these targets. Name them something like platform1_target1, platform1_target2, etc.
3. Create an env_beam for each straight section of track. Set the following:
Property Name Value Beam color 38 50 68 Brightness 255 Ending entity (your info_target) Life 0 Name platform1_beam Render FX Fast Wide Pulse Sprite name materials/Effects/laser1.vmt Start entity (your info_target) Texture scroll rate 2 Width 4
Set it to start on.
Props

You can upload screenshots at Special:Upload. For help, see the Help:Images.
1. Add props at the end of the rails. Also under the corners. These decorative props will appear to be creating and directing the energy rail beam.
- Some props are :
- models/props/light_rail_wall_emitter.mdl
- models/props/light_rail_endcap.mdl
- models/props/light_rail_corner.mdl
2. Add an env_citadel_energy_core that points at the base of the prop. Set these to start on with a scale of .5
Enabling
1. To enable the train use these outputs:
See also
External links
- Example map Example map using this tutorial. VMF included.


