Modifying the Mission Briefing
| Skill Level
This tutorial expects you to have this amount of knowledge within the topic to follow along smoothly. | |||||
|---|---|---|---|---|---|
| Novice | Familiar | Competent | Proficient | Expert | |
The mission briefing, shown to players before they enter the match, is set automatically for basic Capture the Flag and Control Point maps, just by putting the right goal entities on the map. However, you may need to write a custom one. To do this, you must create a custom briefing file.
Writing a briefing
Your map's briefing should follow the style of the official maps. Some default briefings are listed below.
- Capture the Flag
- Objective:
- To win a point, steal the enemy's intelligence briefcase and return it to your base.
- Other Notes:
- Players drop the intelligence when they die. Dropped intelligence returns to its Base after 60 seconds.
- Special Delivery
- Objective:
- Deliver the Australium to the rocket warhead to win the round.
- Other Notes:
- Players drop the Australium when they die. Dropped Australium returns to its home after 15 seconds.
- Standard Control Points
- Objective:
- To win each team must own all five Control Points.
- Other Notes:
- Control Points cannot be captured while they are locked.
- Attack/Defend Control Points
- Objective:
- RED team wins by defending their Control Points. BLU team wins by capturing all control points before the time runs out.
- Other Notes:
- Control Points cannot be captured while they are locked. RED team cannot regain control of a point once BLU has captured it.
- KOTH
- Objective:
- Capture the Control Point and defend it until your team's timer runs out.
- Other Notes:
- The Control Point cannot be captured while locked.
- If the enemy team captures the Control Point, your team's timer will pause until you recapture the point.
- Payload
- Objective:
- Escort the payload to the enemy base. Stand near the payload to make it move.
- Other Notes:
- Enemies can block the payload by getting close to it.
- Payload Race
- Objective:
- Escort your payload cart to the finish line before the opposing team can deliver theirs. Stand near the cart to make it move.
- Other Notes:
- Enemies can block the cart by getting close to it.
- Mann vs. Machine
- Objective:
- Defend against the invading robots.
- Complete all waves for victory!
Adding the briefing
In the directory where your .bsp is:
"..\SteamApps\common\Team Fortress 2\tf\maps\"
Create the localised map .txt briefing files. Your directory should look like this:
mapname.bsp
mapname_danish.txt
mapname_dutch.txt
mapname_english.txt
mapname_finnish.txt
mapname_french.txt
mapname_german.txt
mapname_italian.txt
mapname_japanese.txt
mapname_korean.txt
mapname_norwegian.txt
mapname_polish.txt
mapname_portuguese.txt
mapname_russian.txt
mapname_schinese.txt // Simplified Chinese
mapname_spanish.txt
mapname_swedish.txt
mapname_tchinese.txt // Traditional Chinese
For example: If your map is named cp_factory, then your files should be named like this:
cp_factory_english.txt
After placing the files, run your map to make sure your briefing works and appears as intended.
Adding Custom Map Images
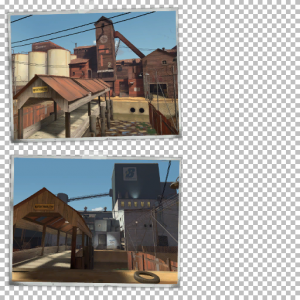
In order for your custom map to have 2 working Menu Photos it needs 2 files in following directory:
..\SteamApps\common\Team Fortress 2\tf\materials\vgui\maps\
These 2 files are:
menu_photos_[mapname].vtfmenu_photos_[mapname].vmt
Creating the VTF file
- Take a few screenshots of your map depending on how many you want to show.
- Use GCFScape to extract one of the existing menu photos from
tf2_textures_dir.vpkto use as a template for your VTF. You can find them inmaterials\vgui\maps\menu_photos_[mapname].vtf. - Choose one of the textures with "menu_photos_" in its name.
- Open the VTF of your choice with VTFEdit and export it as a PNG image.
- Open your PNG and your two screenshots with an image editor.
- Scale and rotate your screenshots so they fit perfectly on the existing thumbnails.
- Save your new image and export it to a VTF file again using VTFEdit. Save it as
menu_photos_[mapname].vtf.
Creating the VMT file
Open Notepad and paste the following lines of code into it.
"UnlitGeneric"
{
 "$basetexture" "vgui\maps\menu_photos_mapname"
 "$translucent" 1
 "$ignorez" 1
 "$vertexcolor" 1
}
Replace 'mapname' in "$basetexture" "vgui\maps\menu_photos_mapname" with the name of your custom map. For example, if your map is named cp_factory, then it should read
"$basetexture" "vgui\maps\menu_photos_cp_factory"
Save the file as menu_photos_mapname.vmt.
Place your files in the proper directory
Move your menu_photos_mapname.vtf and menu_photos_mapname.vmt to the following directory:
"..\SteamApps\common\Team Fortress 2\tf\materials\vgui\maps"
Run your map to make sure your images appear.
Conclusion
When your map is ready for release, you should pack your localized briefing files and map images into the .bsp using a tool such as Pakrat. Otherwise, servers will not have the files and other players won't see them.
