SteamVR/Environments/Adding Sound/Sourcing Audio Assets
January 2024
Overview - Sourcing and Editing Audio Assets
This entry aims to help authors of SteamVR environments with gathering and preparing audio assets for use in their maps and content. It covers where and how audio assets can be created or otherwise sourced, the basics involved in field recording sounds, and a simple guide to editing sound files using free software, ready for implementation into a SteamVR environment.
Synthetic or recorded sound?
The decision to use synthesized sounds, recordings, or a combination of both, will likely depend on the environment you are developing and the experience you want visitors to have.
A realistic photogrammetry scene may benefit from recordings of that exact space. An abstract environment may benefit more from an equally abstract synthesized background ambience, perhaps crossing the line into ambient music.
It’s entirely possible to obtain recordings of real world sounds that are incredibly strange and so are appropriate for visually bizarre environments, just as a talented sound designer can synthesize organic sounding tones suited to setting a mood in a natural photogrammetry map.
It is beyond the scope of this entry to cover synthesizing sound effects and soundscapes, the subject is broad and deep, and currently less applicable to SteamVR environments than gathering recorded sounds. However, you can purchase pre-designed synthesized material from sound libraries, which are covered next.
Library or bespoke?
You can choose to record or synthesize your own sounds, or use assets from sound libraries.
Sound library pros –
- Some companies allow you to audition and purchase individual library sounds online.
- You don’t have to source equipment and software required for generating your own sounds.
- Very little time consuming editing and processing work will be necessary if you purchase the right sound.
- Generally very convenient.
Sound library cons –
- Many companies require you to buy an entire library, much of which may not be useful.
- You may not be able to find an appropriate sound for your environment.
- Even if appropriate, the library sound may be too short to loop for long periods of time.
- The sound will almost certainly be used in other products.
A list of potentially useful sound libraries is offered at the end of this page. If you choose this route, you can skip the following “Field Recording” section and head straight to “Editing and Preparing”.
Field recording does take time and experience to yield useable results from a high percentage of attempts. However, you can generate something truly original and capture a space in another dimension of experience, which can be satisfying as an environment author and enjoyably immersive for your users.
If you do use library sourced material, ensure the license for that sound covers use in a game, most will.
Field Recording
Field recording is an enormous topic, where personal tastes in technique and equipment can lead to lengthy discussion. Basically it involves using specialized mobile audio equipment to capture sound effects outside of the recording studio. It is worth covering here as if you’re capturing a photogrammetry scene in, for example, a forest, it may be useful to capture the ambient forest sounds there, wind in trees, birds chirping, etc. Later that recording can be edited and implemented in order to provide a more complete, holistic experience.
Field Recording Equipment
Field recording can yield successful results on a variety of budgets.
‘Handheld’ recorders are a great option, high quality recordings can be gathered for less than $300, they are compact, and there is a huge range of options. Some examples are the Tascam DR-05 and Zoom H4n.
Discrete recording devices and microphones require you to make multiple choices about which products to get. The recording units run from $500 to $10,000, the microphones $500 to $3000 (and unless you get a “Stereo microphone”, you’d need two!). Then you’d also need cables, bags, stands and a host of other accessories. Two example recording units are Roland R-44 and Sound Devices 702. Some examples of microphone set ups are a stereo pair of DPA 4006Cs or the single stereo mic Rode NT4.
If you do want to get into more expensive equipment, bear in mind that you’re often paying thousands of dollars for what amounts to the last few % points of recording quality. That said, the equipment will be more durable and reliable in adverse conditions, as well as offering a huge array of options.
All modern recorders should have USB connectivity, allowing you to transfer audio files to your PC.
Equipment Advice
- Ensure you also get a windshield for your recorder or microphones, wind has a seriously detrimental effect on results from even the best microphones. The best windshield provider is Rycote.
- A small stand for a handheld recorder, to raise if off the ground, could be very useful. This will reduce the amount of rumble recorded via physical transmission through the ground, and can separate your device from water, dirt, sand etc.
- At the very least you want to be able to record in stereo, that is a left and right channel, and at least at CD quality audio, which has a 44.1kHz sample rate and a 16bit bit depth.
Recording Tips
- The recording environment is arguably more important than the equipment. No matter how much money you’ve spent on equipment, if there is unwanted noise “pollution” when you record, it can be impossible to remove from the resulting audio files.
- You are noise pollution. Your breathing, clothing movements and footsteps will all get recorded. If you can, set the recorder down and walk away. You can edit out the footsteps later. Just make sure you’re recording before you walk away…
- Patience may be required. You’re trying to record the sound of a tranquil beach, but if an airplane is passing over you may have to wait for it. Prepare to be made aware of how much noise humans make.
- Set the recording level. It is important that the recorder be getting a strong signal, but not so much as to distort the equipment. Be conservative, leave a gap (called headroom) between the signal level you see on the recorder and the upper limit of it, so that material which increases in volume can be effectively captured. Some of this is trial and error and even experienced field recordists can get this wrong when working with dynamic sources.
- Balance the stereo field. If you plan on using your recording for ambience, or more generally are recording in stereo, try to position the microphones such that the left and right channels receive equally loud signals. Balancing this during the edit/ mix stage can lead to unnatural sounding results and rarely makes for pleasing results.
- Record much more than you think you’ll need. Take the length of loop you want, 1 minute is a fair length for simple ambiences, and record 3 minutes instead. All kinds of sonic interference and unwanted noises can occur that you may not notice during recording. If you have the time, try different locations in the same space too.
- “Slate” recordings verbally at the beginning or end. Having easy to find information in each recording regarding date, time, location, and any specifics regarding the set up or environment, makes sorting through recordings a breeze, as well as naming the files for future use as you build your own sound library.
Editing and Preparing
Audio editing software can be complex, expensive, and time consuming to learn. Thankfully, for many sounds, simple cost effective solutions are all that is required, as long as the audio file requires minimal editing and processing.
For the following example we’ll run through using free audio software programs Audacity and Wavosaur to take a stereo recording or library sound file from its raw state to being ready to implement as a background loop.
Editing Example
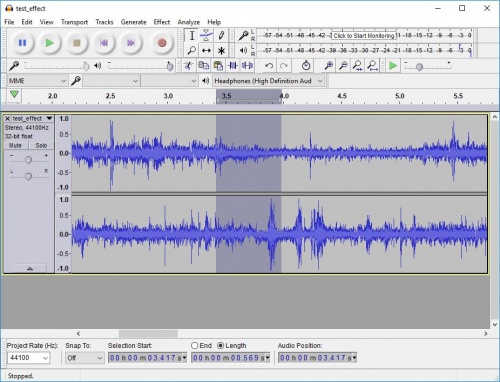
Open Audacity, drag and drop your audio file onto the large blank grey area. In the resulting pop-up, ensure you have the “Make a copy of the files before editing” option selected. This preserves your raw recording.
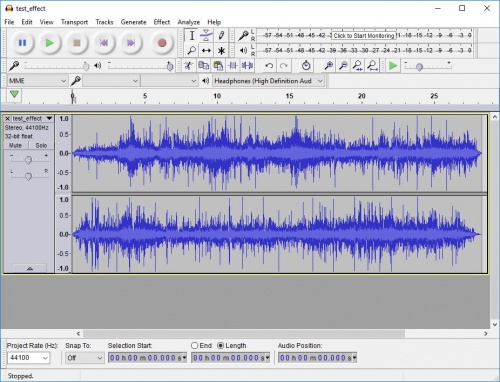
You will now see the waveform of your recording. You can play through it, jump around using your mouse to adjust the playhead marker, and zoom in/ out by holding Ctrl and adjusting your mouse wheel.
Check each end of the recording for handling noise and the slate. To clean out these unwanted sounds, simply drag from within the waveform to just beyond the start/end of it and hit the delete key.
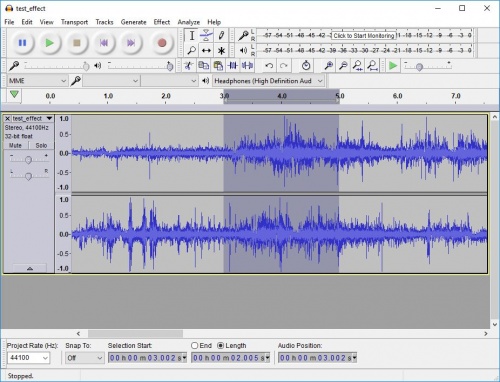
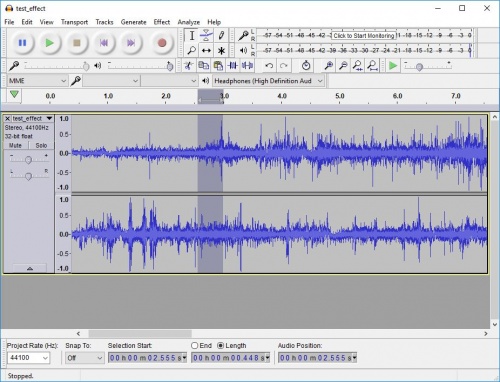
If you find a sound within your recording you’d like to remove, select the area on the waveform where it occurs, as well as some “handles” either side. The handles are required to crossfade the edit out smoothly, their length depends on the material, but at least 0.5s either side is a fair place to start.
Once you’ve made the selection, split the audio file up via “Edit>Clip Boundaries” > “Split” or by using Ctrl+I. The selected area will become a new “clip”.
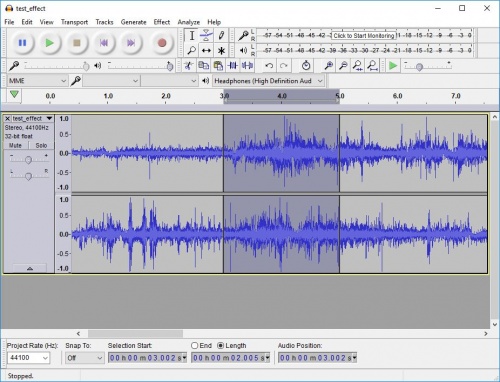
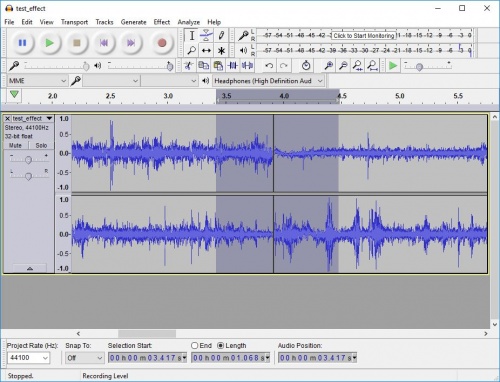
If not already selected, double click the clip with problematic sound, and hit delete. Move the playhead marker to reveal the location where the clips either side of the edit now meet, at the thick grey bar across the waveform.
To blend the remaining clips together, we need a crossfade, so highlight an area around the edit. Note the area selected for the fade should be no longer than the clip previously removed, otherwise you risk reintroducing the problematic sound!
Click on “Effect>Crossfade Clips”. You’ll see the waveforms blend visually, and the result should be smooth on the ear. If not, consider stepping back through the edit using Ctrl+Z, perhaps removing a larger set of handles around the problematic sound and/or a longer cross fade.
Next we’ll edit the audio to make it loop. You may not need to perform this step if you don’t intend the sound to loop in the environment.
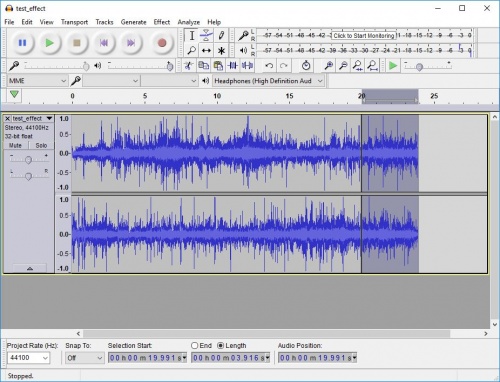
Place your playhead somewhere at least a several seconds away from either end of the waveform, ideally somewhere that appears quieter if possible. Click “Edit>Find Zero Crossings”. This skips the playhead to the nearest zero crossing, where the value of the waveform is essentially zero and is the perfect place to start and end a loop to avoid a “pop” on loop playback. Split the audio file here via “Edit>Clip Boundaries>Split” or by using Ctrl+I. Double click the clip to the right of the resulting clip boundary.
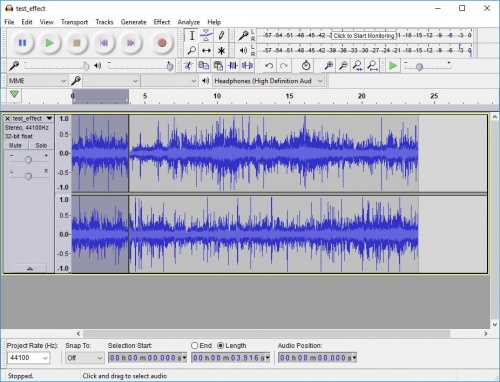
Cut this clip using Ctrl+K or the Edit menu. Click “Transport>Skip to Start”. Paste the cut clip using Ctrl+V or the Edit menu.
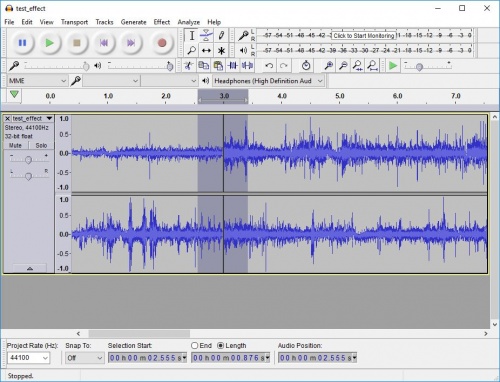
Select half a second or so either side of the new clip boundary.
Click “Effect>Crossfade Clips”. You’ll see the waveforms blend visually, and the result should be smooth on the ear. If not, try a longer cross fade.
Your audio file is almost ready for loop markers, for which we need to use Wavosaur. First, check the Hz value on the first line of the audio file information to the left of the waveform. If it is not 44100Hz, in the “Tracks” menu select “Resample” and choose 44100, then wait a second or so for the processing.
Double click your final clip to highlight it all, go to “File>Export Selected Audio”. Ensure the type option drop down is set to "WAV signed 16-bit PCM". Ignore the Metadata save options pop up. Export. Close Audacity.
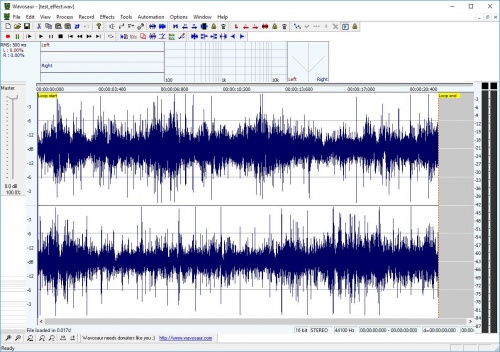
Open Wavosaur, drag and drop your audio file onto the large blank grey area, much like you did with Audacity, and you’ll see the waveform of your audio file. Then simply find and click the “Create loop points” button in the uppermost toolbar, it resembles a red L. You’ll see yellow Loop start and end tabs appear on the waveform. Then save.
Copy the saved audio file into the content/youraddon/sounds folder. It is now ready to call via soundevents and soundscapes!
Links
Community resources
Sound Design Stack Exchange --- A friendly Q&A site for sound.
Gearslutz --- A large selection of forums for new and experienced audio professionals to discuss a range of topics.
Sound Libraries
There are many others out there offering bundles of fantastic sounds, but the following offer single file downloads online with a chance to preview before purchase.
Sound Ideas
Sound Dogs
ProSoundEffects
AudioJungle
Soundsnap
Videvo
