Hammer Manual Configuration
Jump to navigation
Jump to search

 Warning:In most cases, Hammer will configure itself and you do not need to follow this procedure. If you have problems, it is much simpler to reset the game configuration instead. Doing this, however will remove your mod configurations
 Note:In most Source 2013 games, always launch Hammer using Hammer.bat, to make sure that Hammer properly detects the game and automatically configuring itself.
 Note:The Source SDK Launcher is no longer used with
  Source 2013 games and mods, so the above warning does not apply to them.
This article or section needs to be updated to include current information regarding the subject because:
This needs to better explain each game now having its own copy of Hammer and the compile tools.
Remember to check for any notes left by the tagger at this article's talk page.Read This First!
If you launch the Hammer editor with no proper game configurations set up, the Hammer Editor has not automatically configured itself after installing the game Authoring Tools or Source SDK. You can follow these steps to manually configure it. Before following these steps to repair a bad configuration, it is strongly suggested that you first attempt to fix your configuration by following the steps outlined in Reset the Source SDK Game Configuration.
Adding a New Game Configuration
- Launch Hammer.
- The First Time Setup dialog box may appear. If it does, click the No button:
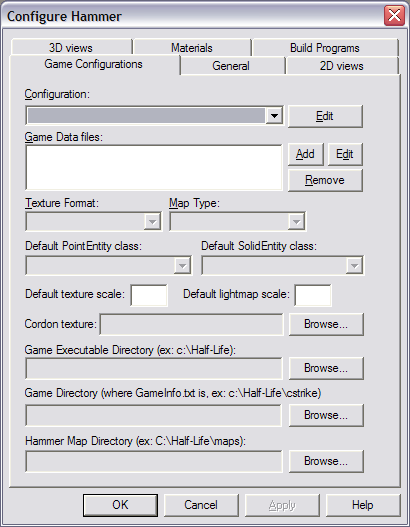
- If the First Time Setup window did appear, this Configure Hammer dialog should now be open. Otherwise, click Options in the Tools menu, and then open the Game Configurations tab.
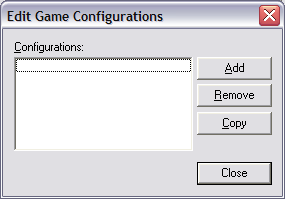
- Click on the Edit button to the right of the Configuration drop-down list, which will open the Edit Game Configurations dialog:
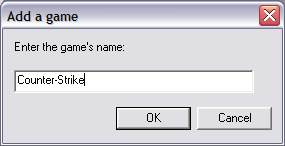
- Press the Add button. This will open the Add a game dialog:
- Enter a name for the new configuration, usually the name of the game or mod. Press OK to confirm your choice and close the dialog.
- Press the Close button in the Edit Game Configurations dialog.
Setting Game Directory and Basic Parameters
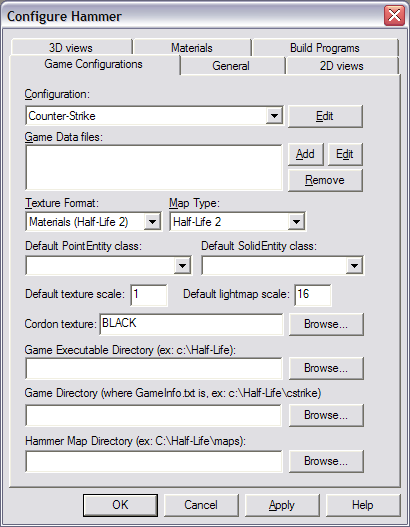
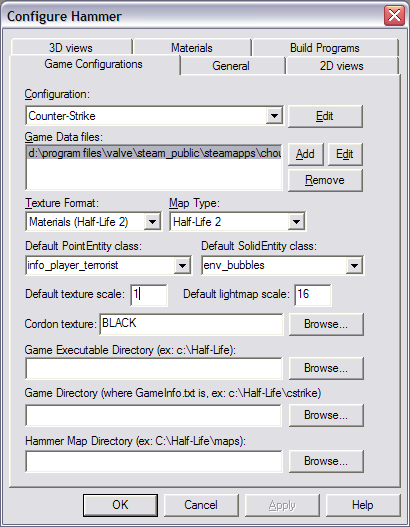
- You should now be back in the Configure Hammer dialog with your configuration selected in the Configuration drop-down list:
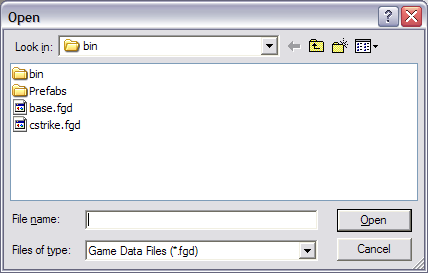
- Press Add to the right of the Game Data files list. An Open dialog will appear:
- Select the appropriate .FGD file for your game or mod:
- For a Counter-Strike: Source configuration, click on cstrike.fgd and then the Open button.
- For a Half-Life 2 (or

 episodes) configuration, click on halflife2.fgd and then the Open button.
 - For a Half-Life 2 Deathmatch configuration, click on hl2mp.fgd and then the Open button.
- For a Portal configuration, click onportal.fgd and then the Open button.
- For a Team Fortress 2 configuration, click ontf.fgd and then the Open button.
- Now you'll be back in the Configure Hammer dialog with these fields filled out:
- Type
0.25into the Default texture scale field. Pastetools\toolsskyboxinto the Cordon texture field. - Under Game Executable Directory, hit Browse and select the folder where the game executable (such as hl2.exe) is located.
- For example, the directory for a Counter-Strike configuration might be:
$SteamUserDir\Counter-Strike Source
- For example, the directory for a Counter-Strike configuration might be:
- Under Game Directory, enter the path of the folder that contains
gameinfo.txt.- For example, the game directory for a Half-Life 2 configuration might be:
$SteamUserDir\Half-Life 2\hl2
- For mods located in the
sourcemodsfolder, the game directory would be of the form:C:\Program Files (x86)\Steam\steamapps\sourcemods\mod
- For example, the game directory for a Half-Life 2 configuration might be:
- Under Hammer Map Directory, you should enter the folder where you wish to save your .VMF map source files.
- Example for Counter-Strike:
C:\Program Files (x86)\Steam\steamapps\common\Counter-Strike Source\cstrike\mapsrcorC:\Program Files (x86)\Steam\steamapps\common\sourcesdk_content\cstrike\mapsrc
- Example for Half-Life 2:
C:\Program Files (x86)\Steam\steamapps\common\Half-Life 2\hl2\mapsrcorC:\Program Files (x86)\Steam\steamapps\common\sourcesdk_content\hl2\mapsrc
- Example for Half-Life 2 Deathmatch:
C:\Program Files (x86)\Steam\steamapps\common\Half-Life 2 Deathmatch\hl2\mapsrcorC:\Program Files (x86)\Steam\steamapps\common\sourcesdk_content\hl2mp\mapsrc
- Example for Team Fortress 2:
C:\Program Files (x86)\Steam\steamapps\common\Team Fortress 2\tf\mapsrcorC:\Program Files (x86)\Steam\steamapps\common\sourcesdk_content\tf\mapsrc
Setting up the Build Programs
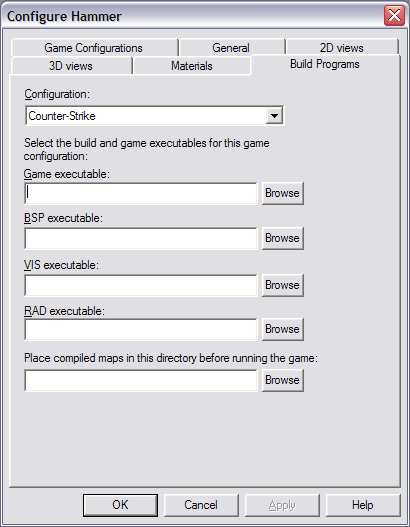
- Click on the Build Programs tab:
- In Game Executable, enter the path of the .exe file used to launch the game.
- For example, for a Counter-Strike configuration, your Game Executable might be:
$SteamUserDir\counter-strike source\hl2.exe
- For a Half-Life 2 configuration, your Game Executable might be:
$SteamUserDir\half-life 2\hl2.exe
- For a Half-Life 2 Deathmatch configuration, your Game Executable might be:
$SteamUserDir\half-life 2 deathmatch\hl2.exe
- For a Team Fortress 2 configuration, your Game Executable might be:
$SteamUserDir\team fortress 2\tf_win64.exe(64-bit)$SteamUserDir\team fortress 2\tf.exe(32-bit)
- In BSP executable, enter the location of
vbsp.exe:- EXEDIR\bin\vbsp.exe
- EXEDIR is the value that was entered into Game Executable Directory field earlier, usually where the game is installed.
- EXEDIR\bin\vbsp.exe
- In VIS executable, enter the location of the
vvis.exe:- EXEDIR\bin\vvis.exe
- EXEDIR is the value that was entered into Game Executable Directory field earlier, usually where the game is installed.
- EXEDIR\bin\vvis.exe
- In RAD executable, enter the location of the
vrad.exe:- EXEDIR\bin\vrad.exe
- EXEDIR is the value that was entered into Game Executable Directory field earlier, usually where the game is installed.
- EXEDIR\bin\vrad.exe
- In Place compiled maps in this directory before running the game, enter the Game Directory with
\mapsappended to the end of it:- Example for Counter-Strike:
$SteamUserDir\counter-strike source\cstrike\maps
- Example for Half-Life 2:
$SteamUserDir\half-life 2\hl2\maps
- Example for Half-Life 2 Deathmatch:
$SteamUserDir\half-life 2 deathmatch\hl2mp\maps
- Example for Source SDK mod:
C:\Program Files (x86)\Steam\steamapps\sourcemods\MODDIR\maps- MODDIR is the name of your game directory for your mod.
- Press OK. Hammer is now configured for use.

