Half-Life: Alyx Workshop Tools/Postprocessing Editor
Launch the Postprocessing Editor via the tool icon or opening a .vpost resource in the Asset Browser.
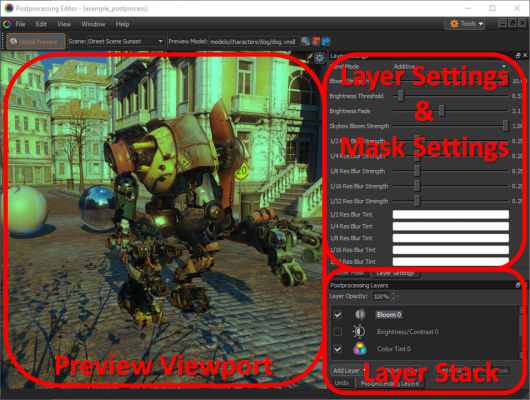
In its default layout, there are three major areas of the editor:
- Preview Viewport - Displays the current postprocess stack applied to a test scene
- Layer Stack - Lists the layers in the current stack and allows adding, removing, and reordering layers
- Layer & Mask Settings - Tools for modifying the current selected layer or its mask
Layer Stack
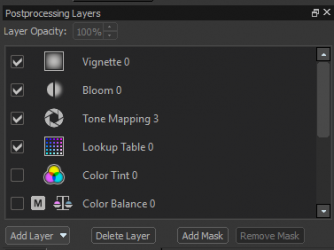
This is the heart of the postprocessing editor, and is similar to layer UI you'd find in image editing software:
The stack consist of an arbitrary number of layers that combine to form the final postprocessing effect for the scene. Different layer types perform different operations on the colors in the scene, and each layer applies color correction to the result from the layers below it.
Bloom and Tonemapping Layers Warning: Bloom and tonemapping layers are different from the other types. For efficiency, the runtime postprocessing operation takes place in two phases: tonemapping+bloom and color correction, in that order. That means that the location of a bloom or tonemapping layer in the stack doesn't actually matter, and that multiple layers of those types will not have any effect. In the case of multiple layers, the bottom layer will determine the runtime behavior.
Basic layer editing
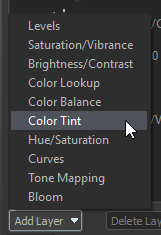
To add a new layer, click the Add Layer button and select a layer type:
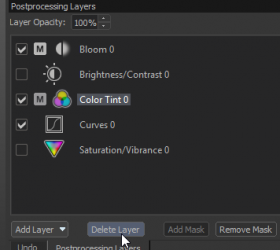
To delete a layer, select it and click the Delete Layer button:
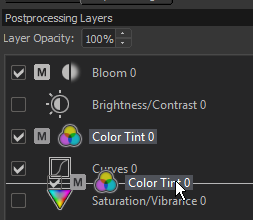
To reorder layers, drag-and-drop a layer to the desired position:
Layer types
Levels
This layer can remaps both global RGB and individual color channels from an input range to an output range.
(If they both global and per-channel remaps are specified, the per-channel corrections will occur before global corrections.)
Saturation/Vibrance
This layer adjusts the intensity of all colors in the scene.
Brightness/Contrast
This layer adjusts how light or dark the scene is.
Color Lookup
This layer can be used to load a custom color lookup table (known as a LUT) that can be edited outside the tool and encode a wide variety of color correction operations. This is an advanced feature that is generally used to allow authoring color correction in external software rather than using the layer system. The UI for this layer has a button that can be used to create a reference (or "identity") LUT that can serve as a useful starting point.
Color Balance
This layer adjusts different colors based on brightness and color channel.
Color Tint
This layer applies a uniform tint to the scene to push all colors closer to a target color.
Hue/Saturation
This layer can adjust colors in unique ways by evaluating them in alternative color space (HSL instead of RGB) which can result in color changes that are hard to achieve through other means.
Curves
This layer adjusts colors based on a hand-authored response curve (either global or per-channel.)
Tone Mapping
This layer applies a response-curve remapping that has parameters designed to recreate the behavior of a physical film camera.
NOTE: The tonemapping layer doesn't operate as a normal color correction layer. See the "Layer Stack" documentation above for more info.
Bloom
This layer specifies the blur/bloom rendering parameters of the scene postprocessing, it determines how much and what type of "glow" will appear around very bright objects in the scene.
NOTE: The bloom layer doesn't operate as a normal color correction layer. See the "Layer Stack" documentation above for more info.
Layer Masks
Layer masks allow you to limit what types of colors a given layer will operate on.
NOTE: Layer masks operate in color-space, and do not have a spatial component. Screen-space masks are not supported.
You can add a mask to the current layer by pressing the "Add Mask" button at the bottom of the layer stack widget. When a mask is active, a layer will display a "M" icon:
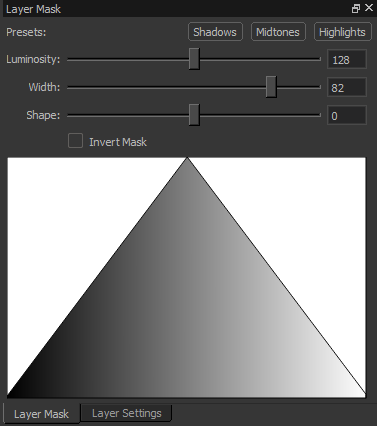
To edit the mask, select the "Layer Mask" tab (by default, docked underneath the "Layer Settings" widget.) You can pick one of three presets, or manually author the curve shape with the sliders and invert checkbox. The bottom half of the mask widget displays a visualization of the mask. The horizontal axis is the brightness of the target colors (dark on the left to bright on the right) and the vertical axis is the mask opacity (fully opaque at the top, fully transparent at the bottom.)
Preview
The toolbar at the top of the editor allows you to pick a preview scene and model that will be used to demonstrate the current postprocessing settings being edited.
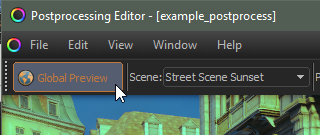
The Global Preview toggle button in the top left corner allows you to preview the current active postprocessing in other views in the engine (such as Hammer or a loaded level in the game.)
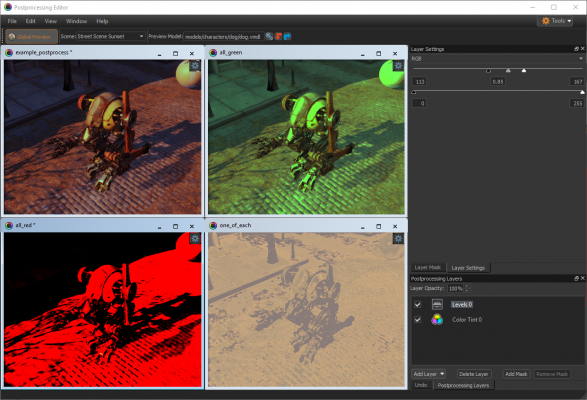
If you have multiple postprocessing resources loaded, the preview viewports will synchronize their cameras to make it easy to compare the different stacks:

