Creating indicator lights:fr
You can help by updating the translation.
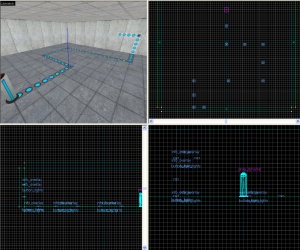
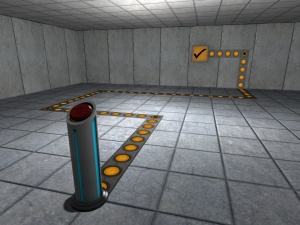
Also, please make sure the article tries to comply with the alternate languages guide.Ce guide va expliquer comment afficher ces lignes lumineuses sur le sol et les murs, quand le trigger est activé. Il est requis de maitriser l'utilisation des l'outil overlay.
Les Overlays
L'entité de base pour les indicateurs au sol/mur est un info_overlay. Les quatre textures utilisées sont:
signage/indicator_lights/indicator_lights_floorsignage/indicator_lights/indicator_lights_wallsignage/indicator_lights/indicator_lights_corner_wallsignage/indicator_lights/indicator_lights_corner_floor
- Créez un chemin en utilisant des
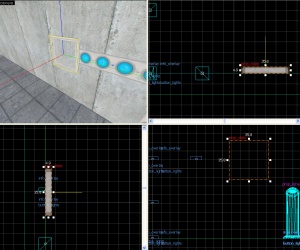
info_overlaysdepuis votre déclencheur jusqu'à ce qu'il va activer. Donnez-leur tous le même nom; dans cet exemple nous allons utiliser button_lights. Chaque lumière est de 8 unités par 8. - Pour paramétrer les lampes, suivez une des étapes suivantes:
- Set the U Start to 0 and U End to length divided by 32, rounded to the nearest 0.25. This will distort the circles of the indicators slightly, but the indicator strip will end without a partial circle light. This is appropriate for longer strips.
- If one of the ends of the strips is concealed by a switch, button, or other object, set the U Start to 0 and U End to length divided by 32, exactly. If your U End is not divisible by 0.25, look at which end of your indicator strips ends with a partial circle light. To switch which end of the strip has the partial light, change your U Start to your old U End value, and change U End to 0.
- La manière la plus simple est de redimensionner l'overlay jusqu'à une taille de 8*32, de désactiver le verrouillage de texture et de le redimensionner à la taille voulue..
Indicateur
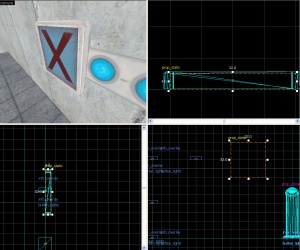
1. Créez un prop_static avec les propriétés suivantes:
Nom de propriété Valeur World Model models/props/sign_frame01/sign_frame01.mdl
Alignez-le afin qu'il soit bien aligné avec le trait d'indication.
2. Créez un bloc de 32Wx4Lx32H texturé avec tools/toolsnodraw. Texturez la face avant avec signage/signage_doorstate. Alignez ce bloc avec le prop_static qui sert de cadre pour l'indicateur.
3. Transformez le bloc en func_brush et donnez-lui le même nom que vos info_overlay.
Pour que ça marche
1. Créez un env_texturetoggle près de vos overlays. Donnez-lui les propriétés suivantes:
Nom de propriété Valeur Name button_lights_toggle Target Brush(es) button_lights (le nom de vos overlays/func_brush)
2. Maintant, ajoutez les output suivants à votre déclencheur (bouton...):
Maintenant vous avez un indicateur très utile dans votre map!


