SteamVR/Environments/Photogrammetry
Contents
Creating a Photogrammetry Environment
In this tutorial, we will walk through creating a Photogrammetry Environment.
There are three main steps to creating a Photogrammetry Environment:
- Taking photos
- Creating a 3D model from the photos
- Creating an Environment out of the 3D model
- If you already have a 3D model or environment in OBJ or FBX format that you would like to make into an environment, you can skip to this step.
What you will need
- Digital camera
- This could be a DSLR or Point and Shoot camera.
- A smartphone will work for simple captures as well.
- Photogrammetry software to turn images into a 3D environment, for example:
- RealityCapture (we will be using this software in this tutorial)
- PhotoScan (used for photo-scenes in The Lab)
- Autodesk ReCap (formerly Autodesk ReMake)
- Autodesk ReCap Tutorial - focused on photo based outdoor photogrammetry for games
- 3DF Zephyr (free version available as well)
- 3DF Zephyr Tutorial - focused on 360° capture using masking
- Regard3D (free, see instructions)
- 3D Modeling software for cleanup and export, for example:
- SteamVR Workshop Tools
Taking photos
Grab your camera and figure out what you would like to capture. A couple tips:
- When selecting a scene to capture, be careful of reflective surfaces and translucent objects. Neither do very well in photogrammetry.
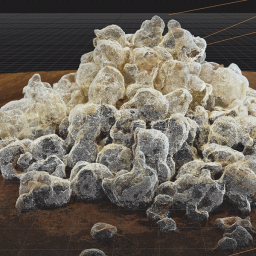
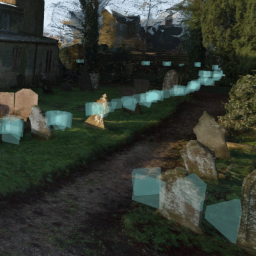
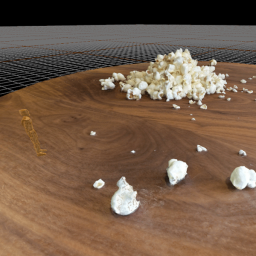
- More pictures from more angles makes better photogrammetry. For the simple example we are showing here 200 photos were used. For something more complex like the English Church, around 450 photos were used.
- Playing with scale is something that VR is uniquely suited for. Try capturing small things and making them huge in the environment. Or the opposite.
- Adam Foster has put together a series of blog posts with detailed instructions and suggestions on taking photos for photogrammetry. Check them out here.
Creating a 3D model from photos
Once you have your photos, transfer them to your computer. There are several photogrammetry programs you can use to create a 3D environment from your photos - for the purposes of this tutorial we will be using RealityCapture and Maya.
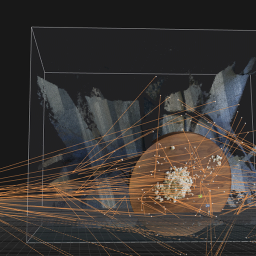
- Align Photos
- Open RealityCapture.
- Look for a panel labeled 2D - select and drag all of your photos from Explorer into this panel.
- Click the Start button at the top of the UI (make sure you are in the Workflow tab).
- This will calculate the position and alignment of all of your photos, and create a model from the results - depending on the number of photos you took this could take a bit of time.
- For more information about how to use RealityCapture, you can find a Getting Started guide here. They have also posted a UI tutorial here.
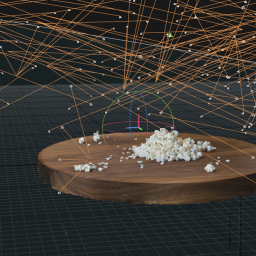
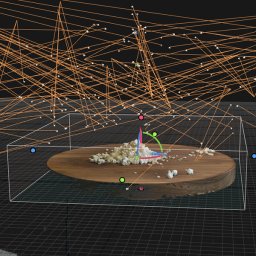
- Define Ground Plane
- Your calculated model may have come out at the wrong angle, to fix this you will need to define the ground plane.
- Switch to the Reconstruction Tab and click Define Ground Plane.
- Click and drag colored rings to rotate the model. The solid bars inside the sphere will allow you to move the model around.
- Use the grid plane to align your model as closely as possible.
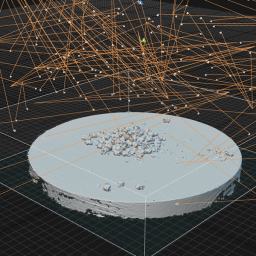
- Set Reconstruction Region
- RealityCapture will recreate as much of the environment as it can calculate. This may end up being more than you need for your environment - to adjust this you should set the reconstruction region.
- Click Set Reconstruction Region.
- To set the region, you'll need to click three times – the first two to define the ground rectangle, the third to define its height.
- Make sure to pan (left click drag) and rotate (right click drag) around the model to make sure the parts you want are contained inside the rectangle.
- Click and drag the dots to resize, and drag the bars in the center to move the reconstruction area.
- Calculate and Colorize Model
- Once you've defined your reconstruction region, the model needs to be recalculated in the defined space.
- Switch to the Workflow tab, and click Calculate Model.
- Once the model is calculated, click Colorize – this will get color info for each vertex.
- Simplify
- Roughly 3 million triangles is the absolute maximum for good performance in VR on a high-end machine. 500,000 to 1 million triangles should be enough for high quality simple scenes, and 2-3 million for more complex scenes. Fewer triangles means smaller file sizes and quicker loading models.
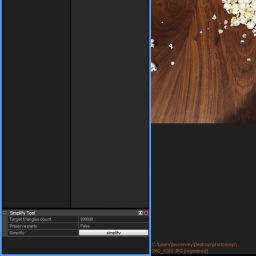
- Click Simplify in the top panel - the Simplify Tool panel will show up in the lower left.
- Type your desired number of triangles in the "Target triangles count" field and click Simplify.
- Unwrap
- This step calculates the material positions for your model.
- Switch to Reconstruction tab at the top of the UI.
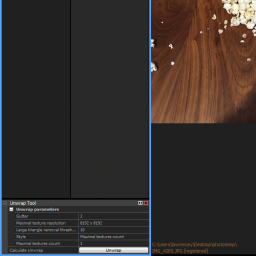
- Click Unwrap - the Unwrap Tool panel will show up in the lower left.
- Select 8192x8192 for "Maximal texture resolution" and click Unwrap.
- This will generate a UV map (texture lookup for the model).
- Create Texture
- Switch to the Workflow tab and click Texture.
- This creates an image file (texture) which maps to the UV map.
- Export Mesh
- Now you are ready to export your 3D environment.
- Click Mesh at the top of the UI.
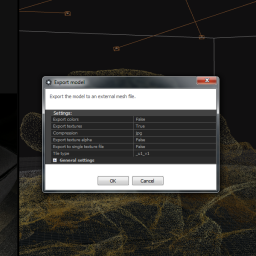
- In the Export model dialog, make sure JPG is selected under Compression.
- Click OK. This will create an OBJ, JPG, and MTL file.
Preparing your model for SteamVR Home (Optional)
It is usually worth spending a little time in a 3D modeling program to clean up your model before importing it into SteamVR Workshop Tools.
- Cleanup in a 3D modeling program
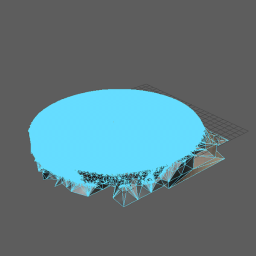
- In a 3D modeling tool you can re-orient your 3D model and delete unwanted bits.
- There are several 3D modeling programs you can use to complete this step (including Blender, which is free). For the purposes of this tutorial, we will be using Maya.
- Open Maya, and bring in your environment. You can either click and drag the .OBJ file into Maya, or use the File > Import dialog.
- Your model will appear without the texture visible by default - to see the texture, press "6". It may show up shiny here - it won't have that effect in SteamVR Home.
- To rotate your model in Maya, press "E". Click and drag to rotate - dragging the yellow, red, and blue circles will rotate around that axis.
- You may have extra faces you'd like to delete. To do this, right click and hold, mouse down to the "Faces" option, and release.
- Click and drag to select faces, and press "Delete" to delete.
- Once you are done, save your model.
- You are now ready to create your environment.
Creating an environment in SteamVR Workshop Tools
Now that you have a cleaned up file, you are ready to create your environment using Source 2 and the SteamVR Workshop Tools. Here, you will learn how to bring in your model, set the user starting point, define teleport areas, and submit your environment to the Steam Workshop.
- Create your SteamVR Addon
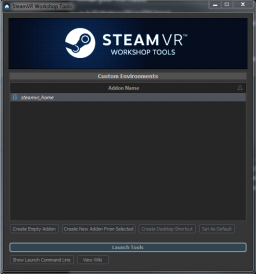
- Open SteamVR Workshop Tools
- For a new environment, click “Create Empty Addon” and name your addon (this will be used in the file path of your Workshop submission)
- A SteamVR "addon" is similar to a Dota 2 custom game. An addon consists of a map, models, materials, Panorama UI files, Lua scripts, etc.--anything that is required to make the addon function.
- Select your addon click “Launch Tools.” This will launch SteamVR Workshop Tools.
- Bring your model in with Model Editor
- First, we need to get your model into the Asset Browser so it can be used in your environment.
- In the Asset Browser click the Model Editor button.
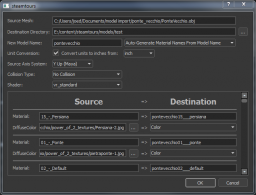
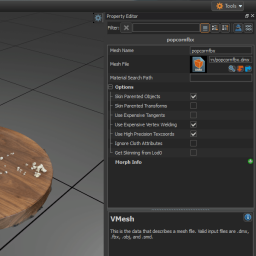
- Click "New VMDL from Mesh file", browse to, and select the OBJ you created. (Workshop Tools can import either OBJs or FBXs)
- Click OK when it asks if you want to create a new content directory.
- On the dialog window that comes up, select the “…” button at the end of the directory line.
- Create a folder here called whatever you want (the name of your environment, for instance).
- You should end up with something that looks like ".../steamtours_addons/popcorn/models/popcorn".
- Under the "Collision type" drop down, select "Collision using exact geometry"
- Under the "shader" drop down, select "vr_unlit".
- For OBJ import, there's an additional drop down to select Source Axis System. If coming directly from Reality Capture, select Z Up (Valve).
- For everything else you can leave the defaults.
- Click OK. Depending on the complexity of your model, it may take some time to import
- Adjust your model's materials in Material Editor
- Your model should now appear in Model Editor. Double click the material in the panel on the left.
- In the Material Editor, check the “Do Not Cast Shadows” checkbox under Shadows. Photogrammetry uses baked in lighting, so there won’t be any additional need to cast shadows.
- If you want your model to be able to receive shadows from the controllers or other shadow casting objects, check "Receive Unlit Shadows" under Shadows.
- Hit Ctrl-S to save and close this window.
- Your model should now appear in Model Editor. Double click the material in the panel on the left.
- Bring your model into Hammer
- Hammer is the level editor for Valve's Source 2 game engine. This is where everything will be assembled before publishing to the Steam Workshop.
- Go back to the Asset Browser window and click the hammer icon.
- In Hammer, hit Ctrl-N to (or File > New File) to start a new project.
- In the Asset Browser window, find your model (you can use Search to find it in the Asset Browser if needed).
- Drag your model's VMDL file into the Hammer window.
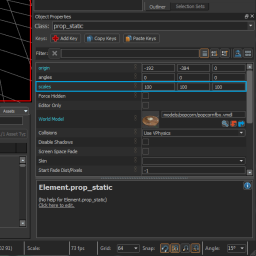
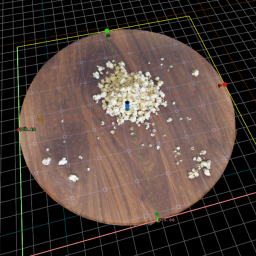
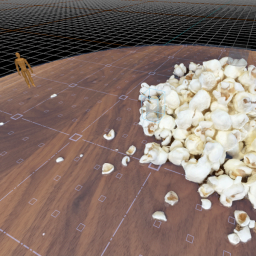
- Your model may come into Hammer very small. Resize it by entering numbers into the "scales" fields on the right. You can also use the scale tool (E) and click and drag the purple box until the model is large enough to see. The example here is meant to be oversized for the player to walk around, so the scales are set to 100.
- For larger, more complex models, performance can be improved by checking the 'Bake to World' option in the placed model's Object Properties.
- This will make map compilation times longer and file sizes larger, but can really help maintain the high framerates required for VR!
- For additional information on using Hammer, see these pages:
- Place the Player Start
- This determines where the player will start when they load your environment.
- Select the Entity button (light bulb icon).
- Make sure the Entity Class is “info_player_start”.
- Click on your map where you’d like the player to start.
- You can adjust the player start position and orientation using the Translate (T) and Rotate (R) tools.
- To change the size things are shown at in VR, change the scale of the objects themselves rather than the scale of the player start entity - changes to the latter will not be reflected in-game.
- Add a Light
- Even though the model(s) you bring in are using the unlit shader, you will still need to add a light so avatars and props can be lit properly.
- Click the entity tool on the left.
- Type “light_spot” in the entity class field.
- Click in the center panel to place your light.
- Use the Translate “T” and Rotate “R” tools to position the light pointing down on the player start.
- You can make the light brighter by putting a larger number under Brightness in Object Properties.
- Placing Teleport areas
- By default, players will be able to teleport to any reasonably flat surface. For a greater degree of control, you can also place teleport meshes and teleport markers. Once you place a teleport mesh or marker, the player will only be able to teleport to those places you’ve identified.
- Placing Teleport meshes
- Teleport meshes work great for large, flat areas that you would like the user to be able to teleport around.
- Select the Polygon tool.
- Click to add vertices around your desired teleport area until you have the shape you want. Hit Enter when done.
- You may need to Translate(T) and Scale(E) the polygon to get it to the right size and place on your model. Make sure the mesh is slightly above the ground to prevent z-fighting.
- To make this polygon into a teleport mesh, go to the Materials tab in the center bottom panel. Search for “teleport” and find teleport_area_visible.vmat
- Click and drag this material onto your polygon to apply the material.
- Select the polygon and you should see options show up in the bottom right panel.
- If you don’t see options, make sure “Mesh” in the top right panel is selected.
- If your teleport mesh is more complex than a simple square or rectangle, make sure you select 'Physics Type: Mesh' in the Object Properties box - this will ensure the teleport beam correctly traces against the mesh.
- Click “Tie Selected Meshes to Entity”.
- Type vr_teleport_area into the field and hit enter. This gives the mesh you just created the properties needed to teleport the player around.
- If you have a teleport mesh that is concave or nonplanar, make sure to set "Physics Type" to "Mesh" under Object Properties.
- Placing Teleport markers
- Teleport markers are great for irregularly shaped areas, or spots of interest.
- Select Entity (light bulb icon).
- In the Entity Class field type vr_teleport_marker.
- Placing teleport markers is as simple as clicking on your model. Like everything else, these markers can be moved around once placed.
- Add a Sky
- If your map does not include a sky the background will be completely black.
- Create the sky material
- To add a sky, first you will need a cube-map or lat-long image to serve as your sky (like the Background images that are used in SteamVR).
- You will want this image to be relatively high res – either 8192 x 4096, or 4096 x 2048.
- In the Asset Browser, click the Material Editor button
- Click the Create New button in the top left
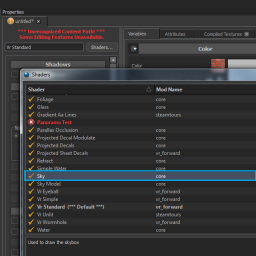
- In the center panel, click the Shaders… button. Select “Sky” and click Accept.
- Hit Ctrl-S to save this material.
- Once saved, right click on the material in the left panel and click “Open containing folder”
- Find your sky image and drag it into this materials folder
- Back in the Material Editor, click on the magnifying glass under Sky Texture in the third panel.
- Select your sky image and click Accept.
- Add a sky to your environment
- Go back to your map in Hammer.
- Select Entity (light bulb icon)
- In the Entity Class field type env_sky
- Click to place this in your map. (It doesn’t matter where you place this, your skybox will still be in the correct place )
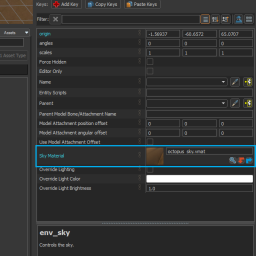
- In the Object Properties menu, click the magnifying glass next to Sky Material.
- Find and Accept the sky material you just created.
- Your sky should now appear in your map. Build and test to see how it looks!
- Test your environment
- To build and test press F9. Make sure the "Full Compile" option is selected.
- Click "Build". If you haven't saved your changes yet, you'll be prompted to name your map. The name doesn't really matter, as long as there is only one map in your addon.
- Once built, you should be able to test your environment now in VR.
- Continue editing and testing your environment until you feel it's ready to submit to the Workshop
- Submit to the Steam Workshop
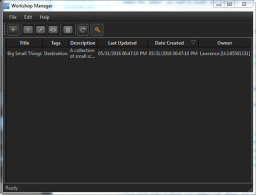
- Once you are happy with your environment, go back to the Asset Browser and click the Workshop Manager Button.
- Click on the "+" icon or go to File > New Submission.
- Fill in the fields and select an image to represent your environment. A screenshot of the environment works great as a thumbnail.
- Finally, click “Submit” to upload your environment to the Steam Workshop. Depending on the size of your submission, this may take a while.
- Your environment will now show up in the SteamVR Workshop.
- Don’t forget to sign the Workshop agreement, or others will not be able to see your work.
Congratulations! Other players will now be able to download and explore your environment.
