SteamVR/Environments/Environment Tutorial: Creating a Physics Prop
Continuing this series of tutorials on the creation of a SteamVR Home environment (see the previous part for information on materials, details and prop placement), we reach making a custom physics prop for our world.
Contents
Props and Models
The terms 'prop' and 'model' are usually interchangeable, with the former generally indicating a model that has been set up for use in a game engine. (There's also the term 'mesh', which is again mostly synonymous beyond hinting at a lower level again.) But what are these things, anyway?
Real-time 3D rendering usually works with mesh-like collections of triangles in 3D space, with material definitions providing information about how these triangles should be rendered. If you look closely, things in computer games are pretty much all made out of these flat triangles, although clever surface shading tricks and use of transparency and similar can obscure this fact.
If you've been following this tutorial from the beginning, then you've already been modelling things in 3D using Hammer - mostly out of multi-sided polygons which, behind the scenes, have been converted to triangles for rendering. But Hammer is geared more towards environmental creation - simpler geometry which relies more on surface materials than geometric complexity.
So, for building more complex props - such as items of furniture, hand-held tools, reusable sections of world geomery and all sorts of other 3D assets - then you'll be creating models in external 3D modelling software such as Blender, Modo, Maya or 3ds Max. 3D modelling is a vast subject in itself - if you're just getting started, then there are plenty of tutorials on the (free and open source) Blender out there on the internet.
The SteamVR Home engine supports a rigorous subset of features of what many 3D software packages might support - you'll want to be making simple triangle / polygon based meshes with no special geometric primitives, subdivision surfaces and so on. Having said that, it is possible to 'bake' surface features from a super-detailed, non-polygonal model to a simpler, polygon-based one using a normal map, meaning 3D sculpting software such as Zbrush and 3Dcoat can be valuable tools for making assets.
The engine won't import any fancy projection-based texturing or advanced materials, just what can be expressed via UV maps - a UV map being a description of how polygons or triangles should be mapped to flat textures. A common task is to have the 3D modelling software 'bake' its own advanced materials to flat, UV-mapped textures which can then be used as inputs for SteamVR Home's own materials system.
Using as few materials as is reasonably possible is recommended for performance and organisation - models designed for CAD purposes or offline rendering can have huge numbers of materials assigned to them, which is definitely not good from a rendering efficiency standpoint. One possibility is to bake these down to a single texture applied to an auto-generated, uniquely textured UV map, with each point in UV space corresponding to at most one triangle or polygon.
You'll likely be exporting from the 3D modelling software in the general-purpose FBX format - Valve's own DMX format is also supported, but the former is more widely supported without specialised export plugins.
So with the basics out of the way, you'll be pleased to know that once you've imported your model data, the engine supports different types of prop - all starting with very similar inputs:
Static Props
Entity type in Hammer: prop_static
Perhaps the simplest to set up - static props are effectively part of the environment, alongside any standard Hammer geometry you may have created. No movement or animations are possible (except for simple wind effects defined in the material) - but they're relatively cheap to render so you can have lots of them. They allow for high-quality baked lighting, with them receiving and contributing to bounced lighting and other effects. You'll typically want as many props as possible to be of this type.
Physics Props
Entity type in Hammer: prop_destinations_physics
These are physically simulated, so you can throw them around and have them bounce off the world and each other. Beyond this physics-based movement, no animations are possible without workarounds. Lighting is simpler than for static props, but they can still cast (dynamic) shadows and receive (but not influence) bounced ambient lighting.
In SteamVR Home, users can re-scale and change tint colours on physics props while in VR, as well as freeze and unfreeze them, or clone and remove them. Props placed in the world from the 'Things' menu are of this type.
Animated Props
Entity type in Hammer: prop_dynamic
These allow for complex animations - think of human characters, machines and so on. Lighting is the same as for physics props. Animation itself is a whole other topic - importing a model with animations is described elsewhere on this Wiki.
Constructing an Example Prop
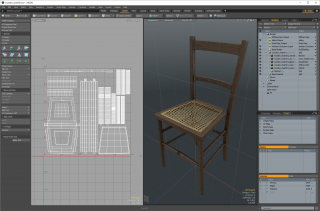
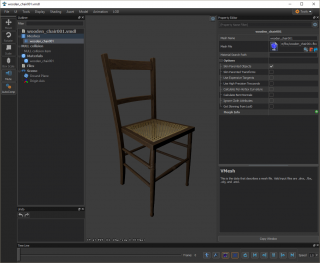
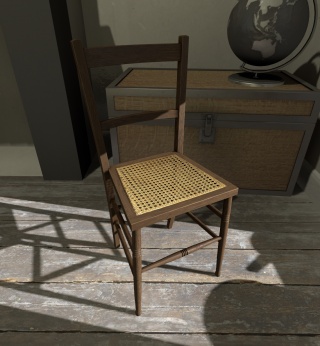
Returning to our apartment scene, we'll be building a simple wooden chair. I modelled this by hand in Modo, based around measurements from a real chair - the intent is to have the chair recreated in a near-photorealistic style.
The Chair Model
In my particular Modo setup exporting to FBX, one base unit corresponds to 100 game units (also known as 'inches') - I initially built it in centimetres, so I had to scale it by 39.37% (i.e. 100/2.54) to get it to the correct scale. (I had to freeze transforms before exporting the selected layer to FBX.) You'll likely want to test your own software if you're building stuff to scale - it is extremely useful to have props import at the correct size without requiring re-scaling in Hammer, so do as much as possible in your 3D modelling software!
I used a single mesh object for all visible chair geometry - this isn't required, but made things easy to organise in Modo. Triangle count was 4,532 triangles - the model is mostly quad-based (i.e. four-sided polygons) for ease of editing. There's a single UV map, with everything uniquely textured (each point in UV space corresponding to at most one triangle or polygon).
Modo's LXO file was saved to content/steamtours_addons/apartment_example/models/furniture/modo/wooden_chair001.lxo, with the FBX exported to content/steamtours_addons/apartment_example/models/furniture/fbx/wooden_chair001.fbx.
The Chair Textures
There's an initial overview on textures as used in SteamVR Home elsewhere on the wiki - if you haven't gone through that already, I recommend doing so. For our chair prop, our material will be working in a similar way, only with a few extra input textures.
I'll be saving textures to filenames like content/steamtours_addons/apartment_example/materials/models/furniture/wooden_chair001_color.psd - essentially an echo of the model path, but in 'materials'. The material in Modo points at these textures, with Modo's material being named 'wooden_chair001'.
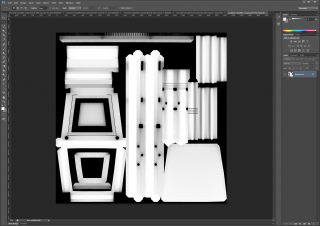
Ambient Occlusion
'Ambient occlusion' (or AO) is a term describing how much of the 'outside' each point on a model can see. Imagine an object outside on a perfectly overcast day - crevices and hollows won't see as much of the sky, so will be much darker than open, flat surfaces in full view of the sky. Ambient occlusion can make rendered objects look significantly more 'solid' - having your 3D modelling software simulate this and 'bake' it to a texture can make a valuable contribution to apparent realism.
For a decent AO bake, you'll want unique UVs. If your model already has non-unique UVs, then it's possible to make a second, unique UV map and bake AO using that.
In SteamVR Home, an ambient occlusion texture is extremely useful - it will realistically modulate ambient lighting, specular effects and similar on a prop. (The standard colour map is 'albedo' only, and thus should only contain surface colour without any lighting information - the AO bake should be kept as a separate texture rather than be mixed with the colour map.)
The AO texture should be saved in the form materialname_ao.tga or whichever format you're using.
Colour, Normal and Gloss
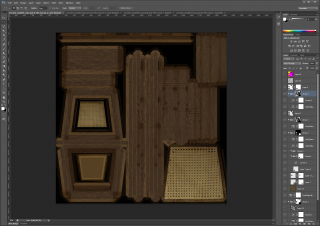
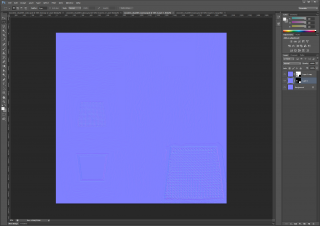
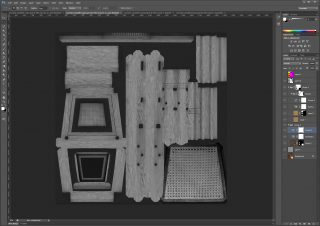
Essentially the same as seen in the previous materials tutorial, these describe surface colour, shape and smoothness respectively. These were all created in Photoshop using some photo-sourced material. The AO texture baked above was another handy ingredient - being used as a mask for simulating grubbiness and reduced gloss in crevices etc.
I also baked concavity and convexity maps in Modo, for use as masks for accentuation edges and crevices in the colour and gloss maps. Another baked texture was a simple two-colour effort showing overall direction of wood grain relative to the UV map, which let me quickly mask off two different rotations of a generic wood grain overlay.
I made the normal map using Crazy Bump and Photoshop - since the engine-ready model's geometry closely matched the shape of the original chair, I didn't need to bake a normal map from a super-detailed version of the chair. The normal map is used here solely to add some subtle shape and definition to the model's surfaces - in use cases such as this, VR benefits from being extremely subtle with surface effects. It's also possible to have a gloss texture doing some of the work of a finely detailed normal map.
The gloss texture started with the colour texture - darker areas of the wood grain being considered slightly rougher, and so on.
The colour, normal and gloss textures should be saved in the form materialname_color.tga, materialname_normal.tga and materialname_gloss.tga or whichever format you're using.
Transparency
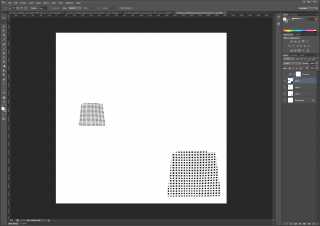
The chair's woven cane seat uses transparency - instead of having to individually model each piece of cane and weave it all together, I simply took a few photos of the chair held above a blue-green towel. Two photos were combined together in Photoshop (to get around the legs being seen at one side or the other due to perspective) and then the blue-green areas selected and removed - this gave a good base for the colour and gloss textures, as well as giving transparency information. It definitely saved a huge amount of time!
This transparency texture is greyscale, with white indicating fully opaque and black fully transparent. I'll be using an 'alpha-test' feature in the material, which considers a surface to be either fully opaque or fully transparent - which has various rendering advantages over partial transparency.
The transparency texture should be saved in the form materialname_trans.tga or similar.
Starting the Import
We've built up a huge pile of carefully named raw assets now - eventually we'll get round to actually importing it into the engine. To get maximum control over this process, we aren't going to be using the simple model import wizard - so this means we have to start by creating a new material first.
Creating the Material
Very similar to creating a world material, the main difference is that it'll be in a subfolder of content/your_addon_name/materials/models rather than just plain content/your_addon_name/materials. We'll save our chair material as content/steamtours_addons/apartment_example/materials/models/furniture/wooden_chair001.vmat, alongside the texture PSDs we've already saved above.
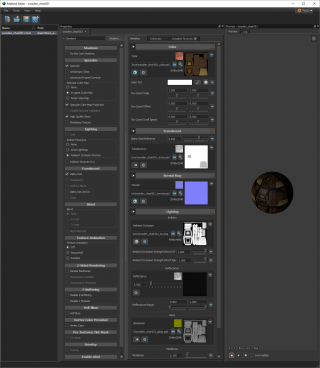
For the AO texture, in the Lighting section in the material editor select the Ambient Occlusion Texture for an extra texture box to appear in the list in the middle. If you've been strict with your naming, it may well have guessed which texture to use already.
Then for the transparency texture, under Translucent select Alpha Test. Again, this will provide an extra texture box to the right.
Save the material, then get ready for the next stage.
Importing the Model
It's taken a while to get here, yes? Well, we're actually about to import the model into the engine.
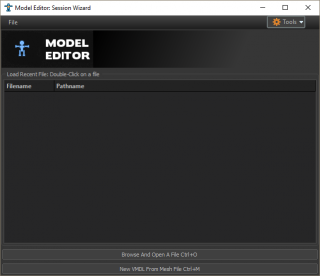
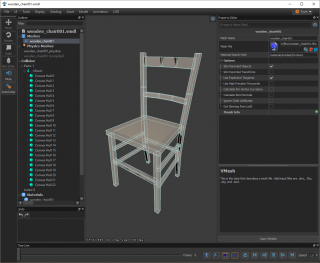
In a manner similar to materials being described by VMAT files, props in SteamVR Home are described by VMDL files which are created using the appropriately named Model Editor. Start it from the Asset Browser by clicking the 'person' icon in the toolbar this will bring up the Session Wizard. At the botton, click 'New VMDL From Mesh File'.
Navigate to your .FBX file - for the chair it's in models/furniture/fbx/wooden_chair001.fbx. It'll ask you if you want to create a new VMDL - if your file naming has been sensible, go with what it suggests and click 'OK'. The Model Editor will briefly flash and then close.
Back in the Asset Browser, find your new model in the list then double-click on it to reopen it in the Model Editor.
There's a good chance it hasn't found the materials you assigned in the 3D modelling software, resulting in a red wireframe - if this happens, expand 'Meshes' in the Outliner to the left, select the mesh name and in the Property Editor the right, enter the materials location in the Material Search Path. For the chair, this would be materials/models/furniture. The model should now start rendering correctly in the 3D view. (I'm still not entirely sure why my chair FBX was considered 'correct' - I need to investigate further!)
Having the console open will often provide useful diagnostic messages at this stage, should things fail to find the correct material. Occasionally it'll get mixed up as to what the material name should be - DMX imports, for example, seem to use the name of a colour texture applied to the 3D modelling software's material to identify which material to use in SteamVR Home. If there's no colour texture, or the ordering is wrong, then it can get confused...
As with texture files automatically updating materials, re-exporting an FBX from your 3D modelling software over the existing one should result in automatic recompilation of the prop. This is extremely useful for iteration - once the initial setup is complete, it's very quick to make new changes and see how they look in Hammer and even in VR.
Occasionally things can go slightly wrong - data stored in the compiled model is partly dependent of the material seen when first compiled. If the material requires vertex normals (used for lighting), or secondary UVs - then the model compiler will include them in its outputs. If the material changes significantly, sometimes it can lose track of which features are needed in the underlying model. If your model is missing correct lighting, or those secondary UVs you're adding just aren't working, then try recompiling the model in Model Editor with Tools : Recompile : Force Recompile Asset.
Testing Scale
Before going any further, it's a good idea to test the scale of your newly imported prop by placing it in Hammer. The general process is outlined in the previous tutorial - your new prop should appear in the asset browser with existing props, so you can drag it into the 3D vew.
If it's ridiculously small or overly large (previous imports have resulted in an accidental yeti the size of a mountain), then change its scale in your 3D modelling software, re-export as FBX over your original export and things should automatically update in Hammer and the Model Editor.
Physics
The model as it stands would work just fine as a static prop - albeit without any collision information. Physics props dropped upon it would fall straight through - for some scenery objects, this can be just fine - but for other purposes, we need something better. Let's add that collision information to our chair so that things can physically interact with it.
Simple Physics
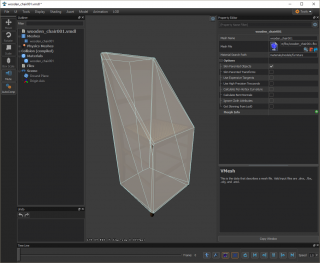
Of all the ways of adding collision information to a prop, this is certainly the simplest. In the menus at the top of the Model Editor, select Model : Collision : Add Simple Physics. Navigate to the FBX you just imported and select that.
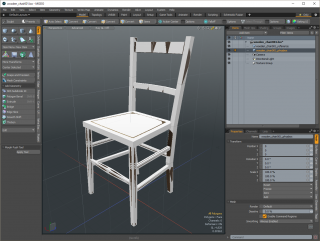
If it's not already set, you can visualise the new collision mesh with Display : Phys Collision - as you can see, the simple physics mesh for this chair is indeed ... quite simple. Attempting to place anything on this chair in VR would result in it sliding off an invisible ski-slope between the top of the back and the front of the seat. For topologically simple, convex objects, such behaviour could be fine - imagine a ball, or a block with few indentations or crevices. The simpler the collision mesh, the cheaper the physics calculations.
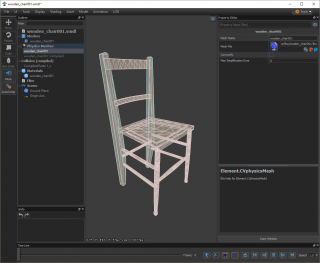
If we want this chair to be a static prop, we can use non-convex, mesh-based collisions. Expand the 'Physics Meshes' section in the outliner, select our mesh and in the Property Editor to the right, uncheck 'Convexify'. This should give results that are much more accurate!
You can simplify things somewhat with the 'Max Simplification Error' number - values of around 0.01 to 0.1 can make sense.
Remember - these non-convex mesh collisions will only work for static props!
If you're importing models for putting together your world as static props, it's best and easiest to use these options. The simple model import wizard documented elsewhere uses these particular features for photogrammetry meshes and similar.
Once you're done, save the VMDL.
Advanced Physics
When dealing with hand-held objects in VR, accurate collisions can be very important. In a third-person shooter, it might not be obvious when an object fails to land on a chair properly - while in VR, the user could very carefully pass an object between its legs, or place it on its seat, or balance it on the back - any hint of incorrect collisions with invisible boundaries can remove that all-important sense of immersion.
Fortunately, SteamVR Home has a variety of options allowing you to automatically create much more detailed collisions for your prop.
Adding advanced physics to a prop requires that you create a collision file. Right-click on 'NULL Collision' in the Outliner and click New Collision. This will pop up a save dialogue with a name pre-filled - the default location should be fine, but we usually stick them in a subfolder named includes.
For our chair, the collision file will be content/steamtours_addons/apartment_example/models/furniture/includes/wooden_chair001.collision.
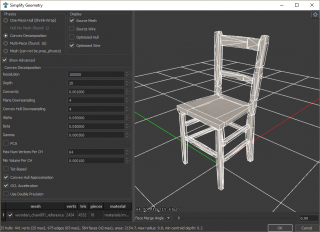
Once saved, there will now be a section in the Outline named 'Empty Collision'. Right-click on it and select Auto-Generate Rigid Collision. This will bring up the Simplify Geometry window - there's a 3D view to the right which you can navigate around. By default, it'll show the base mesh as opaque and the collision mesh in wireframe.
So let's explore the different physics options!
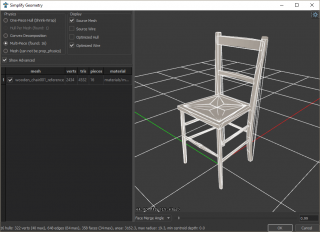
One-Piece Hull (Shrink-Wrap)
This is basically the same as the convex simple physics above, but in the 'Advanced' section below it gives you the option to work from particular meshes as defined in the modelling program. Here, I have just the one mesh.
For simple objects, this is ideal.
Convex Decomposition
This mode automatically generates many individual convex pieces to approximate the shape of the object. It's basically magic, and insanely useful for many tasks. Do keep an eye on the resulting complexity by looking at the hull count, since sometimes it goes completely overboard.
The numbers in the advanced section are mostly a mystery to anyone not a physics engine programmer. Good luck!
Multi-Piece
This mode is dependent on model construction, but is potentially very useful. It creates a convex hull around every unconnected section of the mesh - this works pretty well for our chair! Note, however, the back legs - the convex hull pieces can't follow the concavity of the curves along the rear.
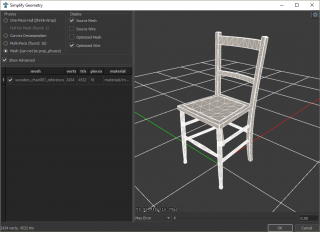
Mesh
For prop_static only! Super-accurate collisions, for non-moving environmental objects only. Pretty much what you get from unchecking the 'Convexify' checkbox for simple physics - the 'Max Simplification Error' number from there is the 'Max Error' slider below the 3D view here. Again, values of around 0.01 to 0.1 can make sense.
Once you're done, again save the VMDL.
Hand-Authored Physics Meshes
Anyone who built props for the Source 1 engine will remember how tedious it was to manually create physics meshes in a modelling program. Fortunately, that functionality is still available for SteamVR Home!
For complex objects, you can potentially get better (and simpler) collisions by creating things manually. The workflow is a little ... esoteric, so here's an overview of how to do so.
Back in your 3D modelling software, create a new mesh and, using individual convex solids, build up the shapes you need using the original mesh as a guide. For the chair, I made some simple cuboids for the back legs, added some edge loops around them, moved those edge loops to match the shape of the legs before breaking loops of quads into separate, four-sided 'tubes'. For each of these, I then added end-caps - the result being a series of tubes matching the overall shape of the curved leg.
Once the physics mesh is complete, export it as a new FBX - there is no need to specify a particular material or smoothing angle here. For the chair, I exported it to content/steamtours_addons/apartment_example/models/furniture/fbx/wooden_chair001_physbox.fbx.
Back in the Model Editor, with the chair VMDL open - if you haven't already done so, create a collision file in the manner seen in Advanced Physics above. If you've already created some collision parts, you can remove these by expanding the 'Collision' section in the Outliner, right-clicking 'Parts' and then selecting Remove Collision before recreating the collision file.
Next, go to Model : Collision : Add Simple Physics and navigate to the collision mesh FBX you exported just earlier.
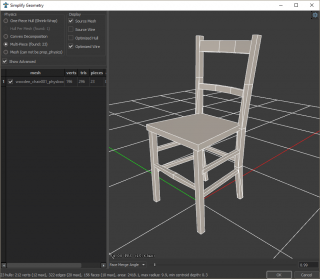
Now that there's a collision mesh defined wih a collision file present, you can right-click on 'Empty Collision' before clicking on Auto-Generate Rigid Collision. The Simplify Geometry window that pops up is the same as for Advanced Physics, but it will be working with the new collision mesh that you've loaded. For our chair, we'll use the 'Multi-Piece' setting - it'll create a separate convex hull around each solid we created in the modelling software.
Beautifully clean and simple, isn't it?
Placing Props in Hammer
By now you're probably itching to throw your prop around the place. If you haven't done so already, place a few instances of your prop into your map in Hammer as described here, then (for an interactive physics prop) set the class name in the Object Properties pane to prop_destinations_physics.
You can visualise prop collisions in Hammer using View : Show Collision Models.
Recompile your map to see these objects in VR!
Surface Properties
By default, interactive physics props will behave as if they're made out of some generic, unremarkable solid substance. It's possible to change this so that they behave like beach balls, metal boxes, glass bottles and more, causing them to calculate mass appropriately and make the correct sounds when dropped or when they collide together. This uses a concept called the 'Surface Property'.
To set this, bring up your model in the Model Editor. You need to have a collision file associated with your model - see 'Advanced Physics' above. Expand the 'Collision' section in the Outliner, then expand 'Parts' and click the '<Root>' section. In the Property Editor to the right, for 'Surface Property' set it to something new.
The surface property 'default' is (unsurprisingly) the default - there are loads of other types to choose from, many from previous Valve games. Relatively few are fully-functional, unfortunately, but a rough guideline is that types starting with a capital letter have been specially created for SteamVR Home and this should have full sound support.
A possible list of working surface properties follows: default, Baseball_Bat, CacheBox, Clockwerk_Mask, Cloth_Prop, Drone, Boxing_Robot, Boxing_Glove, Gym_Weights, Drumstick, Military_Helmet, Plastic_Helmet, Misc_Small_Accessory, Tool_Prop, Toy_Soldier, Rock_Block, Beer_Bottle, Metal_Cube, Toy_Ball, BeachBall, Dice, Oil_Barrel, Toy_Watermelon, Cannon_Ball, Metal_Box.
Coming Next
In a future tutorial, we'll be taking a deeper look at the lighting system (environmental lighting, baked ambient occlusion, light cookies, shadow map resolution and visualisation) and finally detailing a few more aspects of the materials system.
Coming soon!
