L4D Level Design:ru/Finale Events Part 2:ru
Эта переведенная страница нуждается в обновлении.
Вы можете помочь, закончив перевод.
Кроме того, не забудьте использовать русский статье об альтернативных языках.
Кроме того, не забудьте использовать русский словарь переводчика.
Содержание
Создаём спасательный транспорт
А теперь, мы будем делать спасательный транспорт.
В Left 4 Dead, каждая из 4х компаний имеет разный транспорт, на котором выжившие спасабтся. Это вертолёт, лодка, самолёт, и машина.
Спасательный транспорт может быть каким угодно. Это даже может быть комната, дверь в которой открывается в конце финала.
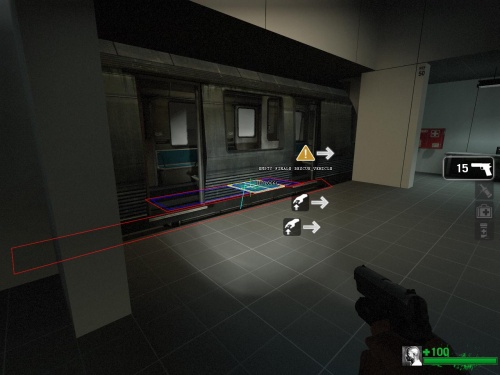
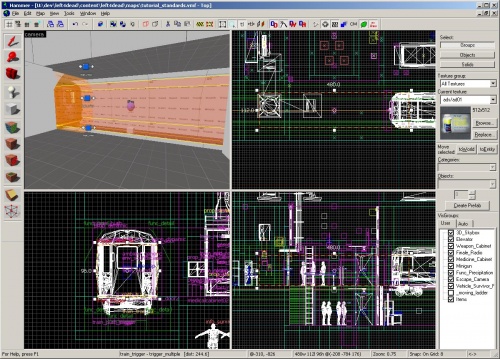
На карте tutorial_standards, вагон поезда метро используется как спасательный транспорт. Таким образом, вы можите видеть использование обьекта, который перемещается в уровне.
Вставляем prop_dynamic
Чтобы создать спасательный транспорт, вы должны выбрать его модель. Мы не будем использовать prop_static, а возьмём prop_dynamic т.к. нам надо чтобы модель двигалась.
Включаем Entity Tool и выбираем "prop_dynamic" на панели Objects из выпадающего списка.
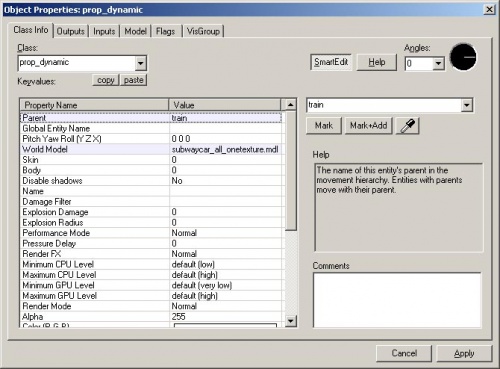
Открываем его свойства и выбираем пункт World model, затем справа наживаем кнопку Browse.
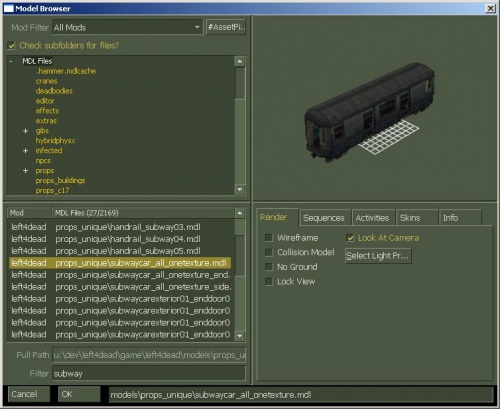
Введите "subway" в поле Filter и выберите модель "props_unique\subwaycar_all_onetexture.mdl".
Нажмите OK.
Закройте свойства.
Теперь у нас есть модель, которая будет спасательным траспортом. Теперь нам понадобится браш-энити чтобы двигать модель. Эта штука называется func_tracktrain.
Создаём func_tracktrain
Включаем Block Tool.
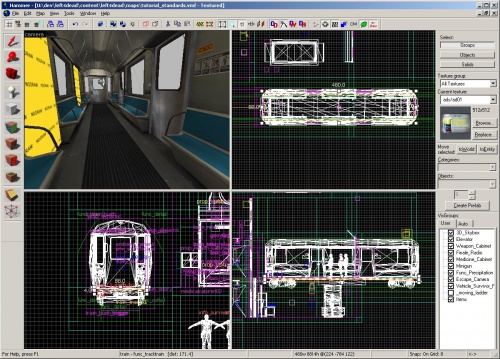
В проекции просмотра Top , нарисуйте браш такого же размера как наш вагон метро и нажмите ↵ Enter чтобы создать браш.
В проекции просмотра Side или Front , сократите браш так, чтобы он был ниже пола нашего вагона.
С брашем который выделен, нажмите кнопку Browse на панели Texture.
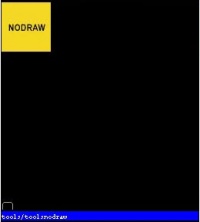
Введите "nodraw" в поле filter и выберите текстуру "tools/toolsnodraw".
Щёлкните двойным щелчком по нужной текстуре, чтобы применить её.
Нажмите Apply current texture на панели tool чтобы применить её на выбранном браше.
С выделенным брашем, нажмите Ctrl+T.
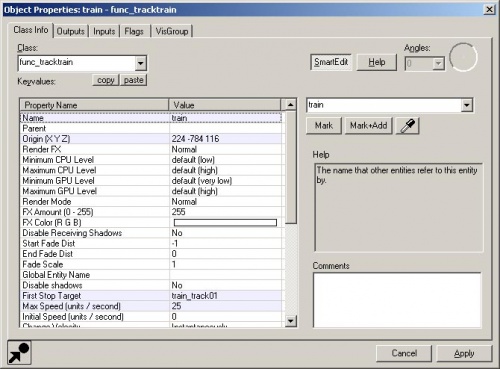
- Измените Class на "func_tracktrain". нажмите кнопку Apply чтобды увидеть свойства func_tracktrain.
- Измените Name на "train".
- Измените First Stop Target на "train_track01".
- Измените Max Speed на "25".
- Измените Height above track на "0"
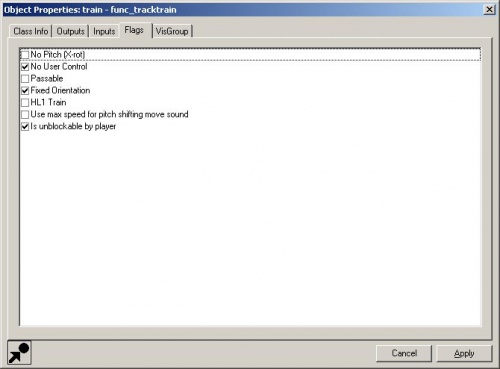
Переключитесь на вкладку Flags.
- Поставьте галочку No User Control.
- Поставьте галочку Fixed Orientation.
- Поставьте галочку Is unblockable by player.
Нажмите Apply чтобы закрыть окно.
Добавляем path_track энити
Now we'll need to create the path for our train to travel on.
Go into the Entity Tool and select "path_track" from the Objects drop-down menu.
Place the path_track in the Camera viewport near the middle of the subway car and open its properties with Alt+↵ Enter.
Change the Name to "train_track01".
Change the Next Stop Target to "train_track02".
Click on Apply and close the properties window.
In the Top and Front viewports, move the path_track to exactly the middle of the func_tracktrain brush. You can find this exact position by clicking on the func_tracktrain and finding the helper node (which, by default, is placed at the middle). You can move the helper node, but make sure you move the path_trac to wherever that helper node is located.
Go back to the Entity Tool and place another path_track where you want the train to move to for the survivor pick up.
Open up its properties and change the Name to "train_track02" and the Next Stop Target to "train_track03".
Back in the Entity Tool, place a third path_track where you want the train to move to escape the level.
Open up its properties and change the Name to "train_track03".
Parenting the prop_dynamic to the func_tracktrain
Go back to the prop_dynamic subway car model and open up its properties.
Change the Parent to "train". This will parent the subway car model to the func_tracktrain. Whenever the func_tracktrain moves, the subway car model will move with it.
Now, we'll need the trigger_multiple to check if all the Survivors are on board the train.
Creating the trigger_multiple
Draw a brush with that Block Tool that is contained inside the subway car at the position where it picks up the Survivors.
Click on the Browse button in the Texture bar.
Type "trigger" in the filter and select the "tools/toolstrigger" texture.
Double-click on it to make it the current texture.
Apply the texture to the selected brush.
Press Ctrl+T to make it a brush entity.
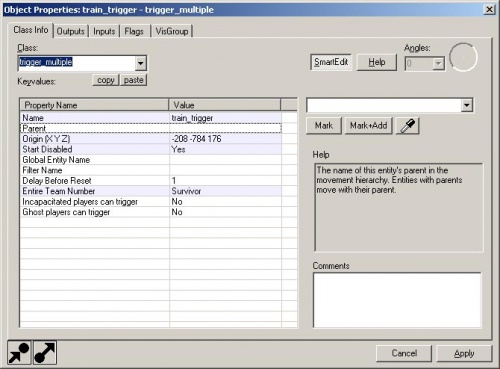
Change the Class to "trigger_multiple" and click Apply to see the properties for a trigger_multiple.
- Change the Name to "train_trigger".
- Change Start Disabled to "Yes".
- Change Entire Team Number to "Survivor".
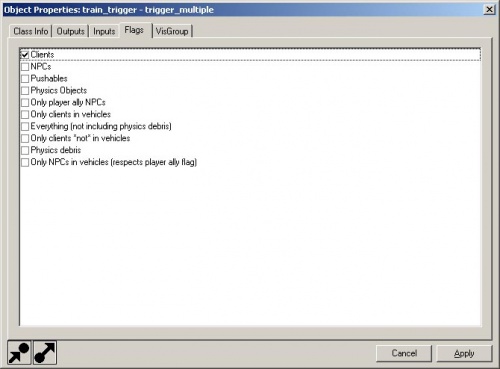
Switch to the Flags tab.
Make sure the box for Clients is checked.
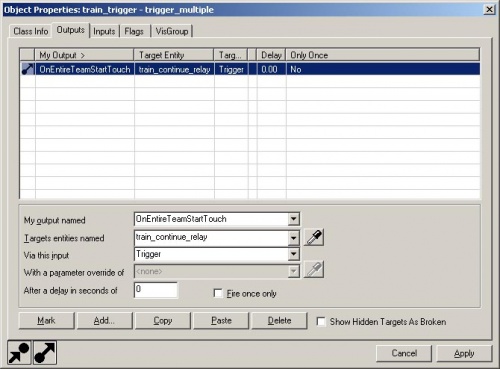
Switch to the Outputs tab.
Add an output with the following:
- My output named: "OnEntireTeamStartTouch"
- Targets entities named: "train_continue_relay"
- Via this input: "Trigger"
This trigger will now send a Trigger output to a logic_relay called "train_continue_relay" when all the survivors are touching it.
Now, let's set up the logic_relay of all the things that should happen when the survivors touch the trigger.
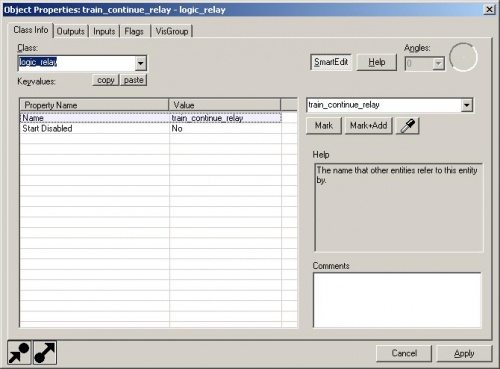
In the Entity Tool, select "logic_relay" from the Objects drop-down menu.
Place the logic_relay in the Camera viewport near where the "train_trigger" is, and open up its properties.
Change the Name to "train_continue_relay".
Switch to the Outputs tab.
Add an output with the following:
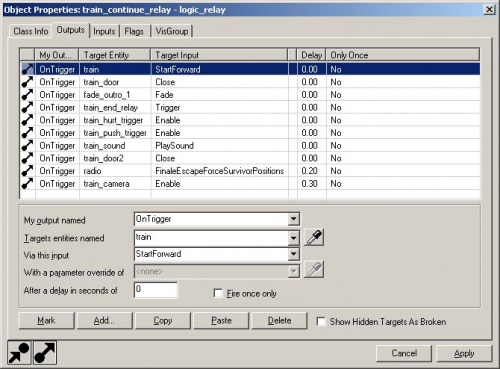
- My output named: "OnTrigger"
- Targets entities named: "train"
- Via this input: "StartForward"
Add an output with the following:
- My output named: "OnTrigger"
- Targets entities named: "radio"
- Via this input: "FinaleEscapeForceSurvivorPositions"
This means that the train will continue to move forward when all the survivors who are alive and not incapacitated have touched the "train_trigger" and this logic_relay will also teleport the Survivors to positions where they are safe from harm.
We'll need to place the Survivor positions where they will teleport to when the escape occurs.
Placing the info_survivor_positions
Go to the Entity Tool and select "info_survivor_position" from the Objects drop-down menu.
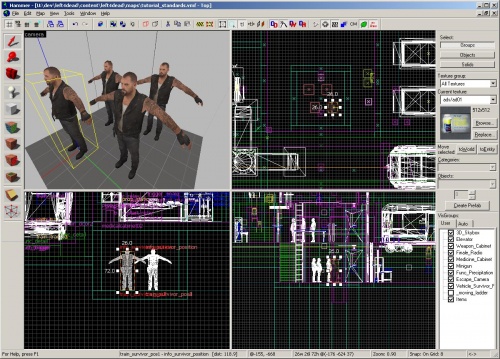
Place 4 of these in the Camera viewport where they can't be touched by the infected team.
This might require you to build a small container for them off the level as shown in tutorial_standards.vmf.
Open the properties for each one.
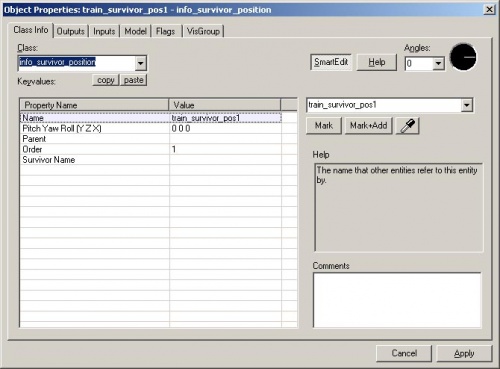
Change the Name of the first one to "train_survivor_pos1".
Change the Name of the second one to "train_survivor_pos2".
Change the Order of the second one to "2".
Change the Name of the third one to "train_survivor_pos3".
Change the Order of the third one to "3".
Change the Name of the fourth one to "train_survivor_pos4".
Change the Order of the fourth one to "4".
Completing the Escape Vehicle
Go back to "train_track02" and open up its properties.
Switch to the Outputs tab.
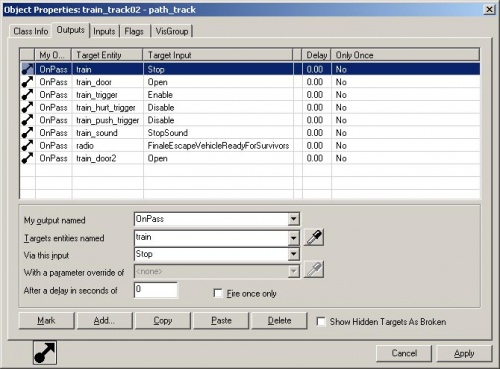
In the tutorial_standards map, there are other outputs hooked up for doors to open, infected to get killed if they get in the way, and survivors to get pushed out of the way. Ignore these for now and just add these outputs:
Add an output with the following:
- My output named: "OnPass"
- Targets entities named :"train"
- Via this input: "Stop"
This will stop the train when it gets to this path_track where it will pick up the survivors.
Add an output with the following:
- My output named: "OnPass"
- Targets entities named: "train_trigger"
- Via this input: "Enable"
This is the output that will enable our trigger_multiple.
Add another output with the following:
- My output named: "OnPass"
- Targets entities named: "radio"
- Via this input: "ForceEscapeVehicleReadyForSurvivors"
This will tell the survivor bots to get to the nav area marked with the "RESCUE_VEHICLE" attribute.
We still need something to send an input to the func_tracktrain to start from its initial position to the survivor pick up position.
Go into the Entity Tool and select "logic_relay" from the Objects drop-down menu.
Place it near the "train_continue_relay" entity and open its properties.
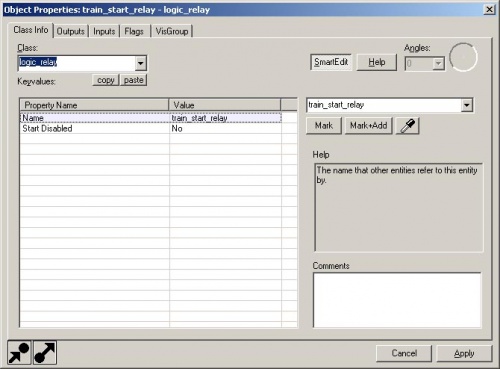
Change the Name to "train_start_relay".
Switch to the Outputs tab.
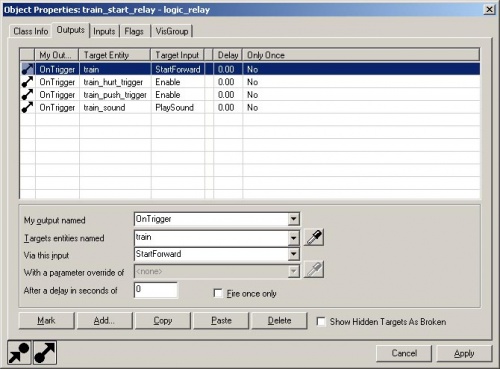
Add an output with the following:
- My output named: "OnTrigger"
- Targets entities named: "train"
- Via this input: "StartForward"
Click Apply and close the properties window.
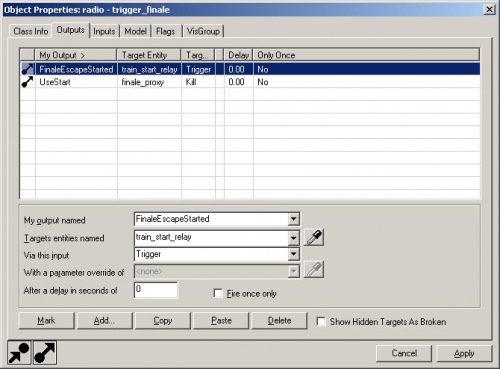
Now, go back to the trigger_finale (the radio model) and open its properties again.
Add an output with the following:
- My output named: "FinaleEscapeStarted"
- Targets entities named: "train_start_relay"
- Via this input: "Trigger"
The trigger_finale will now start the train when the escape phase of the finale starts.
We still need an output to the trigger_finale that will tell it that the escape is complete.
Go to the Entity Tool and select "logic_relay" from the Objects list.
Place it in the Camera viewport and open up its properties.
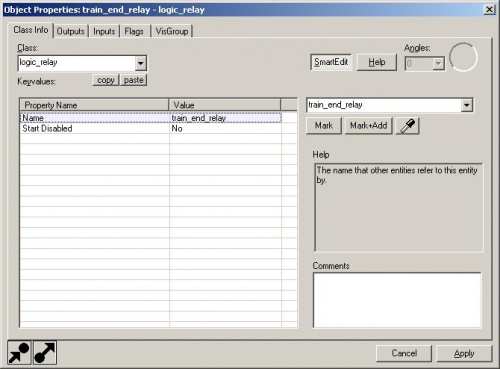
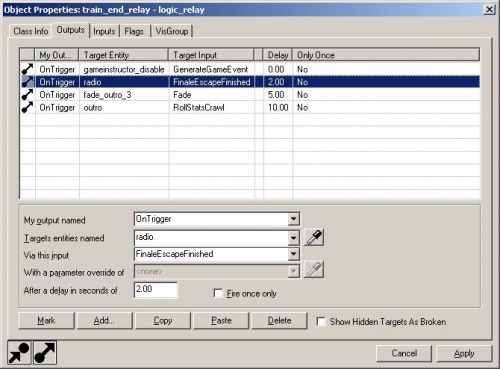
Change the Name to "train_end_relay".
Switch to the Outputs tab.
Add an output with the following:
- My output named: "OnTrigger"
- Targets entities named: "radio"
- Via this input: "FinaleEscapeFinished"
- After a delay in seconds: "2"
This will tell the trigger_finale that the survivors have escaped 2 seconds after being triggered.
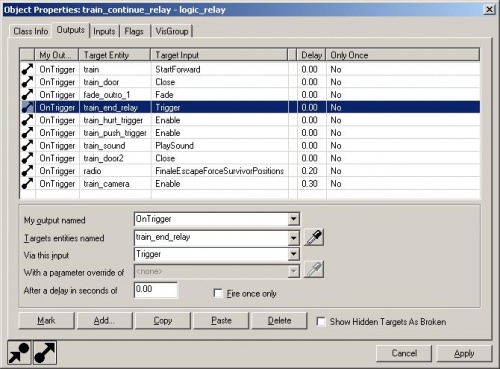
Go back to the "train_continue_relay" and open up its properties.
Switch to the Outputs tab.
Add an output with the following:
- My output named: "OnTrigger"
- Targets entities named: "train_end_relay"
- Via this input: "Trigger"
We could have put the FinaleEscapeFinished output here but we're preparing to add other things for the "train_end_relay".
We will now need to update the nav to include the RESCUE_VEHICLE areas.
Save and compile the map with F9.
When the level loads, enter nav edit mode with Page_Down.
Use noclip N to get to where the subway car picks up the survivors. You'll notice that the subway car is in its initial position. You don't have to play through the finale to get it to its pick up position.
Simply bring down the console and type "ent_fire train_start_relay trigger" and press ↵ Enter.
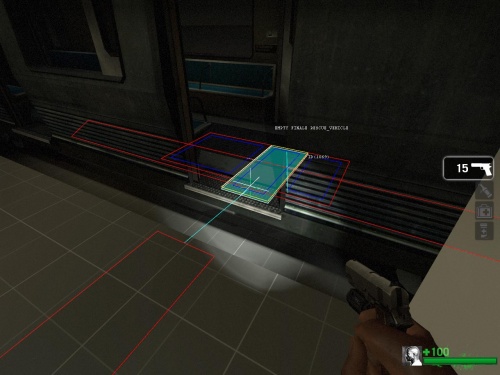
Once the subway car is in position, you can place a nav_mark_walkable M inside it and use nav_generate_incremental B to build the nave mesh for it.
Make sure that the nav areas inside the subway car are connected to the rest of the level.
You should see a light blue (cyan) line connecting the areas.
If the areas are not connected, select both of the areas that you want to be connected and use nav_connect Insert.
Select all the nav areas inside the subway car and use "mark RESCUE_VEHICLE" in the console to mark them with that attribute.
These are all the things necessary for a finale to work properly. Now, we can add some of the optional components of the finale.
