3D Skybox Creation
Contents
Introduction
This short guide will serve as a starting point to help familiarize yourself with Source 2's new method of creating 3D Skyboxes, and also includes an extra step on providing lighting for your 3D Skybox, due to how Source 2 handles skybox lighting differently.
Unlike the Source Engine, 3D Skyboxes in Source 2 are created in compiled .vmap files separate from the actual map, and then loaded in for preview in the Hammer editor once you browse to, and select your configured 3D Skybox .vmap via the skybox reference Point entity. Lighting is also required for your 3D Skybox map separately from your main map, otherwise the visual elements of your 3D skybox will not be lit - additionally a 3D Skybox also requires its very own 2D skybox setup for accurate editor previewing once loaded and used in your maps.
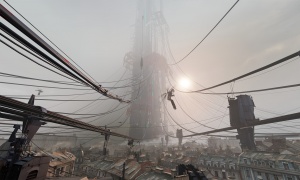
3D skyboxes come in handy for situations where we want to give the player a sense of scale and immersion, and provides the illusion of a populated and fleshed out world around the playable extents of the map. Normally these elements will never be seen up close by the player, and are often made up of low quality models that are performance cheap to render.
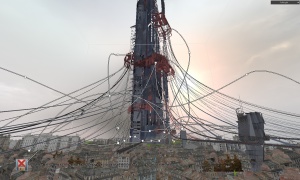
A 3D skybox also provides the feature of uniformly upscaling everything that is part of it, with the sky camera entity as the reference point of origin to scale outwards from. This can be useful in instances where for example you have to convey and accurately depict a giant structure of some kind, without being limited by render distance cutting off and obscuring the structure in the case of placing it in your actual map at a far distance.
Requirements
This guide is solely focused on the creation and lighting of 3D skyboxes in the Hammer editor, and assumes that you're using the Half-Life Alyx Workshop Tools as they are provided out of the box by Valve, unaltered and not modified in any way. You are also expected to already be familiar with the setup of standard 2D skyboxes, and environmental lighting in Source 2 and know how to compile a map.
At the time of writing this guide, not all entities used in the creation of 3D skyboxes are documented on the Valve Developer Wiki, but they are mostly self explanatory.
A list of point entities used during this guide follows:
Creation
3D Skybox
- Go to File → New Ctrl+N to create a completely blank fresh map.
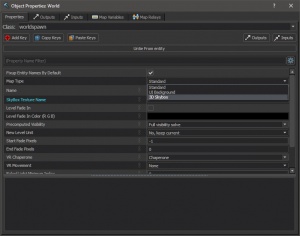
- Now open Map → Map Properties Ctrl+⇧ Shift+P, and change the Map Type from Standard to 3D Skybox. Leave all other settings as they are.
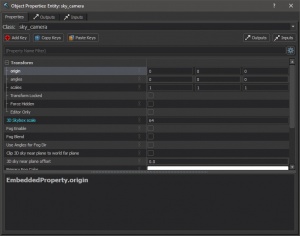
- Next, go ahead and create a sky_camera point entity, and place it perfectly centered at the world origin coordinates at: 0,0,0 (Indicated by the two aqua colored lines crossing in the center of the 2D grid). You can also do this via the object properties, by double clicking the sky_camera entity while in Object selection mode (or Alt+↵ Enter after selecting it), and then adjusting the origin keyvalue under the Transform category. Leave the other settings at default values.
- At this point, the map is technically ready to be loaded and used as a 3D Skybox - the last step is to compose the visual elements of your 3D skybox, e.g. static or animated models, meshes, particle effects.
- Once you are finished creating the 3D skybox elements, save your map to your addon's maps folder, or a sub-folder within the maps folder for organizing.
- Lastly, compile the 3D skybox .vmap like you would compile a normal map, to allow it to load in-game.
Adding the 3D Skybox to your map
- Load your map file.
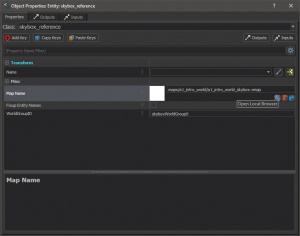
- Create a skybox_reference point entity, and place it perfectly centered at the world origin coordinates just like the sky_camera in previous steps. This is the entity that determines the location the 3D skybox will be created at, relative to the sky_camera coordinates in the 3D skybox map file.
- Open the Object Properties of the skybox_reference, and change the Map Name keyvalue by clicking on the blue magnifying glass icon to open the local asset browser.
- In the Name Filter field at the top of the asset browser, type in the name of the 3D Skybox .vmap, and select it from the list.
Lighting your 3D Skybox
As briefly touched on during the introduction, you will immediately notice a lack of lighting on your 3D skybox elements as they may appear blacked out; including that the 2D skybox has now gone missing in the editor preview of your map. Your 3D Skybox .vmap will now need its own light_environment to properly light up any models or meshes contained in it, and its own env_sky to keep the 2D skybox active in the editor preview.
The issue with the 2D skybox disappearing is likely due to the 3D Skybox overriding your actual map's 2D skybox - and since one doesn't presently exist in the 3D skybox until you create one, it has no skybox material to load. This stems from how the 3D skybox exists in a separate map file, as explained in the introduction, and it will not take on any lighting from entities in your actual map.
- To fix these issues and properly light your skybox elements, copy your map's light_environment and env_sky entities Ctrl+C and paste them (Ctrl+V, or Ctrl+⇧ Shift+V for Paste Special) into your 3D Skybox .vmap. This ensures that the light_environment and the env_sky maintains the same settings, angles, sky material, etc, as your actual map.
- You are now finished with this guide, and should have a working and properly lit 3D skybox in-editor and in-game.
Additional
Notes
- Don't forget to compile your 3D skybox the first time you finish building it, including at any time you make changes to it in the future.
- The skybox_reference entity can be freely rotated on any axis if needed, much like an env_sky, or light_environment.
- Remember to always place the sky_camera and skybox_reference entities at the exact same coordinates in both your actual map, and the map you're creating the 3D skybox in.
- Distance based fog can be applied to your 3D skybox in the sky_camera properties, and will only affect your 3D skybox - leaving you with more control over fog in your actual map. This fog behaves in the same way as sky_camera distance-based fog in the Source engine.
Thanks To
- Discord user Trevor#7686 for sharing info on the difference in creation of 3D skyboxes in Source 2, compared to the Source engine
- Discord user youmenow1#0369 for informing about the need to compile the 3D Skybox .vmap - youmenow1's Steam Profile
