Disc Room
![]() The disc room is the final challenge Atlas and P-body must face when completing a course. It is placed in parts beyond GLaDOS's influence and serves as a last stand of the humans against GLaDOS's growing control over the facility.
The disc room is the final challenge Atlas and P-body must face when completing a course. It is placed in parts beyond GLaDOS's influence and serves as a last stand of the humans against GLaDOS's growing control over the facility.
Contents
Disc Emitter
The disc emitter is the device that creates the discs. It can re-create the disc in case the disc is lost or dissolved. It is usually placed near the Disc Receiver at the end of the last chamber of the course. However it doesn't have to be like that; placing the emitter at the start of the chamber can lead to some interesting puzzles, in which the main priority is to make sure the disc wouldn't get lost.
Step 1 - Setting Things Up
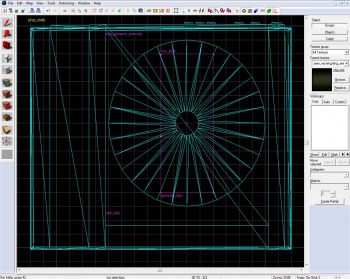
Create a prop_static and set its model to models/props_gameplay/laser_disc_player.mdl, place it anywhere in your disc room. This is where the disc would be picked up from.
We will create the disc now; a prop_dynamic_override. Set its properties as follows:
Property Name Value Name start_disc Parent spawner_door World Model laser_disc.mdl Disable Shadows Yes
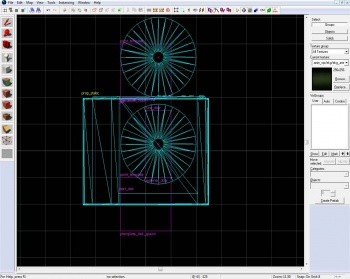
Place the disc model in the device as detailed in the picture to the right.
Now create a 8x20x1 brush and texture it with tools/toolsinvisible. Place it on top of the disc model, again, as shown on the picture to the right. Tie the brush to an entity (by pressing Ctrl+T) and make it a func_door. Now set its properties as follows:
Property Name Value Name spawner_door Speed 26 Start Sound World.LaserDiskLoad Delay Before Reset (-1 stay) -1 Loop Moving Sound Yes Move Direction 0 0 0
laser_disc_player.mdl.Another entity must be made now a prop_physics_override, this will be the disc the players would carry around. Hold ⇧ Shift and drag the start_disc to the point it is no longer in the device and only its 'tip' touches the entrance. Change its "Class" to prop_physics_override and name it disc.
Step 2 - Disc Reproduction
Here we would make some templates to respawn the disc in case it gets lost.
Create a point_template with the following properties:
Property Name Value Name template_disc_spawn Template 1 start_disc Template 2 spawner_door
Create one more point_template with these properties:
Property Name Value Name template_disc Template 1 disc
Step 3 - Output System
After making all the entities needed to get the emitter to work, all that is left is to connect their actions to form a disc; let's make some I/O connections!
Start by creating a logic_auto with the following output:
My Output > Target Entity Target Input Parameter Delay Only Once 
OnMapSpawn template_disk_spawn ForceSpawn 0.00 No
Open your spawner_door 'Output' tab and add the following properties:
Now add the following output to your template_disc_spawn:
My Output > Target Entity Target Input Parameter Delay Only Once 
OnEntitySpawned spawner_door Open 0.00 No
Make sure that the entity that detects when the disc has been lost or killed has the following output:
My Output > Target Entity Target Input Parameter Delay Only Once 
OnTrigger template_disk_spawn ForceSpawn 0.00 No
Now the emitter should be working, and dispensing new discs when the last one is gone. However, this is only a third of the process of getting the disc room to be functioning.
Disc Receiver
The disc receiver (also disc player) is where the disc is placed to fulfill its purpose; placing the disc in the receiver turns on the video showing the information GLaDOS was looking for.
Step 1 - Initializing
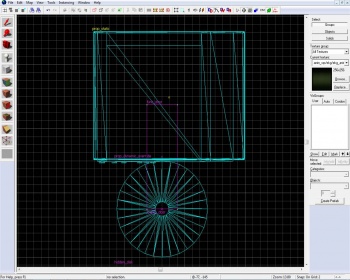
Place a prop_static in your disc room, and set its model to models/props_gameplay/laser_disc_player.mdl. This is where the player will place the disc to end the level.
When the player places the disc near the receiver the disc that was carried would be removed and a hidden disc would load. We will do this to have better control over the way the disc will enter the receiver and to simply overcome a lot of problems. Another prop_dynamic_override would be required, the one that would load in the device by being attached to a func_door.
Property Name Value Parent loader_door Disable Shadows Yes World Model laser_disc.mdl Name hidden_disc
The disc needs to be placed as detailed in the picture to the right.
Now create a func_door brush with the tools/toolsinvisible. Place it on top of the disc model, again, as shown on the picture to the right. Add the following properties:
Property Name Value Name loader_door Speed 8 Start Sound World.LaserDiskLoad Delay Before Reset (-1 stay) -1 Loop Moving Sound Yes Move Direction 0 180 0
Step 2 - Loading
Step 1 lists the visible entities used for the disc receiver, this step will list the invisible entities.
The first is a trigger_once brush, and the second is a filter_activator_name. Add now the following properties:
1. The trigger_once:
Property Name Value Name Filter Name disc_filter
Ensure the Physics Objects flag is checked.
2. The filter_activator_name:
Property Name Value Name disc_filter Filter Name disc
Step 3 - Input System
To get everything interacting, we will use the I/O system. Remember that logic_auto we used? Open its Outputs tab and add the following properties:
My Output > Target Entity Target Input Parameter Delay Only Once 
OnMapSpawn hidden_disc TurnOff 0.00 No
Add the following output to the trigger_once:
My Output > Target Entity Target Input Parameter Delay Only Once 
OnStartTouch hidden_disc TurnOn 0.00 No 
OnStartTouch !activator Kill 0.00 No 
OnStartTouch loader_door Open 0.00 No
To the loader_door entity add one output:
My Output > Target Entity Target Input Parameter Delay Only Once 
OnFullyOpen disc_loaded_relay Trigger 0.00 No
Now the disc receiver should be operating and accepting the disc when it's placed in it. This is, however, only one more step in the process of completing the disc room.
Projected Movie
The projected movie is the sequence that happens after loading the disc. Including the bot explosion at the end.
Step 1 - Setting the Film
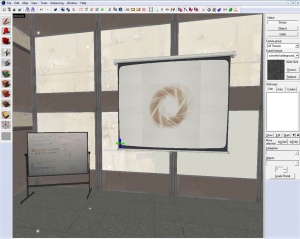
We will start by placing a prop_static and set its model to projector_screen.mdl (Easily found by typing "projector" in the model filter bar). Now on its lower left corner place a vgui_movie_display with the following properties:
Property Name Value Name insert_disc_movie Movie Filename media/insert_disk.bik Loop Movie Yes Stretch to Fill Yes Force precache Yes Panel width 156 Panel height 112
Again open the properties of our logic_auto and add these outputs:
My Output > Target Entity Target Input Parameter Delay Only Once 
OnMapSpawn insert_disc_movie Enable 0.00 No
Now make another vgui_movie_display entity at the exact same spot as the last one (simply shift drag the one you have just created one unit, and move it back). The only difference will be the name and the video it will display:
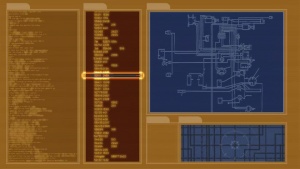
Property Name Value Name aperture_movie Movie Filename media/coop_bts_blueprints.bik Loop Movie Yes Stretch to Fill Yes Force precache Yes Panel width 156 Panel height 112
Step 2 - Raise the Curtains
Remember that disc_loaded_relay entity we used but didn't make? Well, we're using it now. First create a logic_relay and name it disc_loaded_relay. Open the Outputs flag and add the following properties:
My Output > Target Entity Target Input Parameter Delay Only Once 
OnTrigger insert_disc_movie Disable 2.00 No 
OnTrigger aperture_movie Enable 2.00 No
Create an ambient_generic with these properties:
Property Name Value Name disc_windup_sound Sound Name World.LaserDiskPowerUp
And add to the disc_loaded_relay one more output:
My Output > Target Entity Target Input Parameter Delay Only Once 
OnTrigger disc_windup_sound PlaySound 0.00 No
And at last everything should be working!
Finishing up
- Add an instance and set its VMF Filename to
coop_lighting_ents.vmf. You can choose from here what fog options your map will have (fog density, color, etc). More importantly, however, it has four env_globals in it, each can enable, disable the bots pinging and taunting ability. You should have a logic_relay that is triggered when the disc is loaded with four outputs:
- Place a trigger_hurt with the Damage keyvalue set to 10000. Make sure it covers the whole disc room and don't forget to disable it. At the appropriate moment, probably when GLaDOS is making her final statement, enable the trigger_hurt brush to make the bots explode.
- Place a point_clientcommand in your room with the following settings:
Property Name Value Name levelchange
To your trigger_hurt add this output:
My Output > Target Entity Target Input Parameter Delay Only Once 
OnHurt levelchange command changelevel {hub or next chamber} 0.00 No
- Place a static model facing your screen and set its model to
models/props_underground/projector.mdl. On the projector place three point_spotlight, you'll know where. - Somewhere in the disc room there is usually a whiteboard (
models/props_office/whiteboard_coop.mdl) claiming not to upload the disc. For consistency with Valve maps, I suggest placing one too. It comes with 6 different skins.
