Destinations/SteamVR Environment
Converting your SteamVR Environment into a Destination
In this tutorial, we will walk through this process of converting a SteamVR environment to a Destination – from importing your model to publishing to the Destinations Workshop. This is a simplified tutorial to quickly port your environment – for more details, see the other tutorials available here.
What you will need
- Your 3D environment in OBJ or FBX format
- Destinations Workshop Tools (free)
- Once downloaded, you can find this application in the Library > Tools section.
1. Create a new addon
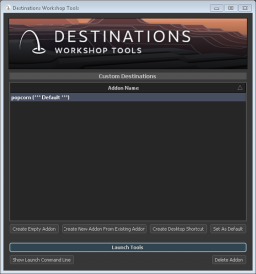
- Open Destinations Workshop Tools (in the Tools section of your Steam Library).
- Click “Create Empty Addon” and name your addon. This will be used in the file path of your Workshop submission).
- Select your addon and click “Launch Tools.”
2. Import your 3D environment into Destinations Workshop Tools
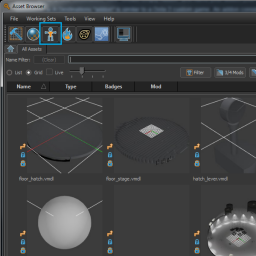
- In the Asset Browser click the Model Editor button.
- Click "New VMDL from Mesh file", browse to, and select your OBJ or FBX.
- Click OK when it asks if you want to create a new content directory.
- On the next dialog, select the “…” button at the end of the Destination Directory line.
- Create a folder here named after your model. You should end up with something that looks like ".../steamtours_addons/demo/models/demo".
- Click the "Collision type" drop down and select "Collision using exact geometry".
- Click the “Shader” drop down and select “vr_unlit”*.
- Click OK. Depending on the complexity of your model, it may take some time to import.
vr_unlit is the best selection for the baked lighting used in SteamVR environments. To do your lighting manually, choose the vr_standard shader.
3. Bring your environment into Hammer
- On the Asset Browser window, click the Hammer icon in the top left.
- In Hammer, hit Ctrl-N to (or File > New File) to create a new map.
- In the Asset Browser, find your environment (you can use the search function to find it.)
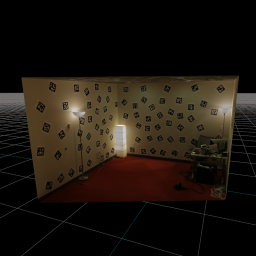
- Click and drag this into Hammer to bring it into the map.
- You may need to adjust the scale of your environment – you can use the Object Properties panel on the right to do so.
4. Place the Player
- This determines where the player will start when they load your Destination.
- Select the Entity tool from the left-most tool panel. (light bulb icon).
- Make sure the Entity Class is “info_player_start” (this should be the default).
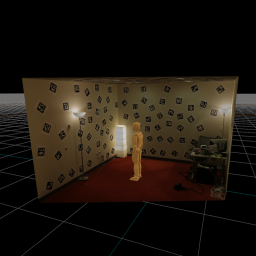
- Click in the center window to place the Player Start. It should look like a low poly scientist, and is a good scale reference for your environment.
- You can adjust the player start position and orientation using the Translate (T) and Rotate (R) tools. For more information on navigating around Hammer: Hammer Navigation
- To change the size things are shown at in VR, change the scale of the objects themselves rather than the scale of the player start entity - changes to the latter will not be reflected in-game.
5. Add a Light
- Click the entity tool on the left.
- Type “light_directional” in the entity class field.
- Click in the center panel to place your light.
- Use the Translate “T” and Rotate “R” tools to position the light pointing down on the player start. This will allow avatars and props to be seen inside of your Destination.
6. Add a Sky
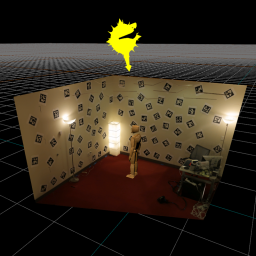
If your environment is not enclosed, you should add a skybox – otherwise the sky will be black.
- Select Entity (light bulb icon)
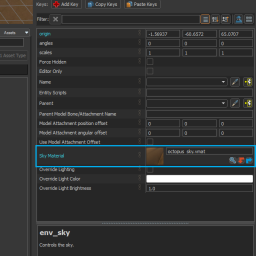
- In the Entity Class field type env_sky
- Click to place this in your map. It doesn’t matter where you place this, your skybox will still be in the correct place.
- In the Object Properties menu, click the magnifying glass next to Sky Material.
- We have included two skybox materials by default: blue_saltflats and night_mountains – select one of these for your skybox.
- Your sky should now appear in your map. It is easy to add your own skybox if you have a lat-long or cube map image you’d like to use. Click here to learn how to create your own skybox material.
7. Test your Destination
- To build and test press F9. Make sure the "Full Compile" option is selected.
- Once built, you should be able to test your Destination in VR.
- Continue adjusting the scale and lighting of your Destination until you feel it's ready to submit to the Workshop.
Optional
Place Teleport areas
- By default, players will be able to teleport to any reasonably flat surface. For a greater degree of control, you can also place teleport meshes and teleport markers. Click here to learn how to place teleport areas.
Add a Cubemap
- Cubemaps are used by the vr_standard shader both for reflections and ambient lighting. For more realistic lighting, it can be useful to add one to your scene. Click here to learn how to place a cubemap.
8. Submit to the Steam Workshop
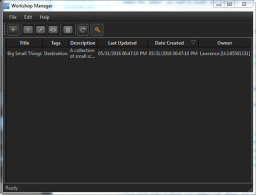
- Once you are happy with your Destination, go back to the Asset Browser and click the Workshop Manager button.
- Click on the "+" icon or go to File > New Submission.
- Fill in the fields and select an image to represent your Destination. A screenshot of the Destination works great as a thumbnail.
- Finally, click “Submit” to upload your Destination to the Steam Workshop. Depending on the size of your submission, this may take a while.
Congratulations! Other players will now be able to download and explore your Destination.
