SteamVR/Environments/Scripting/Flashlight Tool Tutorial
Contents
What Are Tools?
The SteamVR Workshop Tools let you create items in your addon that that allow you interact with them or the world in a number of ways. We call these interactable items, Tools. When a player picks up a tool, a script runs on that entity which can intercept the player's controller input. The tool can then react and do anything based on that input. It's up to you! The Ballooninator, Pop Blaster, Drone and Air Brush were all created using the Tool method.
Prerequisites
Before continuing, we advise you to have a good grasp on how to create an addon, create a map, have a reasonably good idea of how to use Hammer and have some experience with scripting languages like Lua.
Here is a link for creating your own addon.
Here is a link to scripting in Source 2 and using Lua.
Creating The Flashlight
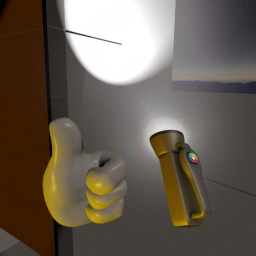
This page covers the basics on how to create your own custom tool, a flashlight for use in your addon.
There are two main things needed for creating a tool:
- The 3D Model (used as the world model and model held in the hand)
- The VScript (the Lua code that runs that tells the tool what to do)
Optional elements:
- Particle systems for feedback and flair
- Sound
Create a Map
Create a new map within your new addon, or add to your existing addon. If you haven't done this yet, you can follow the Getting Started tutorial.
With your new map open:
- Add a
prop_destinations_toolentity to your map somewhere within reach of the player start. - Set the World Model to:
models/props_gameplay/flashlight001.vmdl
You should now be able to compile the map and have a flashlight tool that you can pick up in game. But wait! It doesn't do anything and it doesn't stick to my hand when I grab it! To fix that, we need to add the script.
Creating The VScript
The script is the bulk of what makes the tool work. This section isn't going to go through all of the elements within the script, but will show you how to take a working script and attach it to your tool. The script provided is commented to describe what each bit does and if you'd like to know more about how you can write your own, here's a good place to start: Scripting in The SteamVR Workshop Tools
To create our script:
- Create a new, empty .lua file, name it
flashlight.luaand place it in your addon's path, under vscripts (you will need to create this folder):
..\steamvr_environments\game\steamtours_addons\<YourAddon>\scripts\vscripts
- Open the flashlight_script_code_full page in a new window.
- Copy all of the lua code from this page and paste it into your new, blank lua file.
- Save the file!
- Back in Hammer, open the
Miscsection in Object Properties. Find theEntity Scriptsfield and enter the name of the lua file we just created without the extension. (in this case it'sflashlight)- The Entity Scripts field looks in
..\scripts\vscriptsfor your script files.
- The Entity Scripts field looks in
- Save, compile and run your map!
That's It!
You should now have a working flashlight that you:
- Can drop with grip
- Turns ON and OFF with trigger
- Changes color using the trackpad!
Try it out!
Troubleshooting
If the tool does not work like described, it is often an issue with the scripting. Any feedback from the scripting system is displayed in the Developer Console. Look for lines prefaced with VScript. Light blue text is normal output from scripts, for example from the print() function, and pink text are error messages.
If the console complains about not being able to find the script file, make sure it is in the correct location. While most source assets go under the content folder, scripts need to be placed under the game folder, containing compiled versions of the assets used in the add-on.
Script Functions of Note
---------------------------------------------------------------------------
-- SetEquipped( self, pHand, nHandID, pHandAttachment, pPlayer )
-- This and SetUnequipped are called by code when the tool is picked up and on dropped
---------------------------------------------------------------------------
---------------------------------------------------------------------------
-- SetUnequipped()
-- Called when the player drops the tool
---------------------------------------------------------------------------
---------------------------------------------------------------------------
-- OnHandleInput( input )
-- Called from C++ code
-- This function recieves input passed from the controller inputs from the player
-- we can capture these inputs and choose to pass them back to be used by another attachment
-- or we can clear them and "swallow" the input here
-- other hand attachments, like the one that lets you teleport around or change your hand gesture
-- use certain inputs from the player. if you want to prevent these actions while you have
-- THIS tool equipped, you need to clear the input after you catch it
---------------------------------------------------------------------------


