Adding Menu Photos
This article is an orphan, meaning that few or no articles link to it.
You can help by adding links to this article from other relevant articles.
January 2024
You can help by adding links to this article from other relevant articles.
January 2024
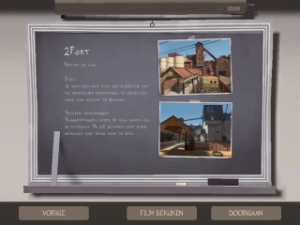
Menu Photos are shown on the loading screen while the map is loading and on the map introduction. Players will be able to see how the map will look like if they are playing on the map for the first time.
Contents
Creating your Menu Photos
Menu Photos are pretty simple to make but you should have some experience with materials and an image editor of your choice.
There are 2 files that are needed for menu photos:
- menu_photos_[mapname].vtf
- menu_photos_[mapname].vmt
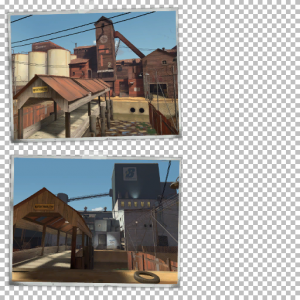
The VTF is just a simple transparent overlay that contains the two thumbnails.
Creating the VTF file
- First, take some nice screenshots that show an important place in your map.
- Use GCFScape to extract one of the existing menu photos to use as a template for your VTF. You can find them in tf\materials\vgui\maps\menu_photos_[mapname].vtf.
- Choose one of the textures with "menu_photos_" in its name.
- Open the VTF of your choise with VTFEdit and export it as a PNG image.
- Open your PNG and your two screenshots with an image editor.
- Scale and rotate your screenshots so they fit perfectly on the existing thumbnails.
- Save your new image and export it to a VTF file again using VTFEdit. Save it as menu_photos_[your map's name].vtf.
- Move the file to tf\materials\vgui\maps. If the directories do not exist yet, create them.
Creating the VMT file
- Create a new file with notepad and paste the following code into it:
"UnlitGeneric"
{
 "$basetexture" "vgui\maps\menu_photos_mapname"
 "$translucent" 1
 "$ignorez" 1
 "$vertexcolor" 1
}
- Replace "menu_photos_mapname" with your VTF file.
- Save the file as "menu_photos_[mapname].vmt" in the same directory as your VTF file.
- Move the file to tf\materials\vgui\maps. If the directories do not exist yet, create them.
Result
Test it out! You should now have a beautiful loading screen!

