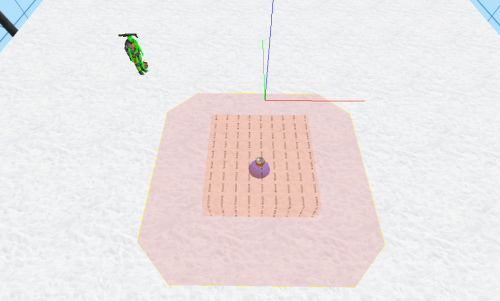
WiseBreakableIce: Creating Breakable Ice
This tutorial was originally created by wisemx. It was originally posted on SDKnuts.net.
Introduction
In this project:
- Snow is falling on a winter day.
- Player spawns on ice.
- Will break through the ice, in center, or can shoot the ice to break it.
- Once in water player will have the illusion of being under an ice hole.
The ice in this project is created with default HL2 SDK materials for snow and glass. Ice in a frozen lake like this doesn’t need to be specular so you can easily create your own ice materials or import materials from the original Half-Life mods.
Creation
To create the hole in the ice I covered the entire body of water with a normal brush 4 units thick and then used the Clipping tool to cut a hole in the center. This hole can easily be shaped any way you want. Once you have made your cuts with the Clipping tool select all of the pieces that will become the breakable section, do this by holding Ctrl as you left-mouse click on them. Once all of these sections are selected press Ctrl+T and convert them to func_breakable. Once they are func_breakable you can adjust the properties as needed. For these I’ve chosen all of the settings for breakable glass. By changing the Prop Data of our func_breakable to Glass.Window and a Strength of 20 it can now be broken by damage, like the shotgun.
I’ve also added a trigger_once in the center of the ice to send this output to the func_breakable:
| My Output | Target Entity | Target Input | Parameter | Delay | Only Once | |
|---|---|---|---|---|---|---|
| OnTrigger | ice01 | Break | 0.25 | Yes |
When the player gets to that trigger it will break the ice one quarter of a second later. You could easily play a groaning sound and maybe even a few cracking sounds before breaking the ice.
The material I used for the upper ice layer is nature/snowfloor002a. On all other faces of the breakable section I’ve used tools/toolsnodraw. On the side faces of the normal brush used for ice I’ve applied glass/glasswindow070a. These are the faces that will show when the breakable section is gone.
To get the illusion of being dark under the ice I’ve used normal brushes with the tools material tools/toolsblocklight. When you use normal brushes textured with tools/toolsblocklight its important to experiment with the size of your brushes. Typically they will work best at blocking light when they are 16 units thick. In this project that would look odd, the shadows wouldn’t match the body of ice. I ended up making the tools/toolsblocklight brushes under the ice 4 units thick and the ones around the sides 8 units thick. They ended up casting a nice dark section of the water under the ice.
Another effect I added to make the water darker was using one of the cheap water materials. These are easier for system to render and also come in handy for project like this. The water material I used is nature/water_dx70.
In the center of the water under the ice I’ve created a brush shaped like the hole that can be broken through the ice and converted it to env_bubbles. The env_bubbles is completely textured with tools/toolsnodraw and the keyvalues are:
- Bubble density: 1
- Bubble frequency: 7
- Speed of current: 7
Above the entire map is a func_precipitation brush. The properties I’ve used are:
- Density: 6
- Color: 100 100 100
- Precipitation Type: Snow
