Swarm Mapping basics
Structure
Alien Swarm maps are required to be open top corridors and rooms, with plenty of room left for the camera above and to the sides of every location.
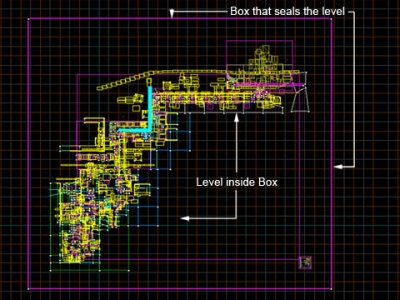
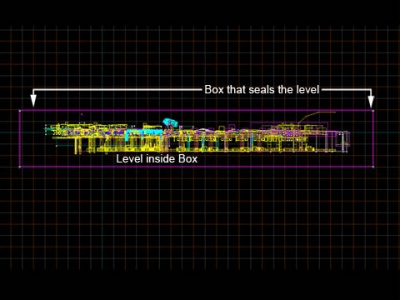
The easiest way to achieve this is to surround your entire map with six brushes which form a large, empty box:
A large space like this is however very inefficient, both for compiling times and for runtime performance. Make sure any large surfaces that the player doesn't need to see lit up are given the texture tools/ToolsNoLight, this black texture will skip any light calculations on that surface, speeding up VRAD a lot.
All detail
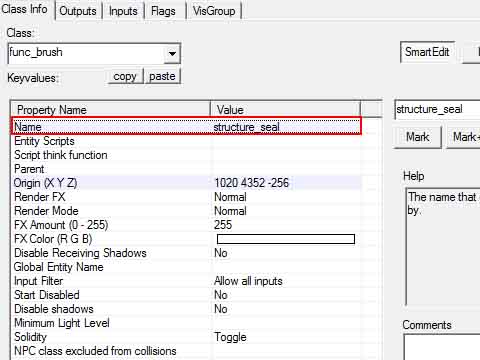
All world brush geometry in your level will turn into func_detail during map compile to speed up the VBSP/VVIS processes. Because of this you will need to seal your level in a different way. The large box that your level resides in will need to be made into a func_brush entity with the name "structure_seal".
Basic example maps that show this concept are in:
...\alien swarm\sdk_content\mapsrc\ExampleAddon\maps\tutorial
For more information on compile settings see Swarm Mapping Compile Settings
Camera Angle
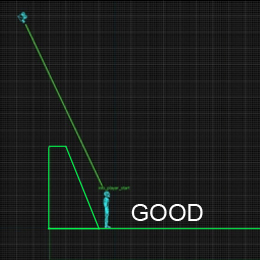
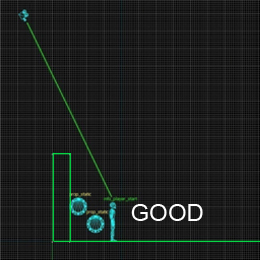
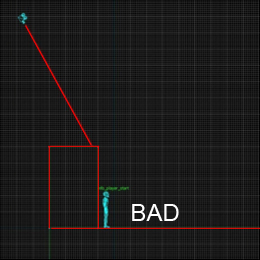
The camera in Alien Swarm has a 60 degree tilt that gives a better perception to the level and helps with immersion, but it does make it harder to aim and can also cause visibility problems if your level isn't designed with this in mind. Most common visibility problem is player getting obscured by the south facing wall in game.
- Make sure your walls are ~ 160 units in height. This height works best for camera visibility while being high enough to make the levels feel like they have walls.
- Tilt your south walls (by using the vertex tool in hammer, for instance). This allows the camera more visibility over the south wall.
- Add enough low decoration to all your south walls to prevent the player from getting close up against the wall.
Also remember that playing with the tilt makes walking towards the south less visible and feels less natural than walking to the north, so try to bear this in mind when designing the flow direction of your map.
Dynamic Lights
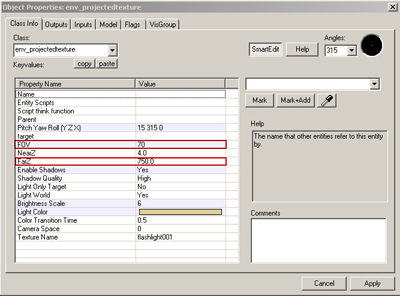
Use env_projectedtexture entities if you want to have dynamic lights in your map. You can parent them to moving objects, but make sure bring up the entity properties and tick 'Always Update' in the 'Flags' tab if you want do so.
Since they are expensive, the game will only render one active projected texture at all times. If you have overlapping env_projectedtextures you get bad looking results (shadows popping on/off).
FOV determines the angle/spread of the flashlight, FarZ the length. Tweak those numbers if you run into problems.
In general:
- Only use a few dynamics lights per map. (We used 6 in Landing Bay, for instance)
- Make sure the FarZ number isn't too big. Values between 400 and 800 usually work pretty well.
Player Start Points
A finished Alien Swarm map must have 8 info_player_start entities for the marines to spawn at. While building you might want to just use 1, so you can easily move it around the level to test different parts without having to run across the map each time.
