Dota 2 Workshop Tools/Level Design/Tile Editor Basics
Contents
Overview
The Tile Editor lets you fluidly paint tiles, handling the connections between tiles of arbitrary heights and configurations. It uses a tileset reference map that has all the appropriate tile lookups set for you. Tile Editor lets you raise/lower terrain and water, place game objects, connect your different elevations with ramps, paint trees onto terrain, define paths, and paint/cycle through relevant aesthetic details.
Your First Map Using the Tile Editor
Getting Started
- In Hammer, make a new map via File > New.
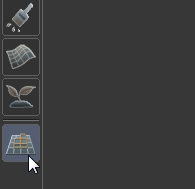
- Click the Tile Editor tool at the bottom of the Hammer interface on the left side, or use the hotkey ⇧ Shift+C. The Tile Editor will auto-generate a large area of flat empty tiles, which you'll see in your 3D and 2D viewports.
- Save your map using File > Save. It will save your map inside a maps folder within your addon directory. Remember to save early and often.
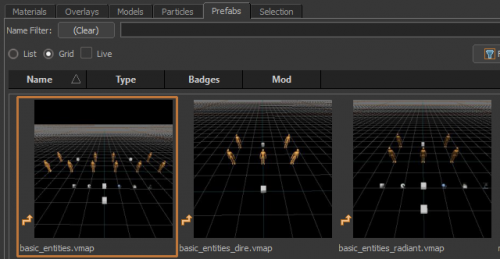
- Go to the Prefabs tab at the bottom of Hammer and drag basic_entities.vmap out into your 3D viewport so that you’ve got the entities required for a playable Dota map.
- In your 3D viewport, hold right-mouse-button (
 ) to move the camera around and use WASD to move.
- W Forward
- S Back
- A Left
- D Right
You now know the navigation basics and don't need to worry about navigating in your 2D viewport. Later, you'll learn about other navigation methods in the section Hammer Navigation.
Painting Terrain
Begin by painting some terrain elevations onto your empty map. Switch to the tile editor ⇧ Shift+C and then Paint Terrain mode with Q. In the 3D and 2D viewports, your cursor becomes a brush that lets you paint tiles. You can adjust the brush's radius by holding Middle-Mouse Button ![]() and moving your mouse left or right. Also, the Undo command (Ctrl+Z) works with all of the Tile Editor's features, so feel free to play around with tile painting during this tutorial.
and moving your mouse left or right. Also, the Undo command (Ctrl+Z) works with all of the Tile Editor's features, so feel free to play around with tile painting during this tutorial.
Let's make a small scene around your spawn point. Choose any brush radius you want and begin raising terrain by pressing ![]() on the tiles in your 3D viewport. You can hold down
on the tiles in your 3D viewport. You can hold down ![]() and drag your mouse around to raise a lot of terrain at once. Ctrl+
and drag your mouse around to raise a lot of terrain at once. Ctrl+![]() lowers your terrain. Make a big boundary of raised terrain around where you placed the basic_entities prefab, that way you've got a basic edge to your map.
lowers your terrain. Make a big boundary of raised terrain around where you placed the basic_entities prefab, that way you've got a basic edge to your map.
Ramps, Water, and Trees
Next, switch to Paint Path mode with R, then use ![]() on one of your cliffs to paint a ramp that connects the lower ground to the upper ground. Switch to Paint Water mode with E and make a small body of water within the bounds of your raised terrain. Switch back to Paint Path mode and use
on one of your cliffs to paint a ramp that connects the lower ground to the upper ground. Switch to Paint Water mode with E and make a small body of water within the bounds of your raised terrain. Switch back to Paint Path mode and use ![]() to paint a ramp on a section of your water's cliff edge.
to paint a ramp on a section of your water's cliff edge.
Switch to Paint Trees mode with T and paint a small forest within the bounds of your small scene. You can select different tree types as well as adjust the placement density of your brush by holding Ctrl+![]() while dragging the mouse left or right.
while dragging the mouse left or right.
Placing Objects
Next, switch to Place Objects mode with U. Make sure Object Type is set to Props, then place a prop of your choice with ![]() . Hover over the prop's blue node and then drag
. Hover over the prop's blue node and then drag ![]() to move it around. After you've put the prop in a spot you like, place your cursor directly over its blue node and use F or V to cycle back and forth through its different variations (some may not have any). You can rotate the prop by hovering over its blue node and holding X while dragging
to move it around. After you've put the prop in a spot you like, place your cursor directly over its blue node and use F or V to cycle back and forth through its different variations (some may not have any). You can rotate the prop by hovering over its blue node and holding X while dragging ![]() .
.
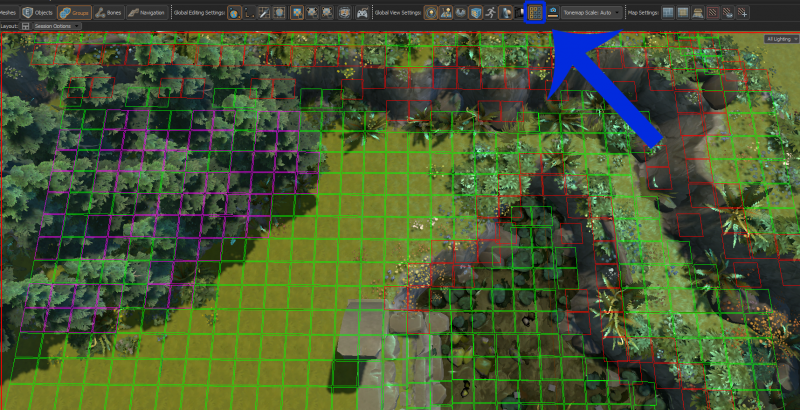
Dota uses a grid navigation system to determine where units can and can't path. To get a visualization of this gridnav, click on the button named Toggle Grid Navigation Preview, or use the hotkey Ctrl+Q.
In gridnav view, green squares are pathable areas, red squares are unpathable areas (with exceptions for flying units), and pink squares are a special type of unpathable area associated with trees (since trees can be destroyed).
Verify that your hero will be able to walk to the shop by ensuring that there's an uninterrupted path of green squares between your hero start and your shop (the hero start is one of the entities contained in the basic_entities prefab).
Next: Compile and Run, where you'll learn how to compile your map and load it in-game.


