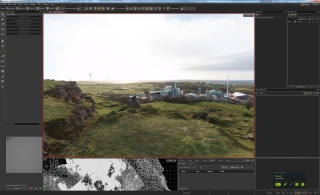
SteamVR/Environments/Advanced Outdoors Photogrammetry
Nearly all the tutorials on photogrammetry out there concentrate on capturing single objects rather than whole scenes - and those that concentrate on whole scenes are usually about capturing enclosed, indoors areas.
This tutorial will describe one possible workflow for digitising an expansive outdoors scene for maximum immersion in VR - including more distant geometry and a surrounding skydome. While intended for a fairly high level of user (it will assume some proficiency in photography, 3D modelling, texture editing and the like) it should hopefully still help others in capturing the real world.
For a simple introduction to photogrammetry in SteamVR Home, I highly recommend starting with this tutorial, while for a general overview I suggest reading through these blog posts.
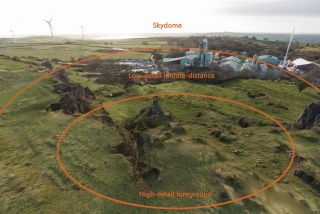
I'll be using a relatively small set of photos I took when I was last back in Britain over Christmas, out walking the dog in a brief spell of sunny weather between the storms which were crossing the country. Concepts demonstrated include the capture of high-detail foreground geometry; middle distance, low-detail geometry; and a skydome constructed from projected photos. While perhaps not the most picturesque location – a post-industrial landscape off the Cromford and High Peak Railway between Brassington and Spent – it is structurally similar to other photo-scenes you may have seen, such as the Vesper Peak and Snaefellsjoekull National Park scans in The Lab, and the Mars and English Church scans in SteamVR Home.
While a fairly large selection of software was used in the construction of this scene, much of the ideas and advice should be sufficiently generic that mixing and matching between different software should be possible. Do experiment, and build your own workflow that suits you best!
Capture
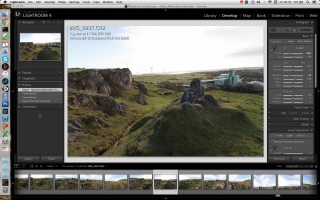
The camera used was a Canon EOS 7D, with the EF-S 10-22mm lens at 10mm, its widest. A manual exposure was set in order to capture consistent lighting – f/8, 1/60s, ISO 100. The camera was set to shoot in RAW format to maximise post-processing capability. Some basic processing was done in Lightroom (finding a nice white balance, pulling the shadows and highlights in, correcting chromatic aberration and lens vignetting – the same development settings were applied to all images for uniformity) before exporting to minimally compressed JPEGs – 8-bit TIFF could have been used, but I was transferring the images over a VPN so wanted things to be a bit smaller.
Foreground
Reconstruction in Reality Capture
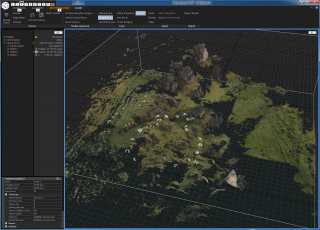
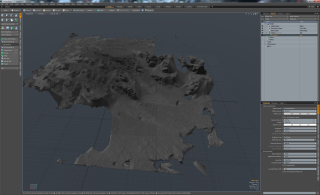
I used Reality Capture to generate the high-detail foreground mesh – while still early in its development, it has proved itself extremely adept at extracting fine geometric detail from photographs. I did a camera alignment, then set the reconstruction region to include all the areas in the immediate vicinity of the camera positions – initially I did a normal detail reconstruction to check the results, then did a high detail reconstruction. This came out at around 79 million triangles, perhaps a little too heavy to render in VR! I also did a ‘Colorize’ to generate vertex colours for doing some quick renders from Reality Capture for inspection purposes.
Next, I decimated the mesh using the ‘Simplify Tool’ to the fairly arbitrary 1,750,000 triangles (around 3 million is a sensible maximum for VR, and the relatively limited size and complexity of this scene meant I wouldn’t gain much by going higher). Then I generated UVs for this model using the ‘Unwrap’ tool – just one texture in this case (it being more for visualisation than final rendering purposes), generated that texture then exported to an .OBJ and a .PNG.
Closing Holes in MeshLab
Meshes exported from Reality Capture can sometimes have small holes in them – from a few triangles to slightly larger areas. Rather than clean these up manually, I’ll use it as an opportunity to introduce a free, open source tool that can prove invaluable when dealing with high-poly meshes – that being MeshLab.
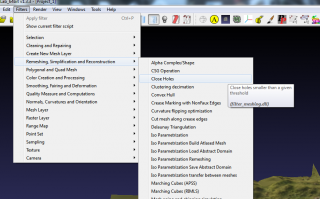
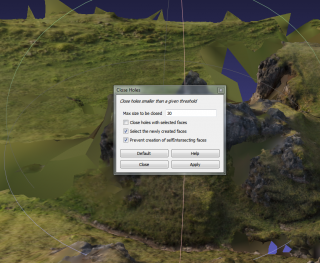
Here, I used Filters : Remeshing, Simplification and Reconstruction : Close Holes – I left things at their defaults, then after holes were filled I re-saved the .OBJ and opened it in Modo. (Other modelling software should also work!)
Cleanup in Modo
To counteract the different up-axis used between Reality Capture and Modo, I added a Locator, parented the mesh to it then rotated the locator 270° around the X axis.
Reality Capture’s meshes are generally closed – that is, they enclose a particular volume. In this case I do not need the geometry below and to the sides of the mesh – selecting these faces in Modo and deleting them was the start of cleanup.
I worked my way through, deleting unnecessary geometry and filling the occasional, visible divot or hole left unfixed by MeshLab – large, unreconstructed sections are not a problem at this stage. For exporting back to Reality Capture, which is rather picky when it comes to importing .OBJs, I reset the rotation on the locator, deleted the mesh’s UVs and surface normals from the ‘Lists’ tab in Modo, assigned everything to a single material and set the smoothing angle to 180°, then saved as a new .OBJ. (The latest Reality Capture update seems to have fixed most of the .OBJ import issues - mesh UVs and arbitrary smoothing angles no longer seem to be a problem.)
On importing into Reality Capture, I ran the ‘Unwrap’ tool again (this time with maximal textures set to 10), regenerated textures then exported the mesh again – there was some back-and-forth between Reality Capture and Modo in this way, iterating until I was happy with the foreground geometry and texturing.
Middle-Distance
Reconstruction in PhotoScan
For full scene capture in VR, the key to immersion is to completely surround the player – be it with geometry or distant, textured skydome. For some scenes, just the foreground geometry and a skydome will be sufficient – while for others, some low-detail, textured geometry in the middle-distance will prove invaluable. An alpha channel can be used to blend this geometry into the skybox, making it difficult to see where the geometry ends and the skydome begins.
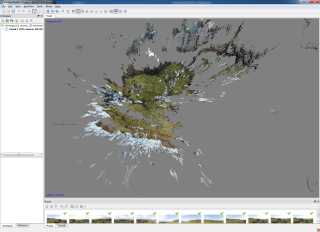
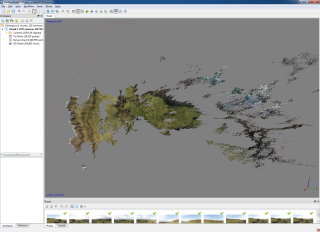
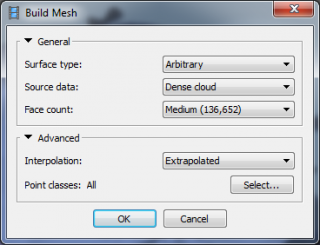
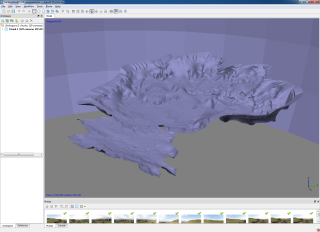
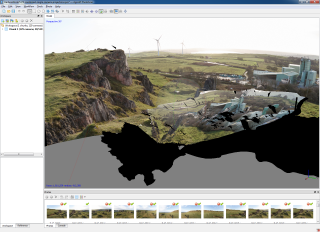
Since I needed the camera positions for creating the skydome later on, I used Agisoft PhotoScan for this stage – PhotoScan having a workflow much more conducive to doing single-camera texture projections. Roughly similar to Reality Capture, I added all the photos I exported from Lightroom earlier, generated a sparse point cloud (in this case trimming out some of the more esoteric and misplaced points before doing a camera optimisation pass), then generated a low-detail dense point cloud – this had many unnecessary points in the sky and below the ground, so I carefully trimmed most of these out before generating a mesh.
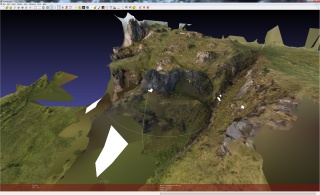
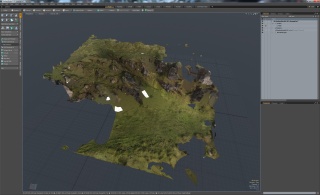
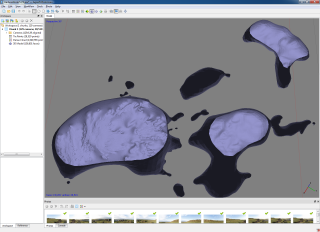
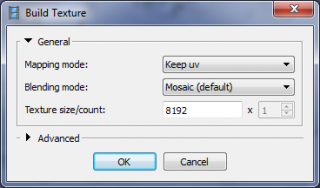
The result was this strange, blobby mess. Don’t worry – this is expected. The aim is to create some basic geometry for texture projection to work on – contributing scale and some parallax to the more distant parts of the scene. I then generated a texture (new, generic UVs and just a single 8k texture) then exported the results as an .OBJ for opening in Modo. (Once again, the texture is for visualisation purposes rather than something to keep – I’ll discard this particular version soon enough.)
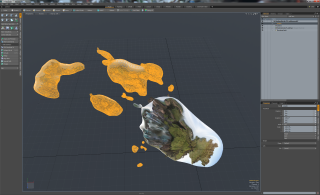
Once there and rotated 270° around the X axis using another locator, I deleted all the more distant blobs, then worked on removing as much of the blue sky-textured geometry as was practical. Where a triangle crossed over between sky and ground, I kept it – I’ll use the alpha channel (to be created later) to create a nice edge against the skydome.
The mesh for the factory area is, to be frank, quite horrific – I could have created some simple, low-poly versions of the buildings, but I thought to demonstrate instead quite how bad distant geometry can be but still be effective with single-camera texture projections. The only added geometry was a simple cylinder for the narrow chimney – this contributing more to visible parallax as the player’s viewpoint moves around.
Combined Geometry
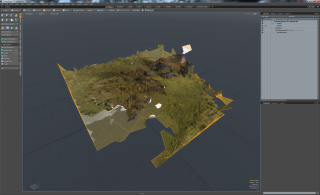
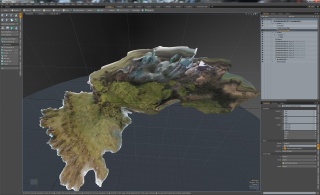
The two separate meshes generated by Reality Capture and PhotoScan, while depicting some of the same area and built from the same data, had quite different scales and rotations. Since the detailed foreground mesh and background meshes needed to be aligned for the whole scene to make sense in VR anyway, I imported the foreground mesh, added another locator and carefully adjusted scale, position and rotation until it matched up with the low-detail geometry. Areas of the low-detail section which overlapped the high-detail section were deleted, and the boundaries slightly distorted to give a nicely subtle and mostly gap-free transition between the two sections.
Once the middle-distance mesh was looking relatively clean – with unnecessary sky and separate blobs deleted, outer edges for particularly far sections moved outwards and particular holes and cavities filled in – I generated some basic planar-projection UVs for the mesh. Since there was a bit of overlap in the UVs, I relaxed them a little – increasing texel density uniformity in the process.
Skydome
Required Skydome Geometry
Now that I had a good idea of where everything would be in the scene, I could create the skydome to enclose everything and receive projected photos.
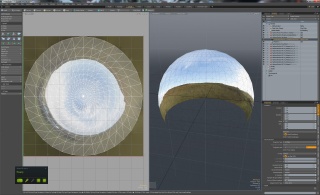
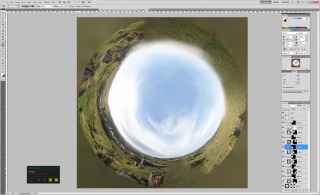
This was a basic sphere surrounding the whole scene, with the bottom third or so removed – essentially making an over-enthusiastic hemisphere. I generated a planar projection for the UVs, then relaxed those UVs – resulting in a fish-eye effect with the centre being directly ‘up’. The image data itself will be generated later – this seamless, circular texture is a little strange to edit around the edges (the horizon being curved) but makes editing the sky itself very easy. Filling in any uncaptured sections with cloning and gradients in Photoshop is straightforward.
Generating Initial Textures in PhotoScan
At this point, I was almost ready to export the mesh to PhotoScan for a first pass at texturing. I had the middle-distance geometry with one material assigned, the skydome with another, and a copy of the foreground geometry with a placeholder material name and quick planar projection UVs generated – the texture for this particular mesh would be discarded, it only being there for blocking cameras from unnecessarily projecting on to more distant geometry. (Another trick is to use one of the pre-existing materials which will be used, but to compress the UVs for the discarded section down to a small, irrelevant corner. Alternatively, the mesh and materials could be left as-is, but then there’d be the computational cost in generating lots more textures which would subsequently be ignored.)
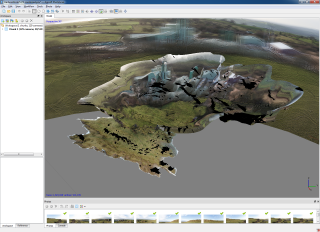
The rotation of the locator was then reset, unnecessary parts of the scene deleted and the combined mesh exported as an .OBJ for texturing in PhotoScan.
The textures, while decent for closer-range things, look blurry, shadowed and doubled-up for distant areas – which brings us to the next technique.
Single-Camera Projections
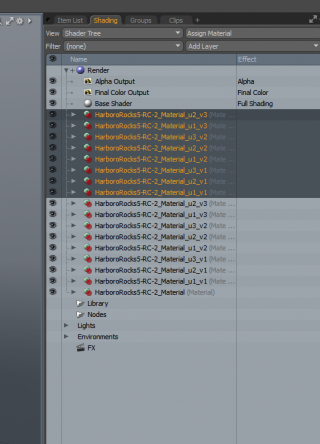
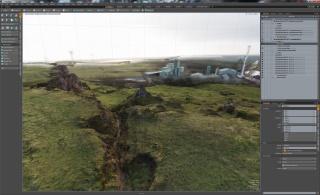
Now that I had a good base to work on, I reassigned textures in Modo to use the newly generated ones and exported the scene (skydome, middle-distance geometry and the Reality Capture-textured foreground geometry) to an .FBX for importing into SteamVR Home. One in there and placed in a basic map with a rough scaling factor applied to the mesh, I could start work on the textures – creating new .PSDs for the middle-distance and skydome textures and reassigning the relevant materials in Material Editor.
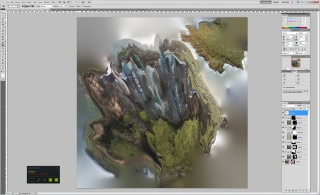
Back in PhotoScan, I disabled all cameras except one pointing in an appropriate direction – towards the reservoir and wind turbines to start off with. Then I rebuilt textures again, exporting the textures to .PNGs – the new, super-sharp textures for the skydome and middle-distance geometry were then carefully blended over the blurry versions in Photoshop.
I repeated this with different camera positions, steadily completing the skydome and middle-distance textures – every time I saved in Photoshop, the view in Hammer would update. Testing in VR would indicate particular areas needing more work – you’ll soon learn that some things that look terrible in a general 3D overview can look just fine in the more restrictive navigation of VR.
Translucency
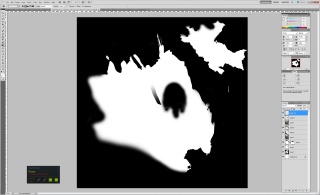
For blending the middle-distance geometry into the skydome, I added a second texture for use as translucency in Material Editor. Initially based on the alpha channel from PhotoScan’s first exported texture, careful trimming, blurring and editing gave a nicely adaptive edge to the geometry. The factory buildings were carefully traced around with a sharp edge, while sections of field were faded out to hide a visible transition. A reasonable amount of work went into this, since it contributes significantly to the scene.
For better sorting of transparent layers, I duplicated the middle-distance mesh in Modo so that it sat perfectly aligned with the original copy and assigned another material to it – re-importing into SteamVR Workshop Tools and fixing the materials to use the .PSDs again meant I could set up a second material for the middle-distance geometry – this time set to ‘Alpha Test’ rather than ‘Translucent’, with the ‘Alpha Test Reference’ set fairly high to hide the hard edge in the translucent layer. While the blurry edges to the mesh contributed by the might not sort correctly, the effect was much less visible than apparently opaque sections of the mesh sorting incorrectly!
(I also used this trick for the trees and other foliage in the English Church scene, with surprisingly effective results.)
Real-World Scale
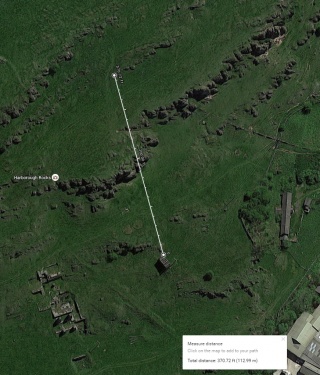
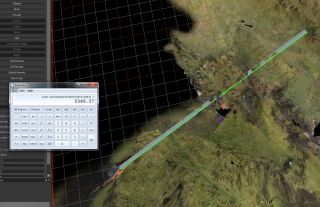
For obtaining a super-accurate overall scale for the scene not based on guesswork, the web-based Google Earth’s measurement tools can be borrowed – find your scanned location, then measure out the distance between two landmarks visible in your own 3D model. Divide the distance in metres by 0.0254 to give the distance in inches – the same as game units in Hammer for the purposes of VR. Back in Hammer, create a simple, long box shape and rotate it and scale it to go between the two points you measured in Google Earth. Select one of the edges, and it should give the length in game units – you can now divide the real-world length by the current in-game length to get a scale factor – multiply your current scales by this to get the accurate real-world scale.
If your scanned scene isn’t available in Google Earth – it being indoors, deep underground, particularly remote or otherwise – you can use any other known length to obtain your scaling factor.
Finishing the Scene
Bake to World
After importing the main world model and placing it in the map in Hammer, I checked the 'Bake to World' option for the prop static's object properties. On map compilation, the large mesh is then chopped into smaller sections which are easier for the computer to render.
Lighting
For a full description of lighting dynamic objects present in the scene, see the tutorial on Lighting Setup for Photogrammetry Scenes, which uses this map as an example.
Entities
In addition to the lighting entities described above, I added a player start position and a few circling crow npcs.
In a recent update, I enabled shadows on the directional light and set all terrain materials to receive but not cast shadows, to prevent self-shadowing artifacts. This helps better ground spawned props and player avatars in the world. I also added a basic teleport mesh, to allow multiple players to roam more freely - I used Hammer's mesh editing tools to crete the basic shape before selecting all the outer edges and using the 'Extend' tool to create the outer, solid borders. More information on creating teleport areas is available here.
Final Scene
I've uploaded this scene to the workshop here. If you have any questions, do feel free to ask in the Discussions tab here or on the SteamVR community site.
Further Workflows
I've uploaded some additional example scenes to the Workshop, with specific workflow details in the descriptions for each:
- Country Lane, Derbyshire, UK - includes a workaround for texturing a heavily specular, damp road, along with simple reconstruction of cars.
- Raufarholshellir Lava Tube, Iceland - describes how to avoid sparkly UV island edges in dark areas in a highly contrasty scene.
- Beech Woodlands, Derbyshire, UK - extensive notes on alpha test / translucent materials for reconstructing foliage, along with some additional Reality Capture / PhotoScan texturing tricks.
